Dashboard
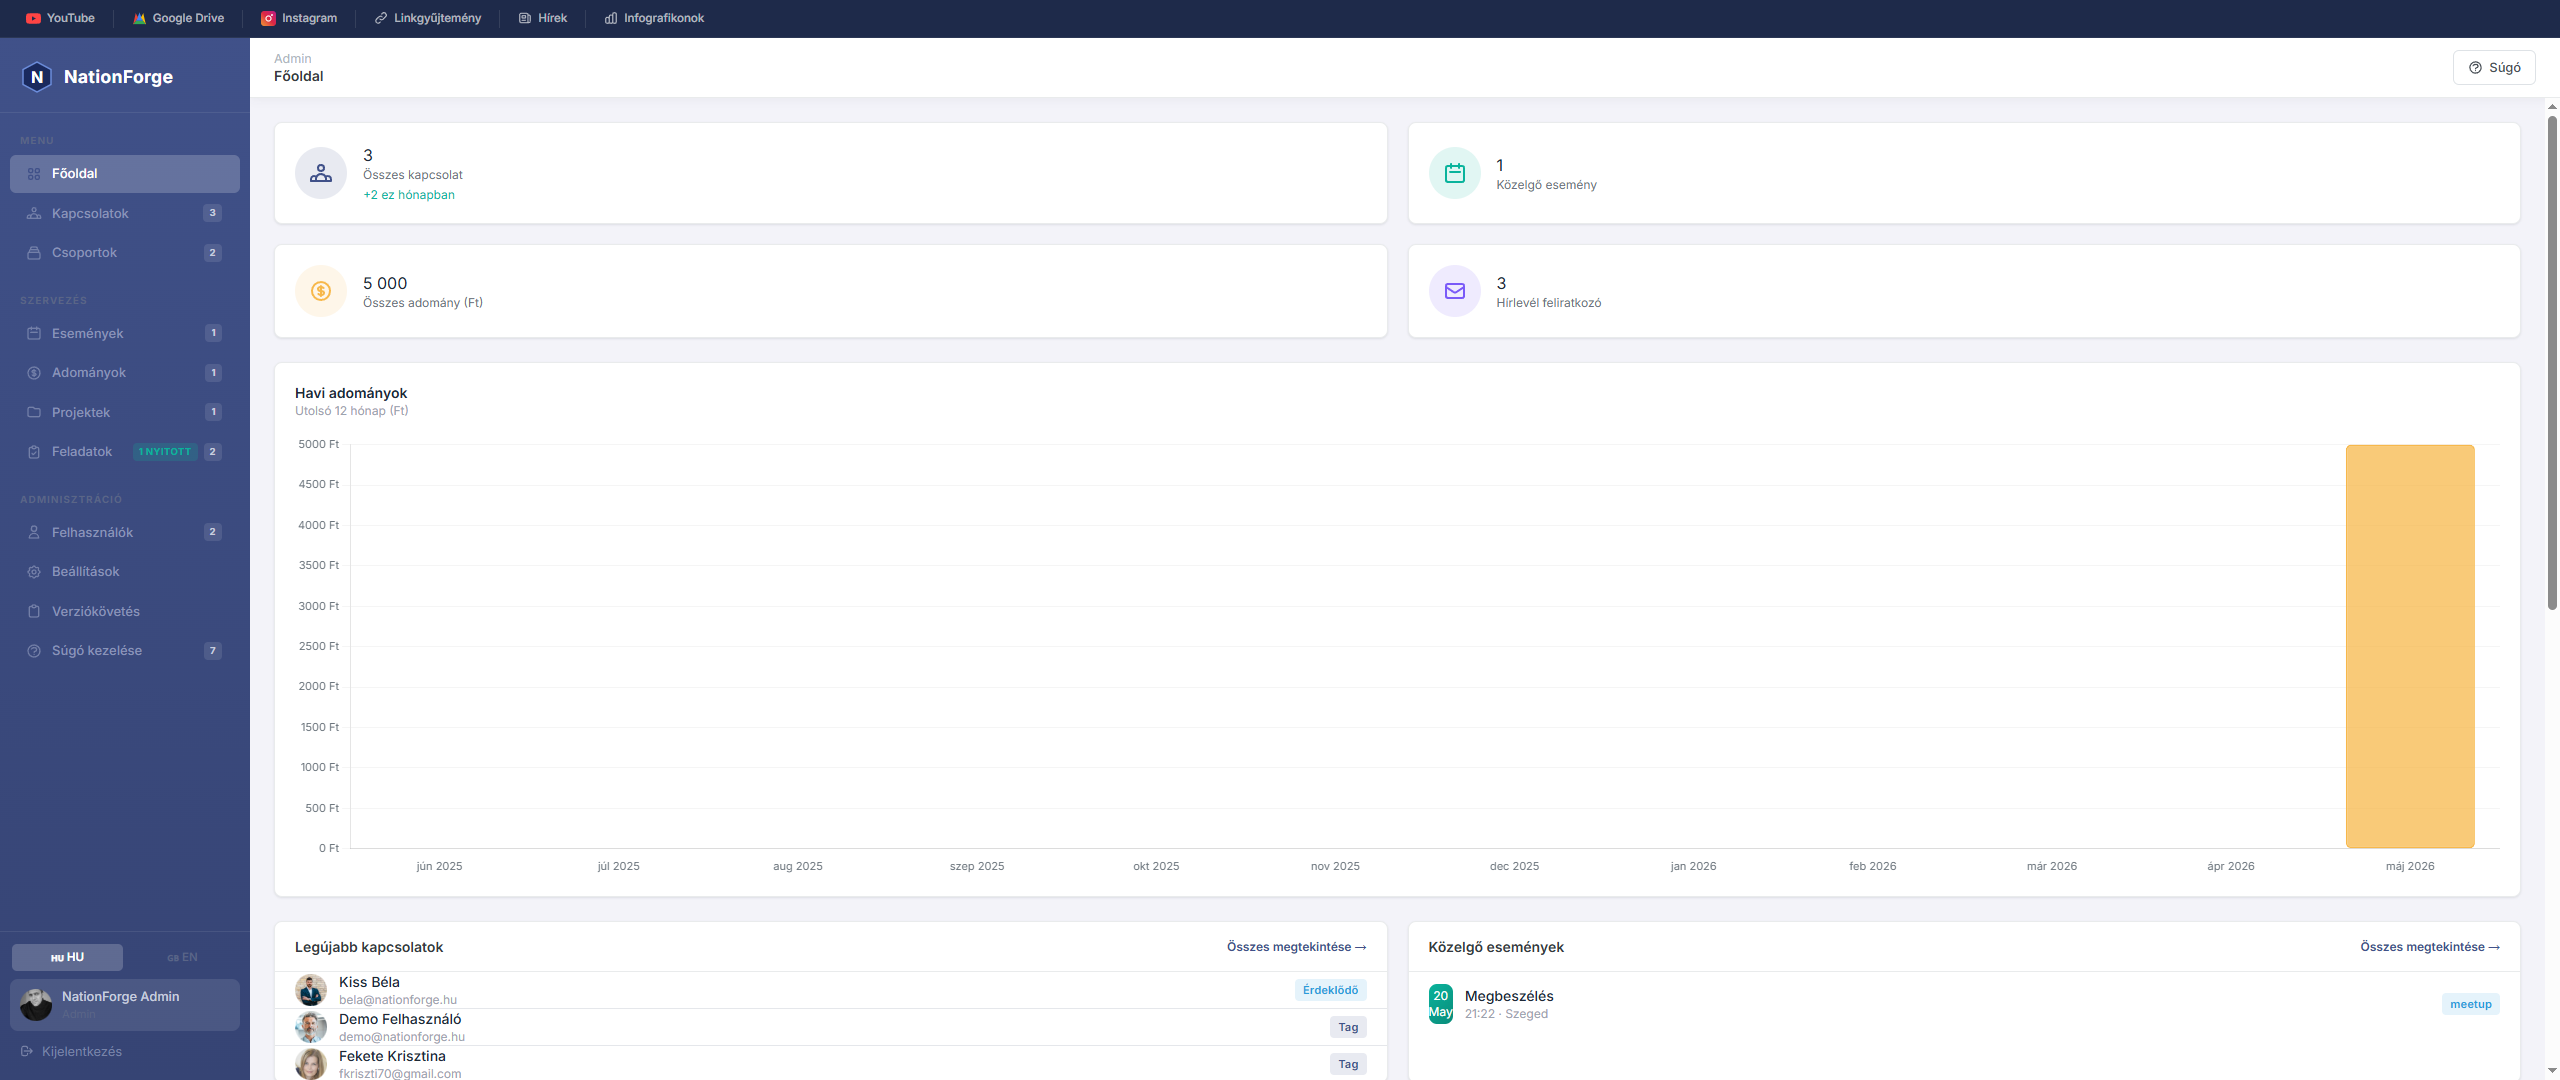
The Dashboard gives you an overview of the most important data in the system.
Stat cards — Four summary cards are shown at the top of the page:
- Total contacts — the number of people in the system, plus new additions this month
- Upcoming events — the number of future events
- Total donations — the total amount of donations received
- Newsletter subscribers — the number of active subscribers
Latest contacts — A list of the most recently added people. Click any entry to open the detailed profile.
Upcoming events — The nearest upcoming programmes with date, time, and venue.
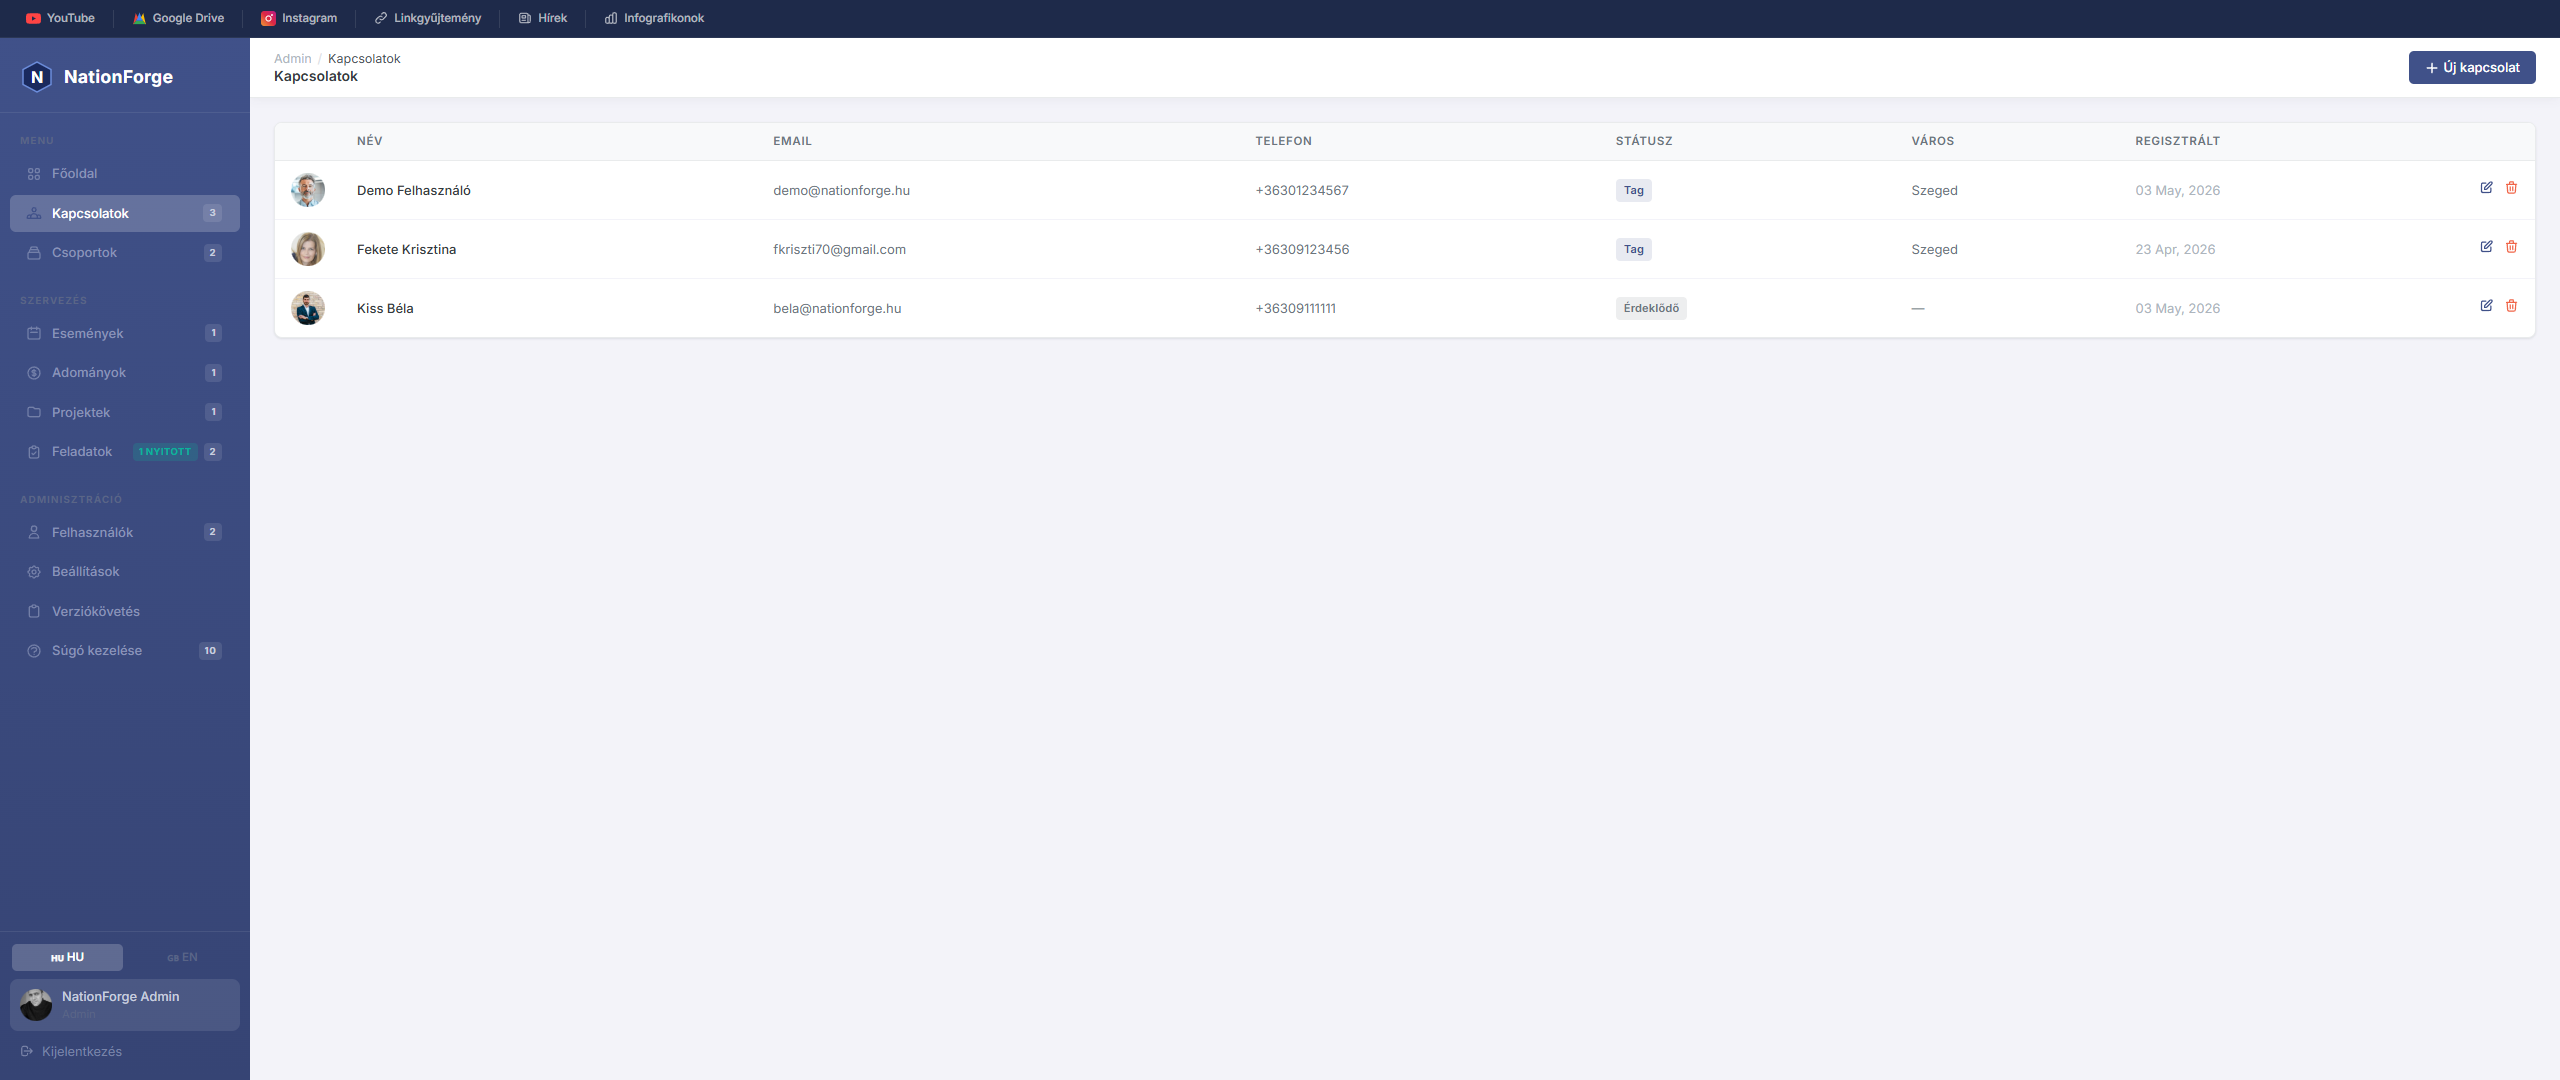
Contacts
The Contacts module is used for the complete management of people and organisations.
Add a new contact — Click the "New contact" button. In the pop-up window you can enter the name, email, phone, city, status, source, and notes. A profile photo can also be uploaded.
Edit — Click any row in the table; the editor window opens immediately with the current data.
Statuses:
- Member — active organisational member
- Supporter — sympathiser, but not a member
- Donor — financially supporting person
- VIP — highlighted contact
- Inactive — currently not active
Newsletter — The subscription checkbox shows who receives email communication.
Advanced Features
Contacts – Advanced CRM Features
This page covers the advanced features of the Contacts module: import & export, saved filters, duplicate detection, activity log, and lead scoring.
Import and Export
The Export ▾ and Import buttons are available in the top-right corner of the Contacts list.
Export
- CSV – UTF-8 BOM encoded, semicolon-delimited file, opens directly in Excel
- Excel (XLSX) – bold header row, no line breaks
Import
- Click the Import button
- Choose a CSV or XLSX file
- The system maps columns by name (e.g.
email,first_name,last_name,phone,city,status) - Existing email addresses are skipped
- After a successful import, feedback shows the number of imported rows
Tip: You can use an exported file as a starting point for import — the header names match exactly.
Filters and Saved Searches
Click Filter ▾ to open the filter panel. Available filters: text search, status (multi-chip), city, source, newsletter, group, registration date range, lead stage, min. score.
Save a filter set: Set your filters → click Save → give it a name. Reload any saved filter from the Saved filters dropdown. Presets are per-user.
Duplicate Detection & Merge
Click the Duplicates button to open /admin/people/duplicates.
Matches by: identical email, identical phone, identical full name (case-insensitive).
To merge: click Merge on the pair card → choose which to keep → confirm. Empty fields are auto-filled, donations/RSVPs/group memberships are transferred, duplicate is soft-deleted.
Activity Log
On any contact's detail page, record interactions: Phone call, Email, Meeting, Note, Task, SMS, Other — with timestamp, notes and recording user. Shown as a colour-coded vertical timeline.
Lead Scoring
Set a pipeline stage (New Lead → Contacted → Qualified → Proposal Sent → Converted → Lost) and a 1–5 star score (Cold → Very hot) on each contact's detail page. Filter the contacts list by Stage and Min. score.
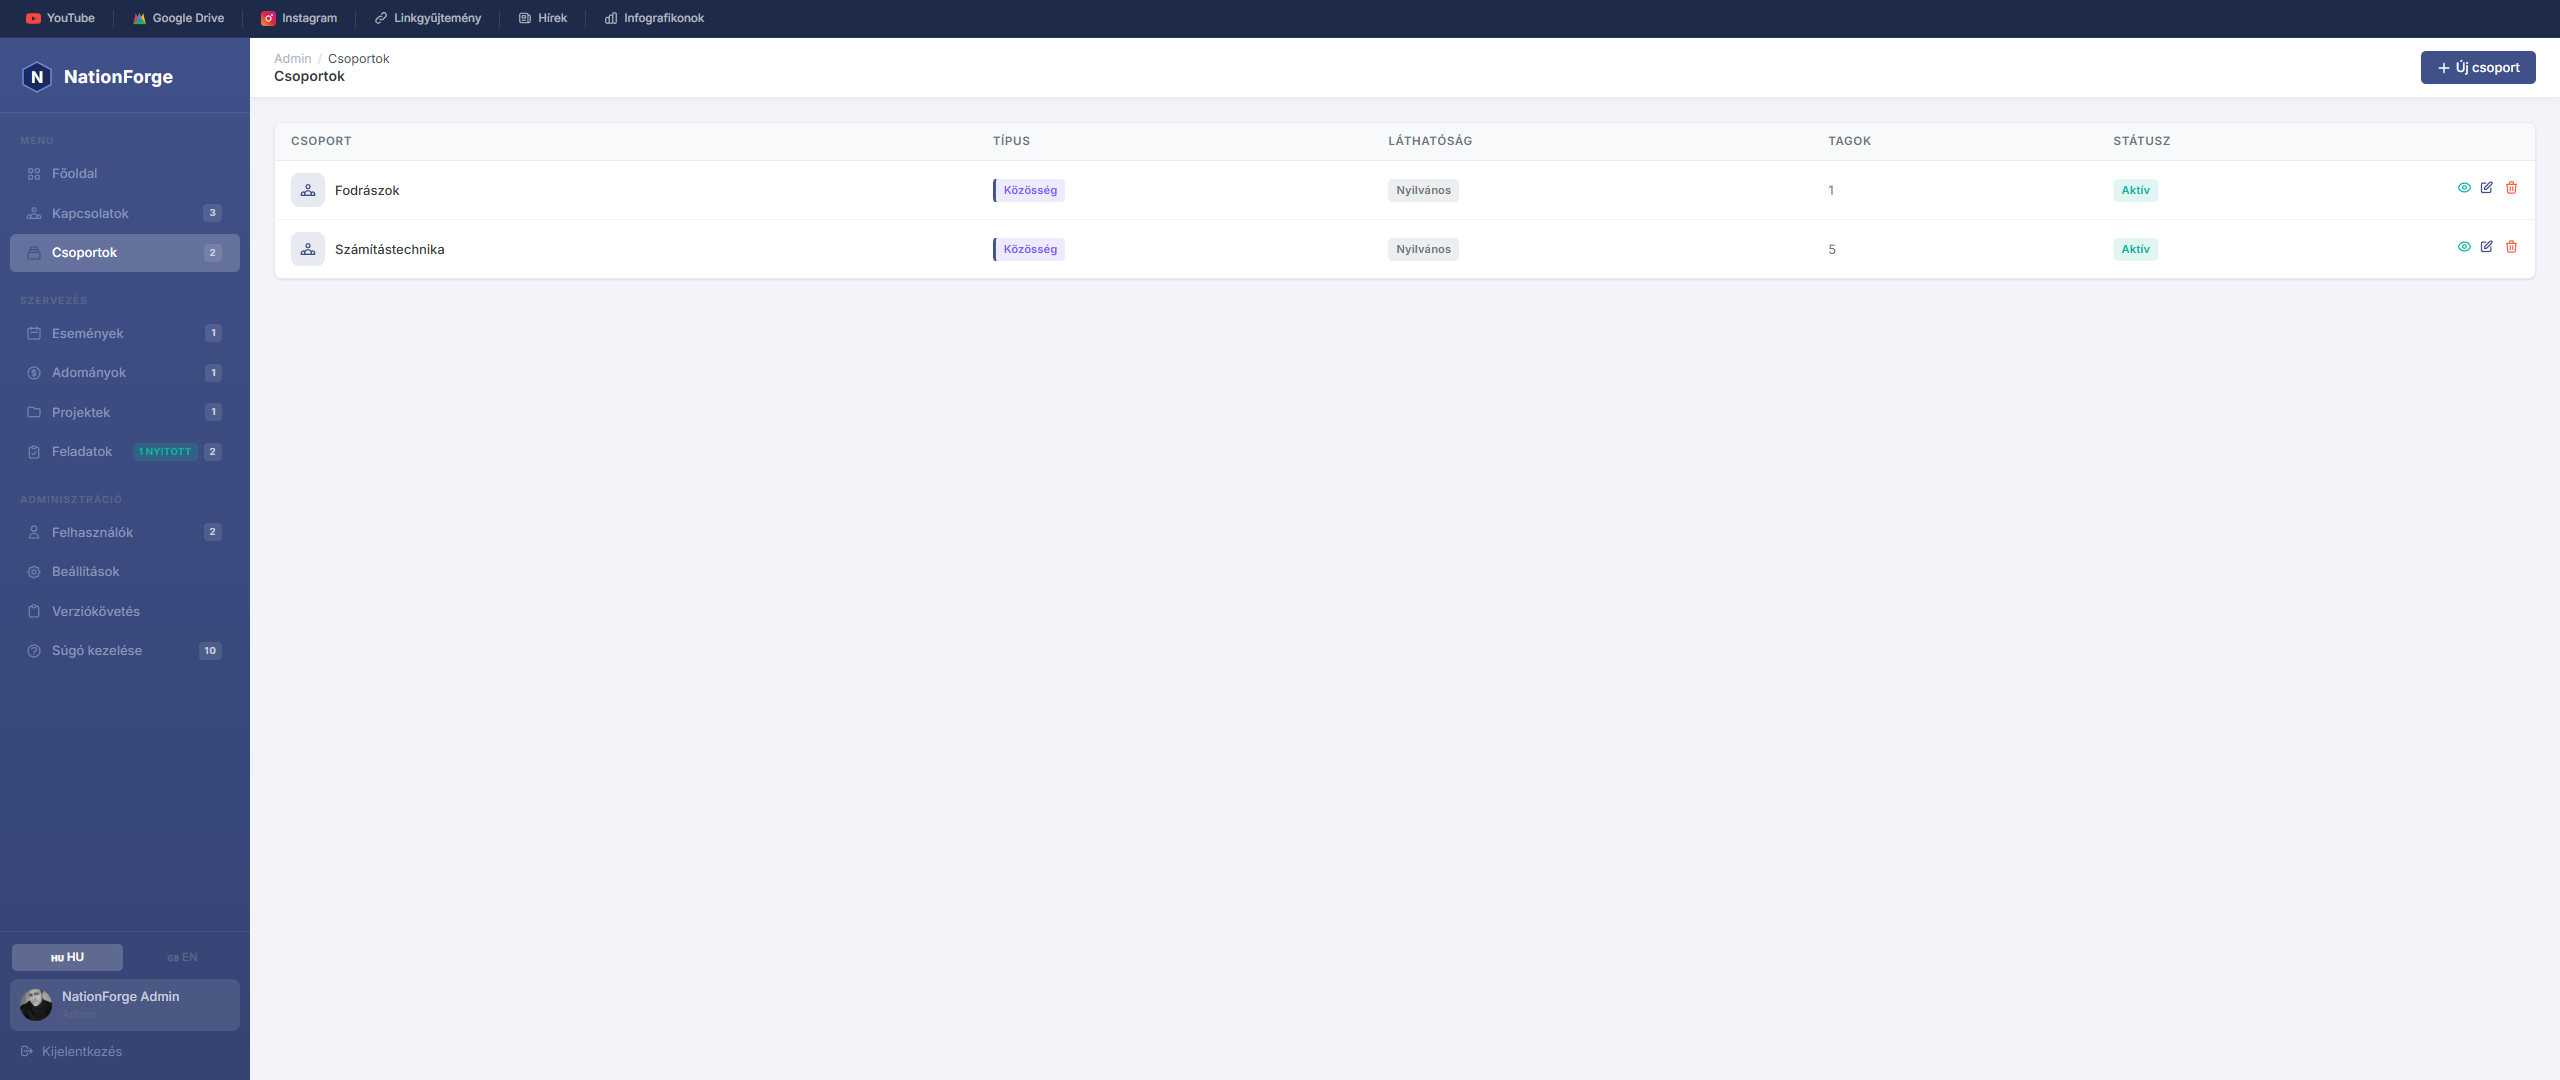
Groups
The Groups module is used for organising contacts thematically.
Create a new group — Click the "New group" button and enter the group name and description.
Manage members — On the group editing screen, members can be added and removed.
Usage — Groups make it easy to filter and target communication, for example when sending newsletters or invitations to events.
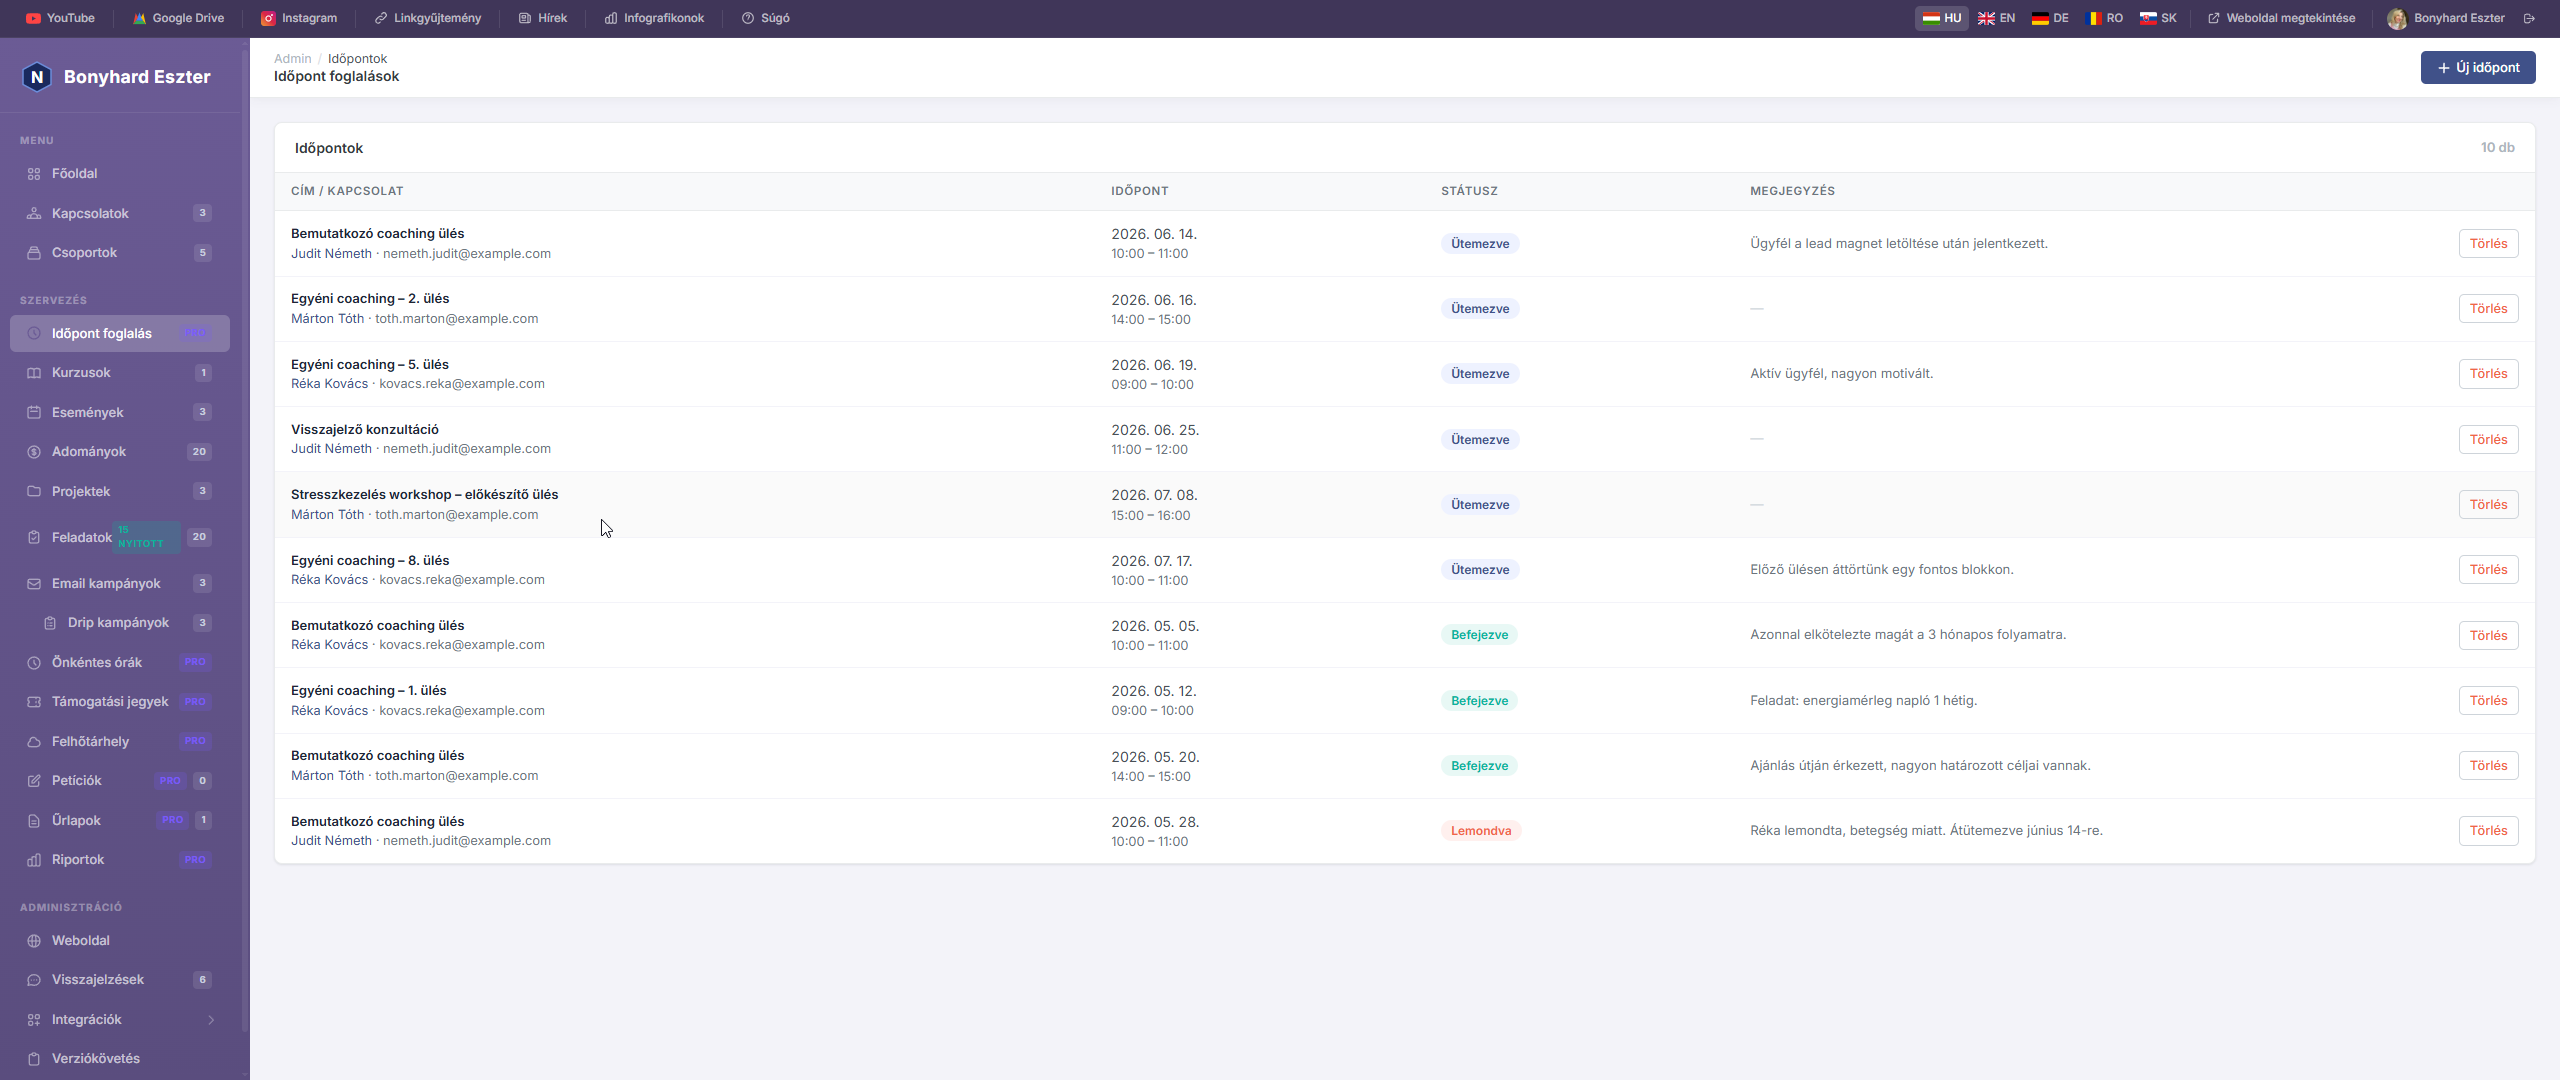
Az Időpontfoglalás modul lehetővé teszi, hogy a szervezet ütemezett találkozóit, konzultációit és időpontjait nyilvántartsuk és kezeljük.
Pro funkció — Az időpontfoglalás kizárólag a NationForge Pro verzióban érhető el.
Időpontok listája
Az Időpontok oldalon táblázatos formában látható az összes rögzített találkozó: cím, kapcsolódó személy, felelős adminisztrátor, kezdési időpont és státusz.
Új időpont létrehozása
Kattints az „Új időpont" gombra. A létrehozó ablakban az alábbi adatok adhatók meg:
| Mező | Leírás |
|---|---|
| Cím | Az időpont megnevezése (kötelező) |
| Kapcsolódó személy | A találkozóhoz rendelt kapcsolat (opcionális) |
| Kezdés / Befejezés | Időpont kezdete és vége (mindkettő kötelező) |
| Felelős | Melyik adminisztrátor vezeti a találkozót |
| Státusz | Ütemezett / Megtörtént / Lemondva |
| Helyszín | Fizikai helyszín (cím, épület, terem) |
| Online | Jelölő, ha online találkozóról van szó |
| Online link | Videóhívás URL-je (pl. Google Meet, Zoom) |
| Leírás | Részletes megjegyzések, agenda |
Státuszok
- Ütemezett (
scheduled) – jövőbeli, tervezett találkozó - Megtörtént (
completed) – lezajlott találkozó - Lemondva (
cancelled) – visszamondott időpont
Szerkesztés és törlés
Az időpont részletoldalán módosíthatók az adatok és törölhető a rekord. A törlés visszavonhatatlan.
Nyilvános időpontfoglalás
A nyilvános időpontfoglalási oldal /book URL-en érhető el (ha engedélyezve van). Az ügyfelek itt választhatnak szabad időpontot, amely megjelenik az admin felületen.
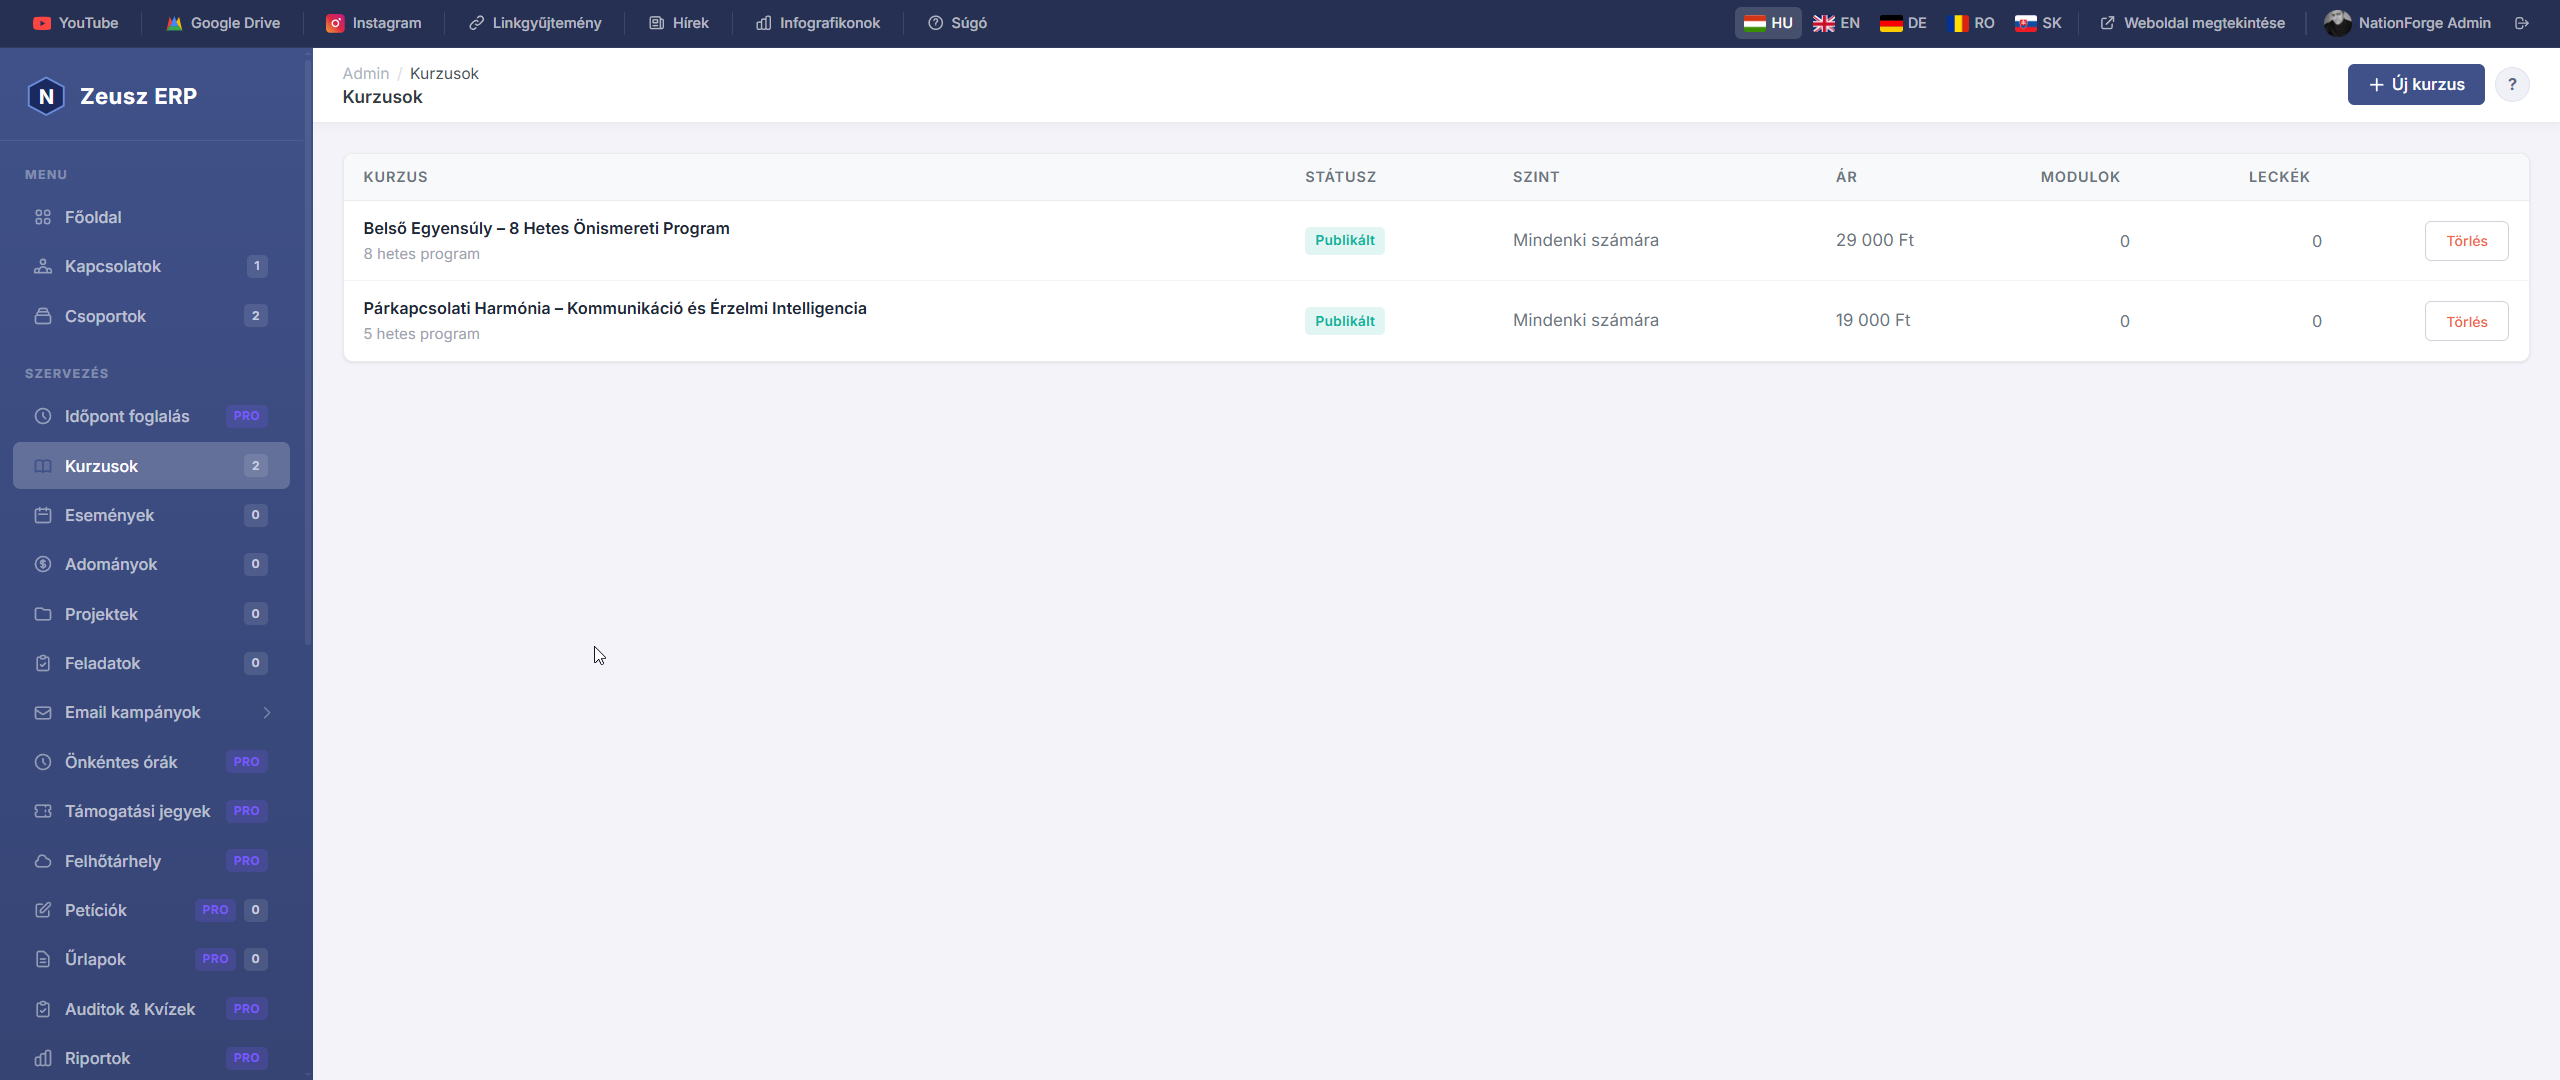
A Kurzusok modul lehetővé teszi online tanfolyamok, képzések és oktatóanyagok strukturált kezelését.
Kurzusok listája
A Kurzusok oldalon látható az összes kurzus neve, szintje, státusza, modulok és leckék száma. A kártyákra kattintva megnyílik a kurzus szerkesztőfelülete.
Új kurzus létrehozása
Kattints az „Új kurzus" gombra. Megadható adatok:
| Mező | Leírás |
|---|---|
| Cím | A kurzus neve (kötelező) |
| Leírás | Részletes bemutató szöveg |
| Státusz | Vázlat / Publikált / Archivált |
| Szint | Kezdő / Haladó / Mindenki |
| Ár | Kurzus díja (0 = ingyenes) |
| Időtartam | Hány hét alatt teljesíthető |
| Kiemelt | Jelölő, ha a főoldalon kiemelten jelenjen meg |
Modulok és leckék
Minden kurzus modulokból áll, a modulok leckékből. Ez a hierarchikus szerkezet átlátható tananyagstruktúrát biztosít.
Modul hozzáadása
A kurzus részletoldalán kattints az „Új modul" gombra. Megadható: cím, leírás. A modulok pozíció szerint rendezhetők.
Lecke hozzáadása
A kurzus részletoldalán az „Új lecke" gombra kattintva adható hozzá lecke:
| Mező | Leírás |
|---|---|
| Modul | Melyik modulhoz tartozik (opcionális) |
| Cím | A lecke neve |
| Tartalom | Szöveges leírás, markdown formázással |
| Videó URL | YouTube vagy Vimeo link |
| Időtartam | A lecke hossza percben |
| Ingyenes | Ha be van jelölve, bejelentkezés nélkül is megtekinthető |
Státuszok
- Vázlat (
draft) – csak adminisztrátorok látják - Publikált (
published) – nyilvánosan elérhető - Archivált (
archived) – már nem aktív, de megtartott
Events
The Events module is used for managing all organised programmes.
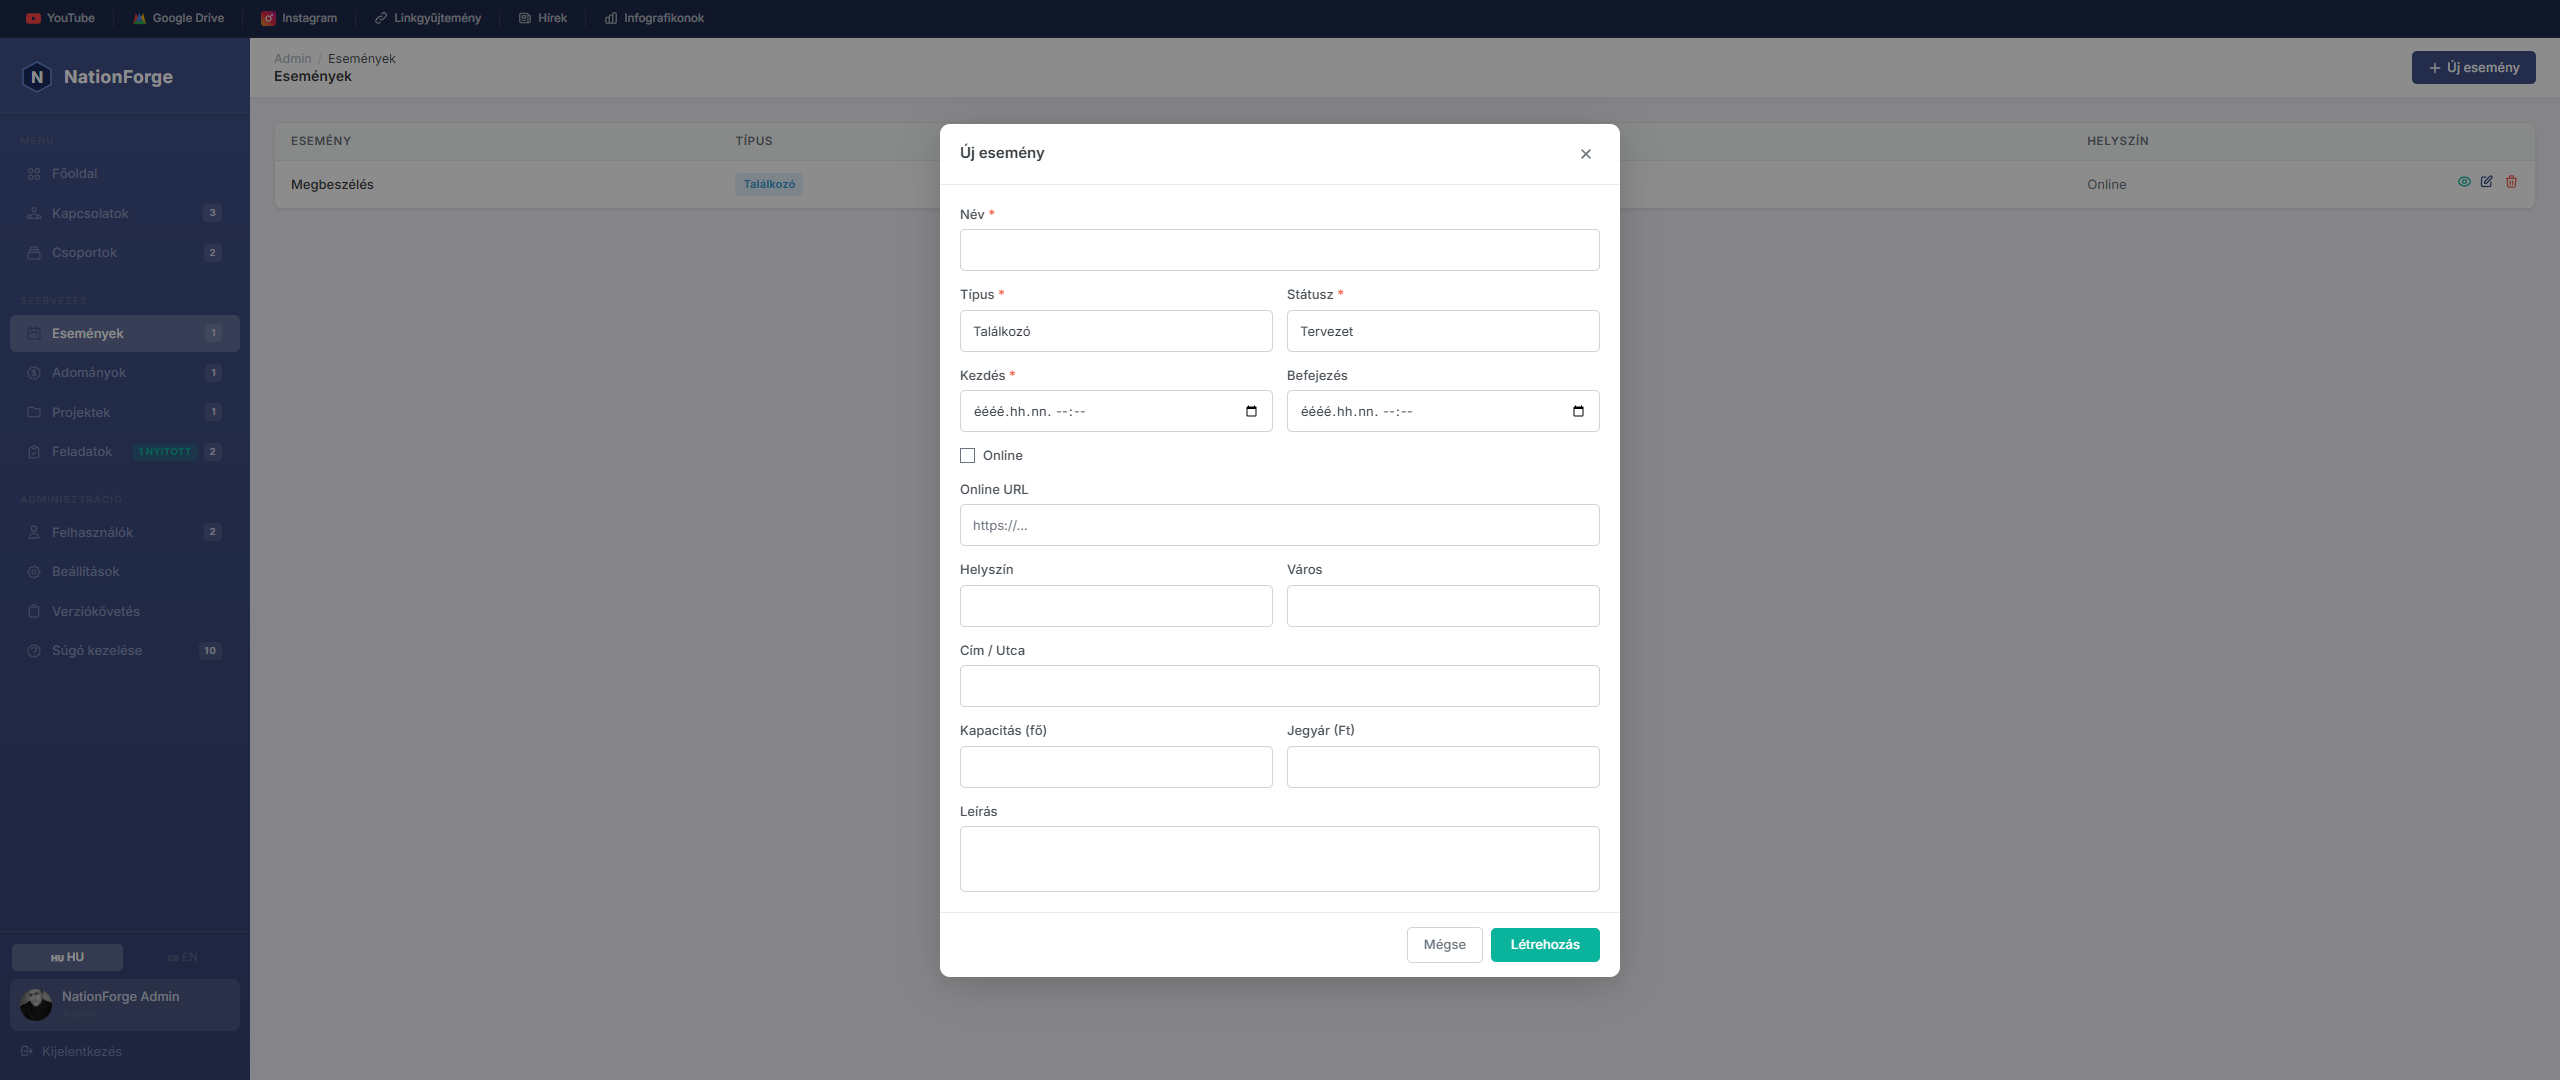
Create a new event — Click the "New event" button. You can specify:
- Event name and type
- Start and end date/time
- Venue (city, address) or Online flag
- Description and other details
Edit — Click the event row in the table.
Delete — After clicking the delete button and confirming, the event is permanently removed.
Upcoming events — Events due soon are also shown on the Dashboard.
QR Code Check-In
QR Code Check-In
Event attendees can check in at the venue using a QR code ticket.
Viewing Your Ticket
After a successful registration, a "View my ticket" button appears on the confirmation page. The ticket page shows:
- A QR code (encoding the registration token)
- Event details
- Attendee name and number of guests
You can bookmark the ticket URL or print the page.
QR Scanner (admin)
On the event detail page, click the QR Scanner button above the registrations table.
On the scanner page:
- Click Start scanner
- Hold the attendee's phone or printed ticket up to the camera
- The system gives instant feedback: ✅ check-in successful / ⚠️ already checked in / ❌ unknown token
If a camera is not available, you can enter the token manually using the text field at the bottom of the page.
Manual Check-In
On the event detail page, each registration row has a Check in button at the end. Use this to manually toggle check-in status on or off.
Statistics
Above the registrations table a summary row shows:
- Total registrations
- Checked in
- Not yet arrived
Check-In Confirmation
Once an attendee has checked in, a green banner showing the check-in time appears on their ticket page.
Waitlist Management
Waitlist Management
When an event is fully booked, visitors can join a waiting list and be automatically notified when a spot opens up.
Enabling the Waitlist
On the event edit page, check the Waitlist enabled checkbox. This only takes effect for events with a capacity limit.
Public Behaviour
When an event is full and the waitlist is active:
- A yellow "Join the waiting list" form appears on the registration page
- The current number of waiting people is shown
- After signing up, the visitor receives an email with their position number
Automatic Promotion
When an admin deletes a confirmed registration:
- The system automatically finds the first person on the waitlist
- The first waitlisted entry is promoted (becomes a confirmed registration)
- A "Spot available" email is sent with a ticket link
- The positions of remaining waitlisted entries are automatically reordered
Waitlist Section in the Admin Panel
Below the registrations table on the event detail page, a Waiting list section appears:
- Waiting people are listed by position
- Promote button: manually promote someone (if a spot is available)
- × button: remove someone from the waitlist (positions are automatically reordered)
Waitlist Emails
- Waitlist confirmation — includes the position number and a note that you will be notified
- Spot available — includes the event details and a link to the personal ticket page
Donations
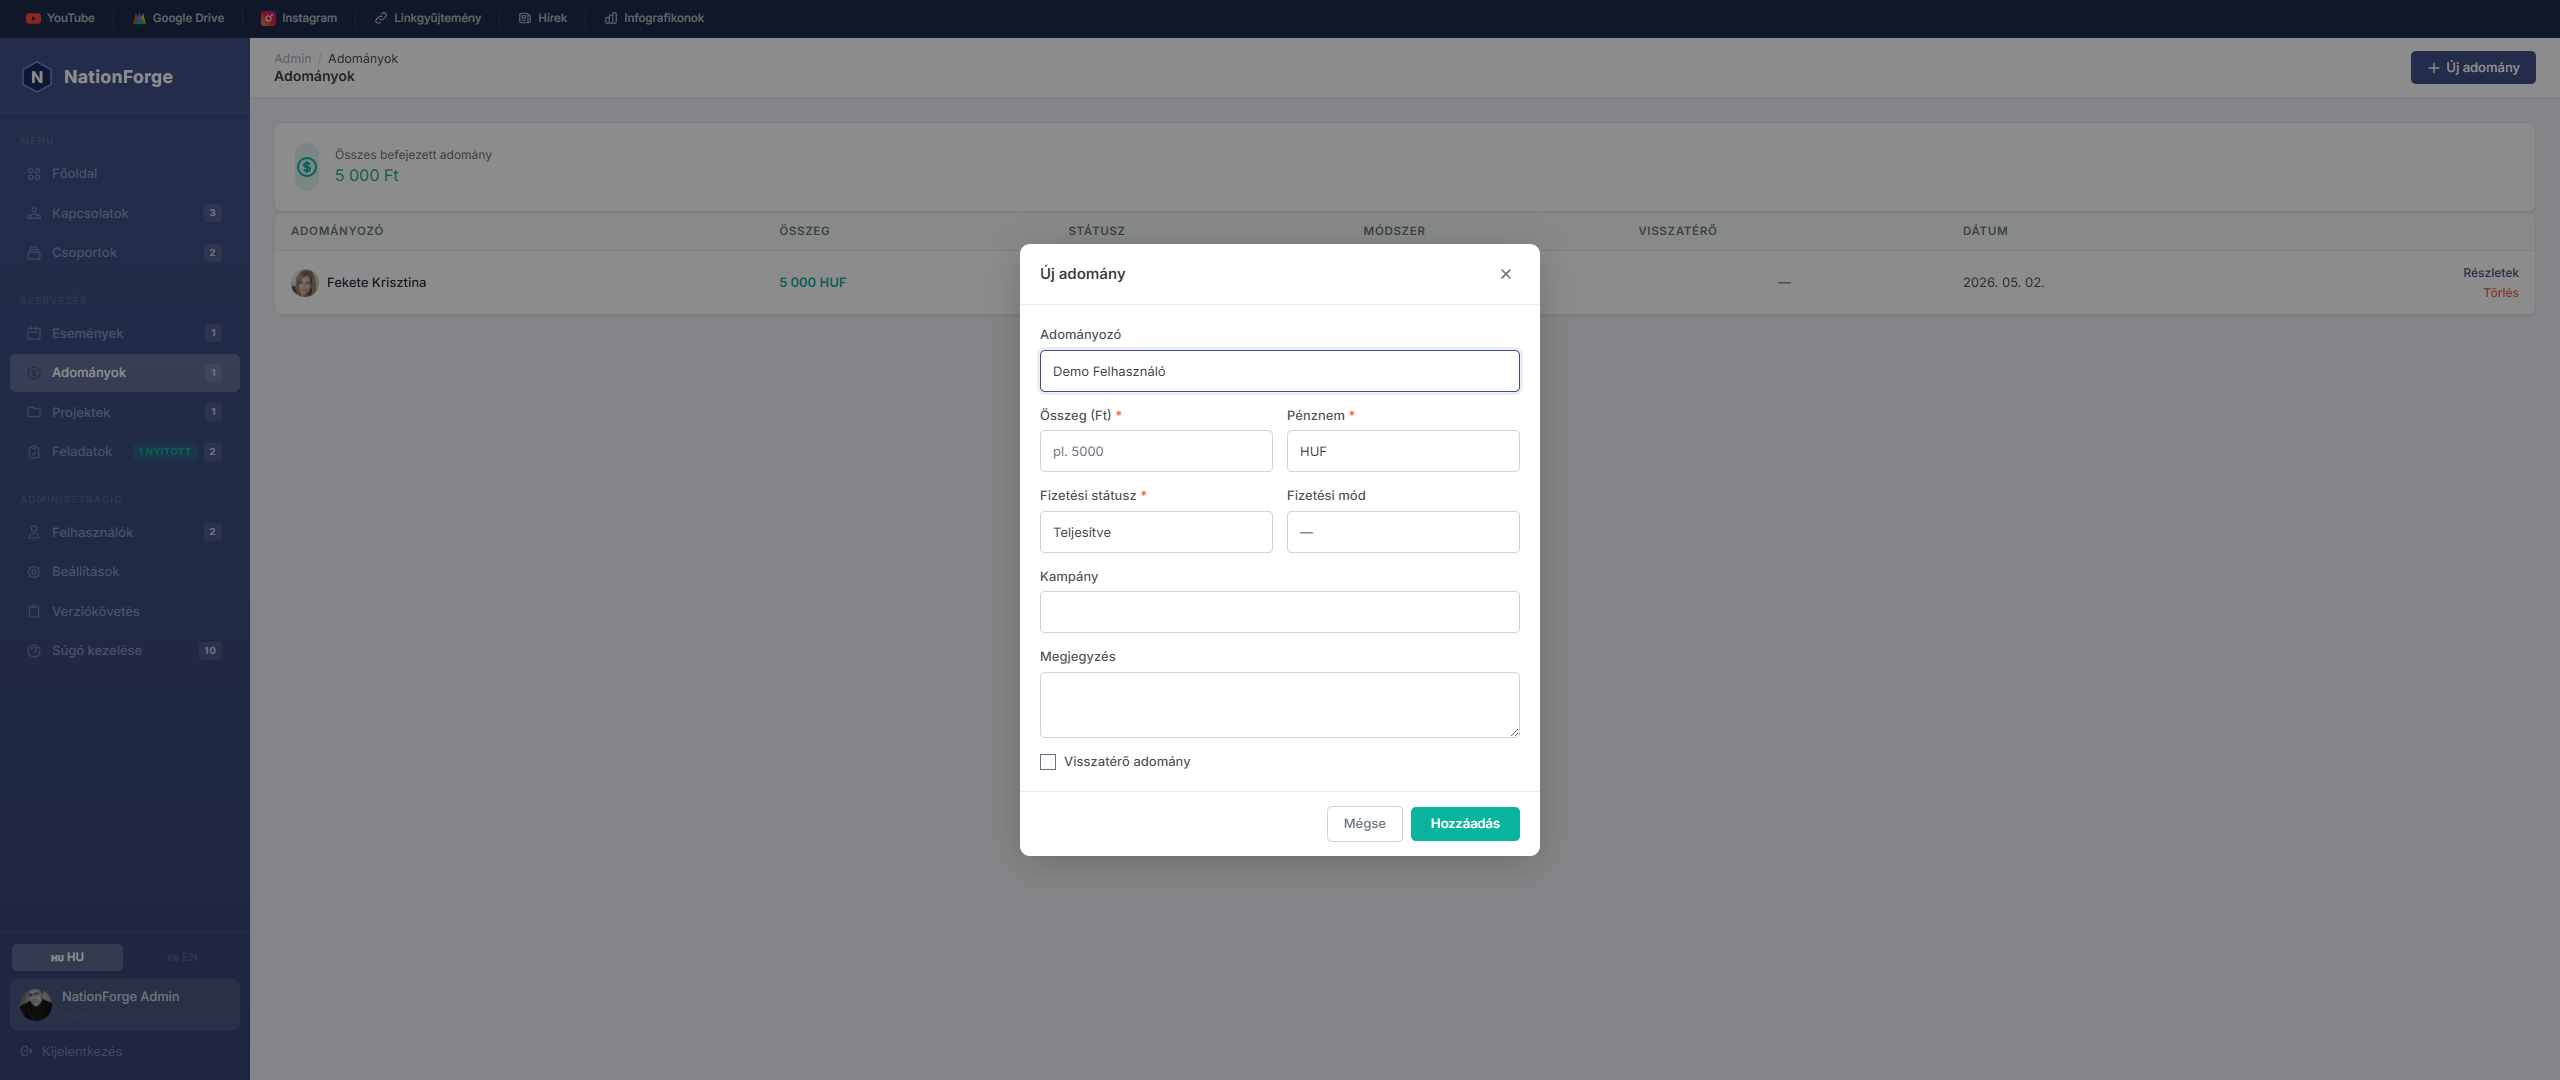
The Donations module is used for recording all incoming financial contributions.
Donation list — The table shows the donor name, amount, date of receipt, and payment method.
Details — Click a donation row to view the full details.
Delete — Incorrect entries can be removed with the delete button.
Summary — The total donation amount is also displayed on the Dashboard stat card.
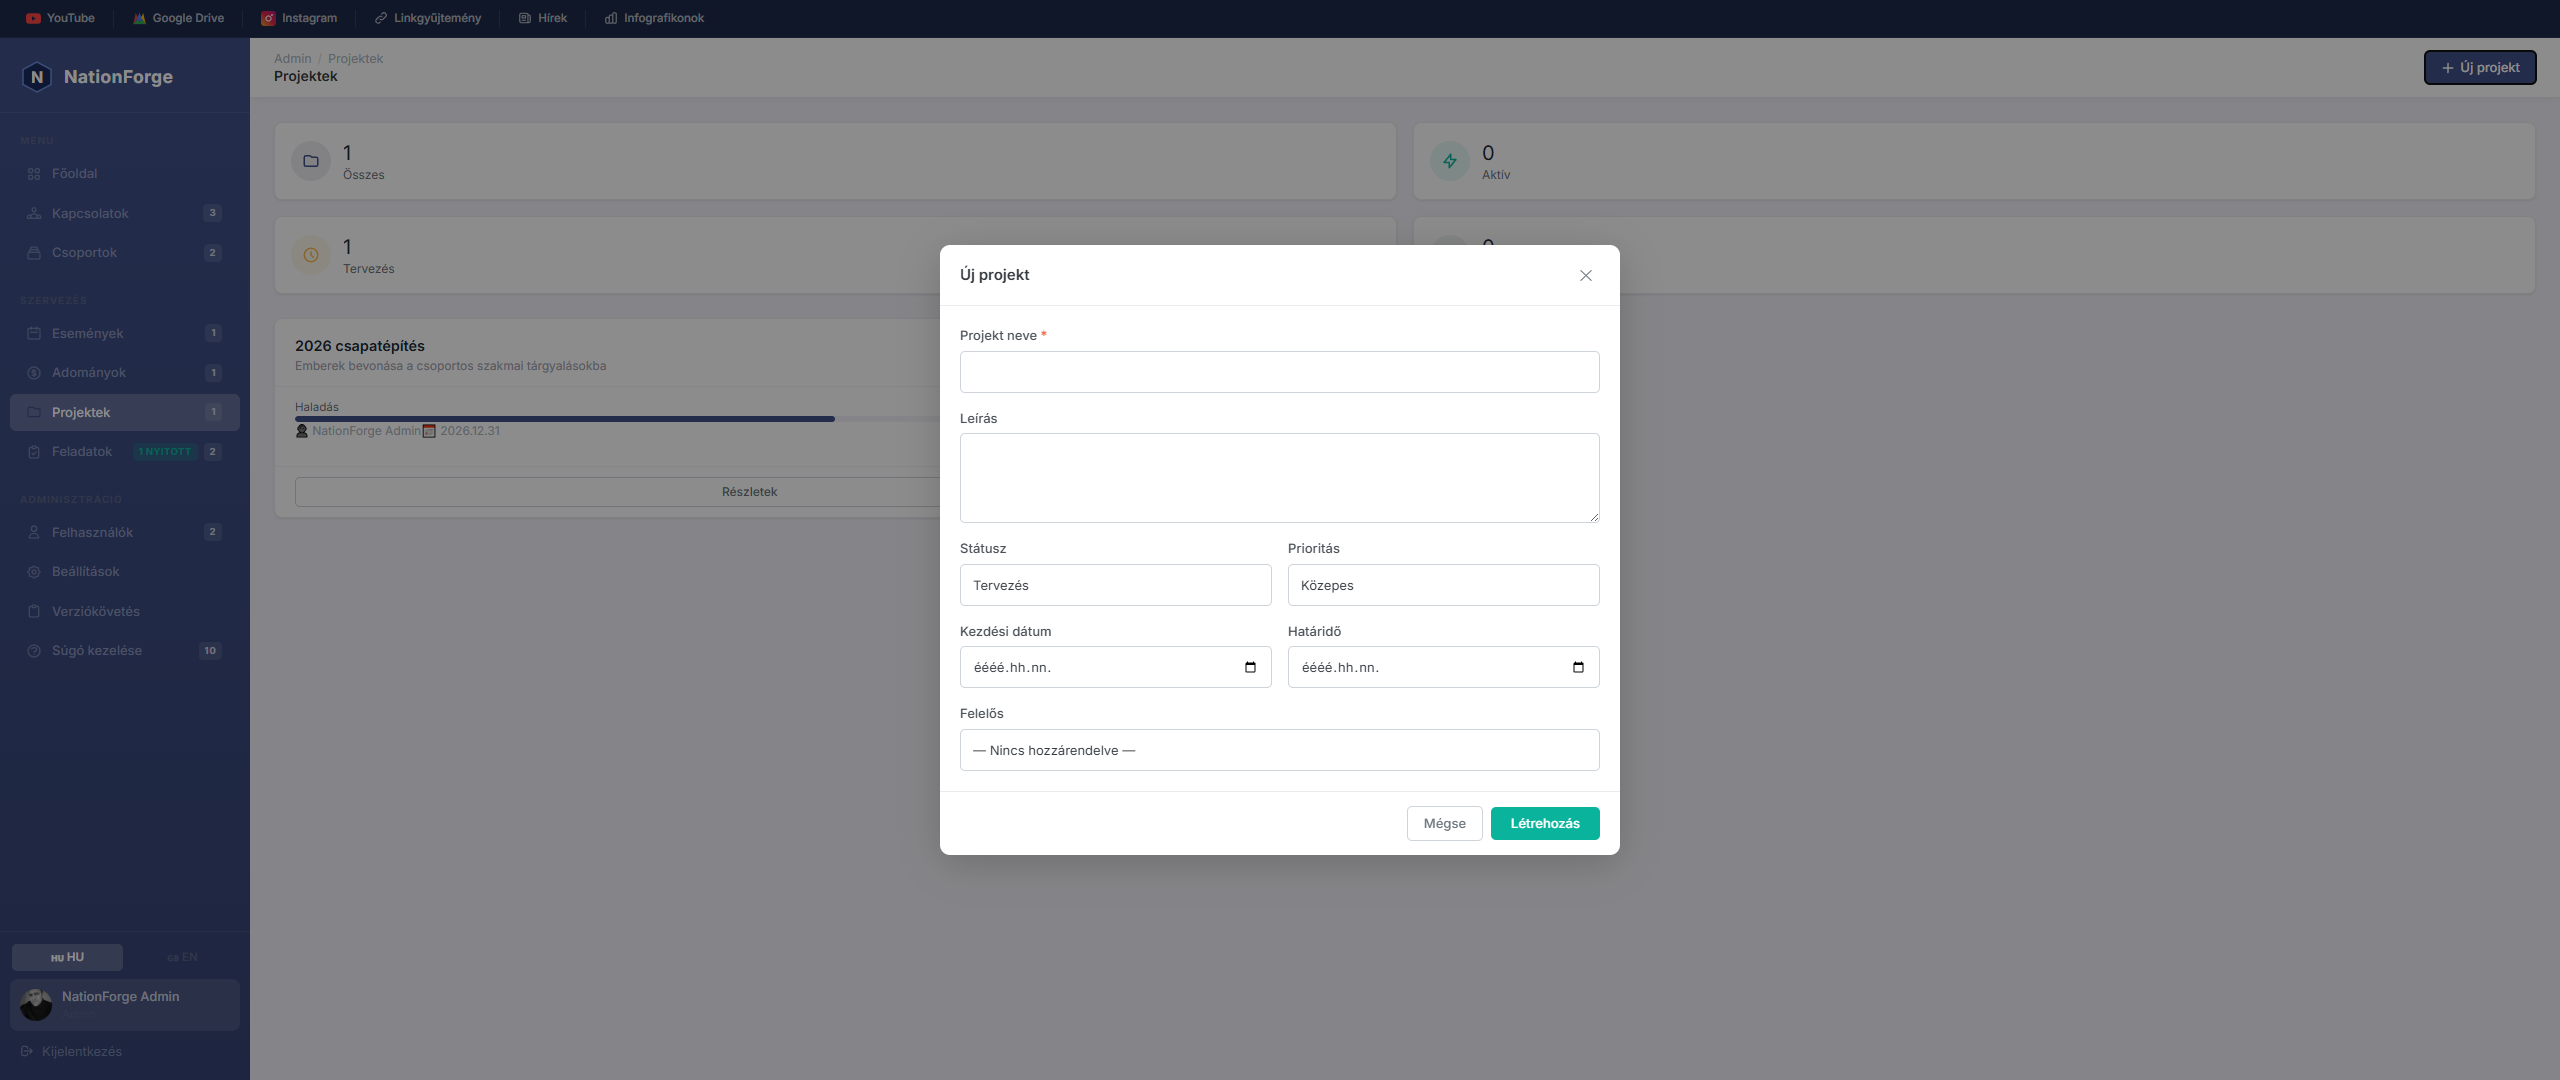
The Projects module allows you to manage your organization's internal projects and tasks.
Create a project - Click "New project", enter the project name, description, status, and assigned members.
Task management - Tasks can be assigned to each project. For each task you can set:
- Task name and description
- Responsible person
- Deadline
- Status: Open / In Progress / Done
Statuses:
- Planning – project is in the preparation phase
- Active – project is currently in progress
- On hold – temporarily paused
- Closed – project has been completed
Edit and delete - Click a project to open the detail view where editing and deletion are available.
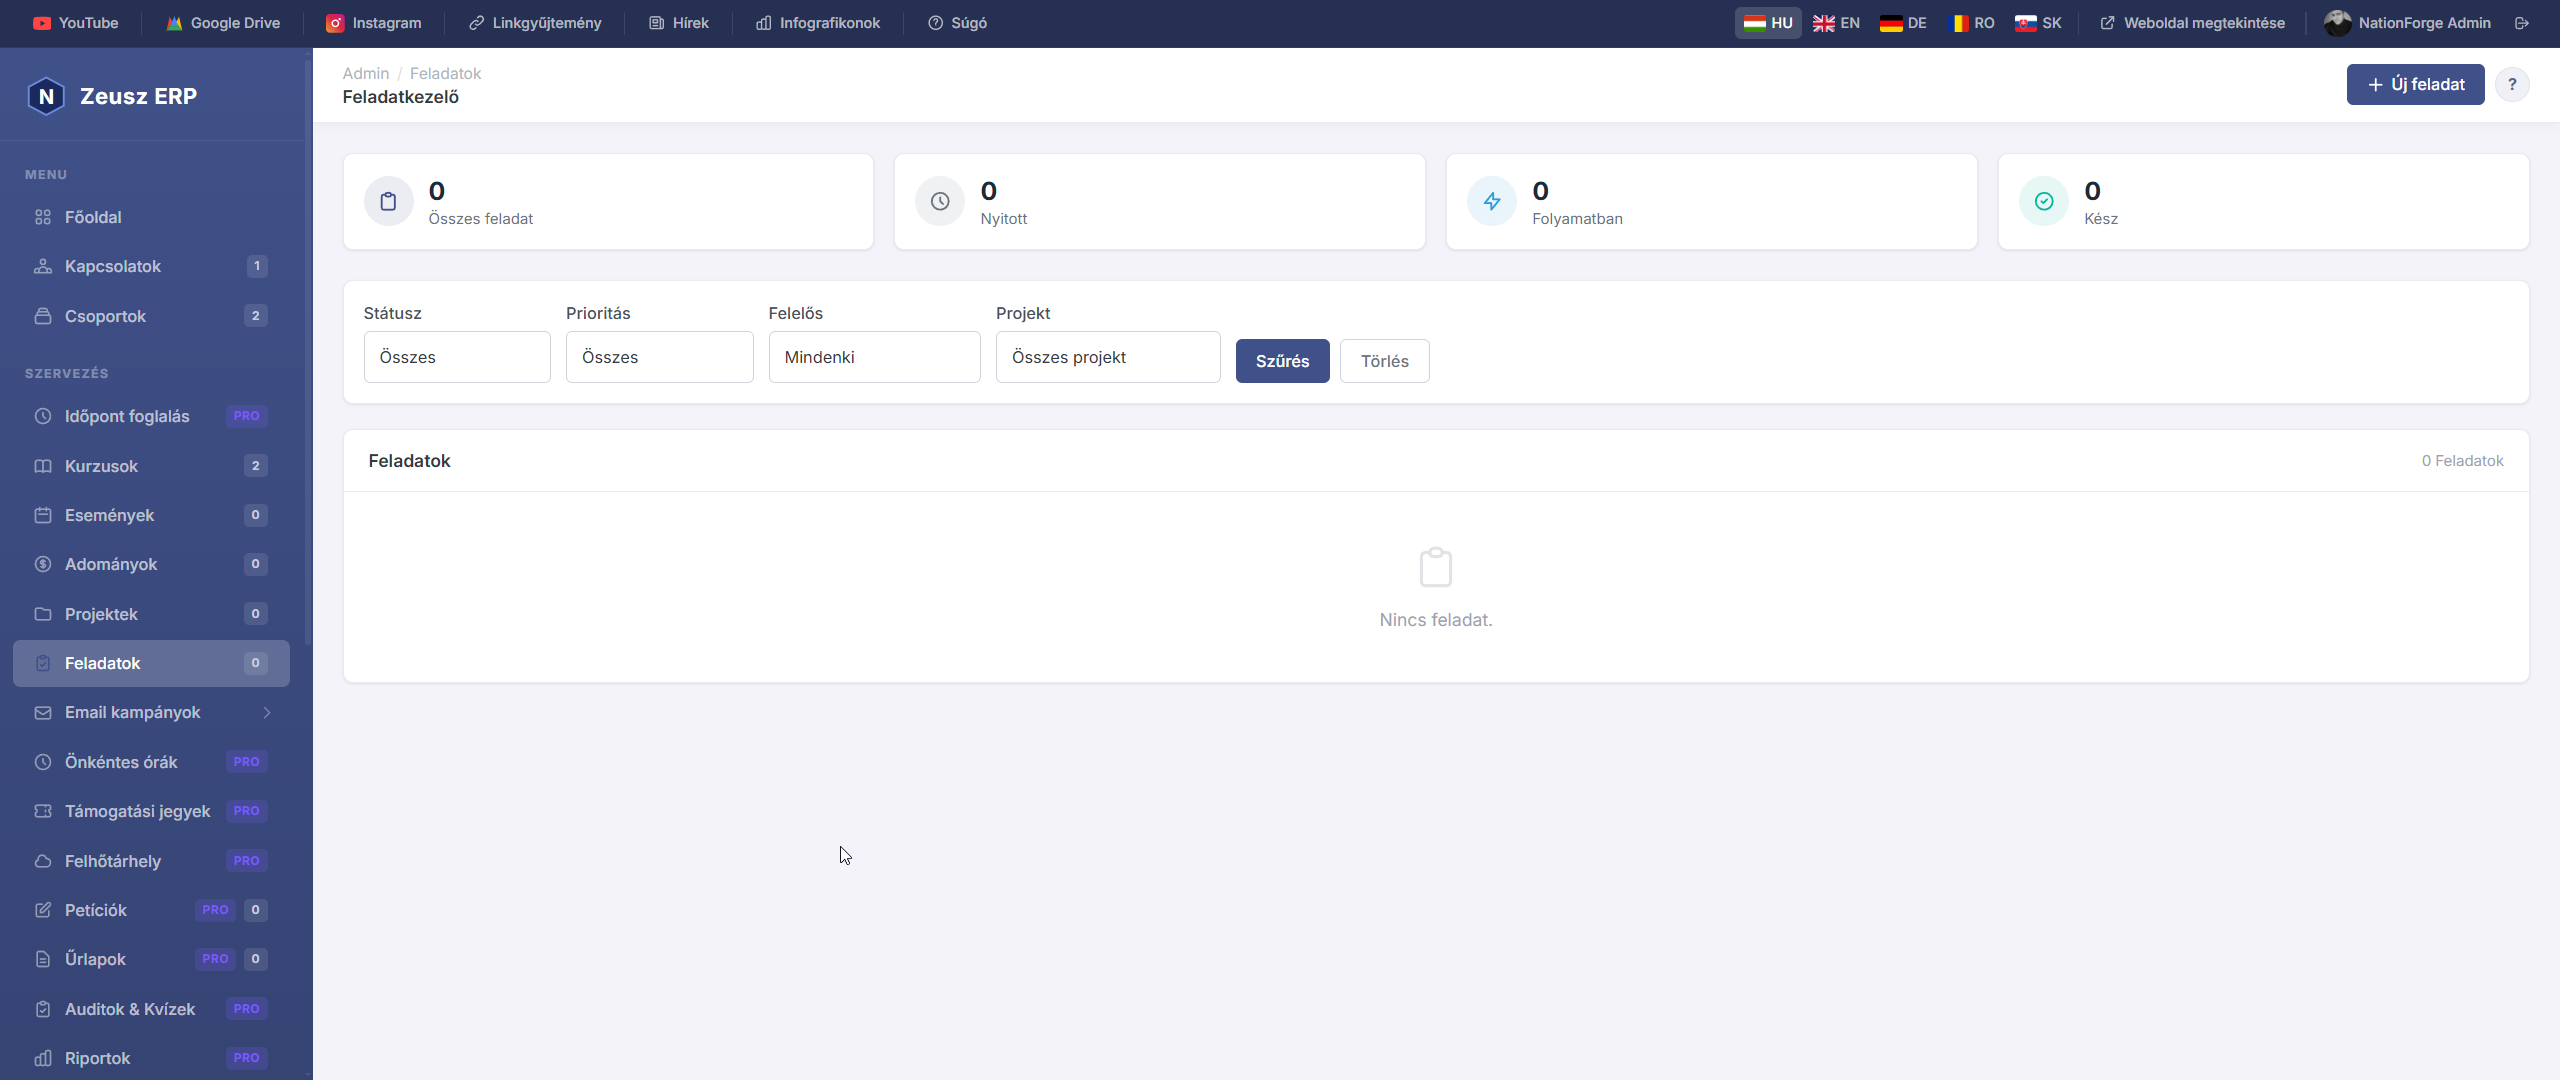
A Feladatok oldal az összes feladatot egyetlen nézetben jeleníti meg, projektektől függetlenül. Ez a globális feladatlista segít átlátni a teljes szervezeti munkaterhelést.
Feladatok listája
Az oldal tetején négy összesítő szám látható:
| Kártya | Leírás |
|---|---|
| Összes | Minden feladat száma |
| Nyitott | Még el nem kezdett feladatok |
| Folyamatban | Aktívan folyó munkák |
| Kész | Lezárt, befejezett feladatok |
A feladatok prioritás szerint rendeződnek: Sürgős → Magas → Közepes → Alacsony, azon belül határidő szerint.
Szűrők
A lista az alábbi szempontok szerint szűrhető:
- Státusz – Nyitott / Folyamatban / Kész
- Prioritás – Alacsony / Közepes / Magas / Sürgős
- Felelős – melyik adminisztrátorhoz van rendelve
- Projekt – melyik projekthez tartozik
Új feladat létrehozása
Kattints az „Új feladat" gombra. Megadható adatok:
| Mező | Leírás |
|---|---|
| Cím | A feladat neve (kötelező) |
| Leírás | Részletes feladatleírás |
| Státusz | Nyitott / Folyamatban / Kész |
| Prioritás | Alacsony / Közepes / Magas / Sürgős |
| Határidő | Teljesítési határidő dátuma |
| Felelős | Melyik adminisztrátor végzi |
| Projekt | Melyik projekthez kapcsolódik (opcionális) |
Megjegyzések és mellékletek
A feladat részletoldalán megjegyzések fűzhetők a feladathoz és fájlok csatolhatók. Részletek a Projektek – Feladat megjegyzések és mellékletek súgócikkben.
Webhook integráció
A task.created és task.completed eseményekre webhook értesítés küldhető. Konfigurálás az Integrációk → Webhooks alatt.

Az Email kampányok modul lehetővé teszi hírlevelek és tömeges emailek kiküldését a szervezet kapcsolatainak.
Kampányok listája
A kampányok oldalon láthatók az összes létrehozott kampányok: név, tárgy, státusz, elküldött példányszám és a küldés ideje.
Az előfizetők száma az oldal tetején jelenik meg — csak azok a kapcsolatok kapják meg az emailt, akiknek van email-jük és az is_subscribed mező true értékű.
Új kampány létrehozása
Kattints az „Új kampány" gombra. Megadható adatok:
| Mező | Leírás |
|---|---|
| Kampány neve | Belső azonosítónév (nem látja az olvasó) |
| Tárgy | Az email tárgysora |
| HTML tartalom | Az email törzse (HTML szerkesztővel) |
| Feladó neve | Megjelenő feladónév (alapértelmezés: rendszerbeállítás) |
| Feladó email | Reply-to cím |
| Célcsoport | Kik kapják meg (lásd szegmentálás) |
Célcsoport szegmentálás
A kampány létrehozásakor meghatározható, ki kapja meg az emailt:
| Típus | Leírás |
|---|---|
| Összes feliratkozó | Minden aktívan feliratkozott kapcsolat |
| Csoport tagjai | Egy vagy több csoport tagjai |
| Cimke alapján | Adott tag(ek)-kel rendelkező kapcsolatok |
| Státusz alapján | Kapcsolatok státusza szerint szűrve |
A várható fogadók száma a szegmentáció megadásakor azonnal megjelenik.
Kampány küldése
A „Küldés" gombra kattintva elindul a kiküldés. Ehhez szükséges:
- Beállított Resend API kulcs (Beállítások → Email konfiguráció)
- Legalább egy fogadó
A kiküldés közben a státusz sending, majd sent (vagy failed) lesz.
Kampány státuszok
| Státusz | Leírás |
|---|---|
| Vázlat | Még nem elküldött kampány — szerkeszthető |
| Küldés alatt | Folyamatban lévő kiküldés |
| Elküldve | Sikeresen kiküldött kampány — nem szerkeszthető |
| Sikertelen | Minden küldés meghiúsult |
Kapcsolódó funkciók
- Email sablonok – Előre elkészített HTML sablonok a kampányokhoz
- Drip kampányok – Automatizált emailsorozat ütemezéssel
- Leiratkozás – Automatikus leiratkozási link minden emailben
- Nyomon követés – Megnyitás és kattintás statisztikák
Drip campaigns
Drip campaigns
Drip campaigns (/admin/drip-campaigns) allow a pre-planned email series to be sent automatically over time.
How it works:
- Create a drip campaign (name, description, trigger type)
- Add steps: subject, sender, HTML content, delay in days
- Activate the campaign
- The system runs the
drip:processcommand every 15 minutes and sends due emails
Step delay: For each step, specify how many days after the previous step it should be sent (0 = immediately).
Trigger types:
- Manual — the admin manually enrolls contacts
- Group join — automatic enrollment when a contact joins the specified group
- Tag added — automatic enrollment when the specified tag is added to a contact
Manual enrollment: On the drip campaign detail page, the Enroll contact button allows manual enrollment.
Statistics: The detail page shows 4 cards: active / completed / cancelled enrollments and total steps.
Volunteer Hours Tracking
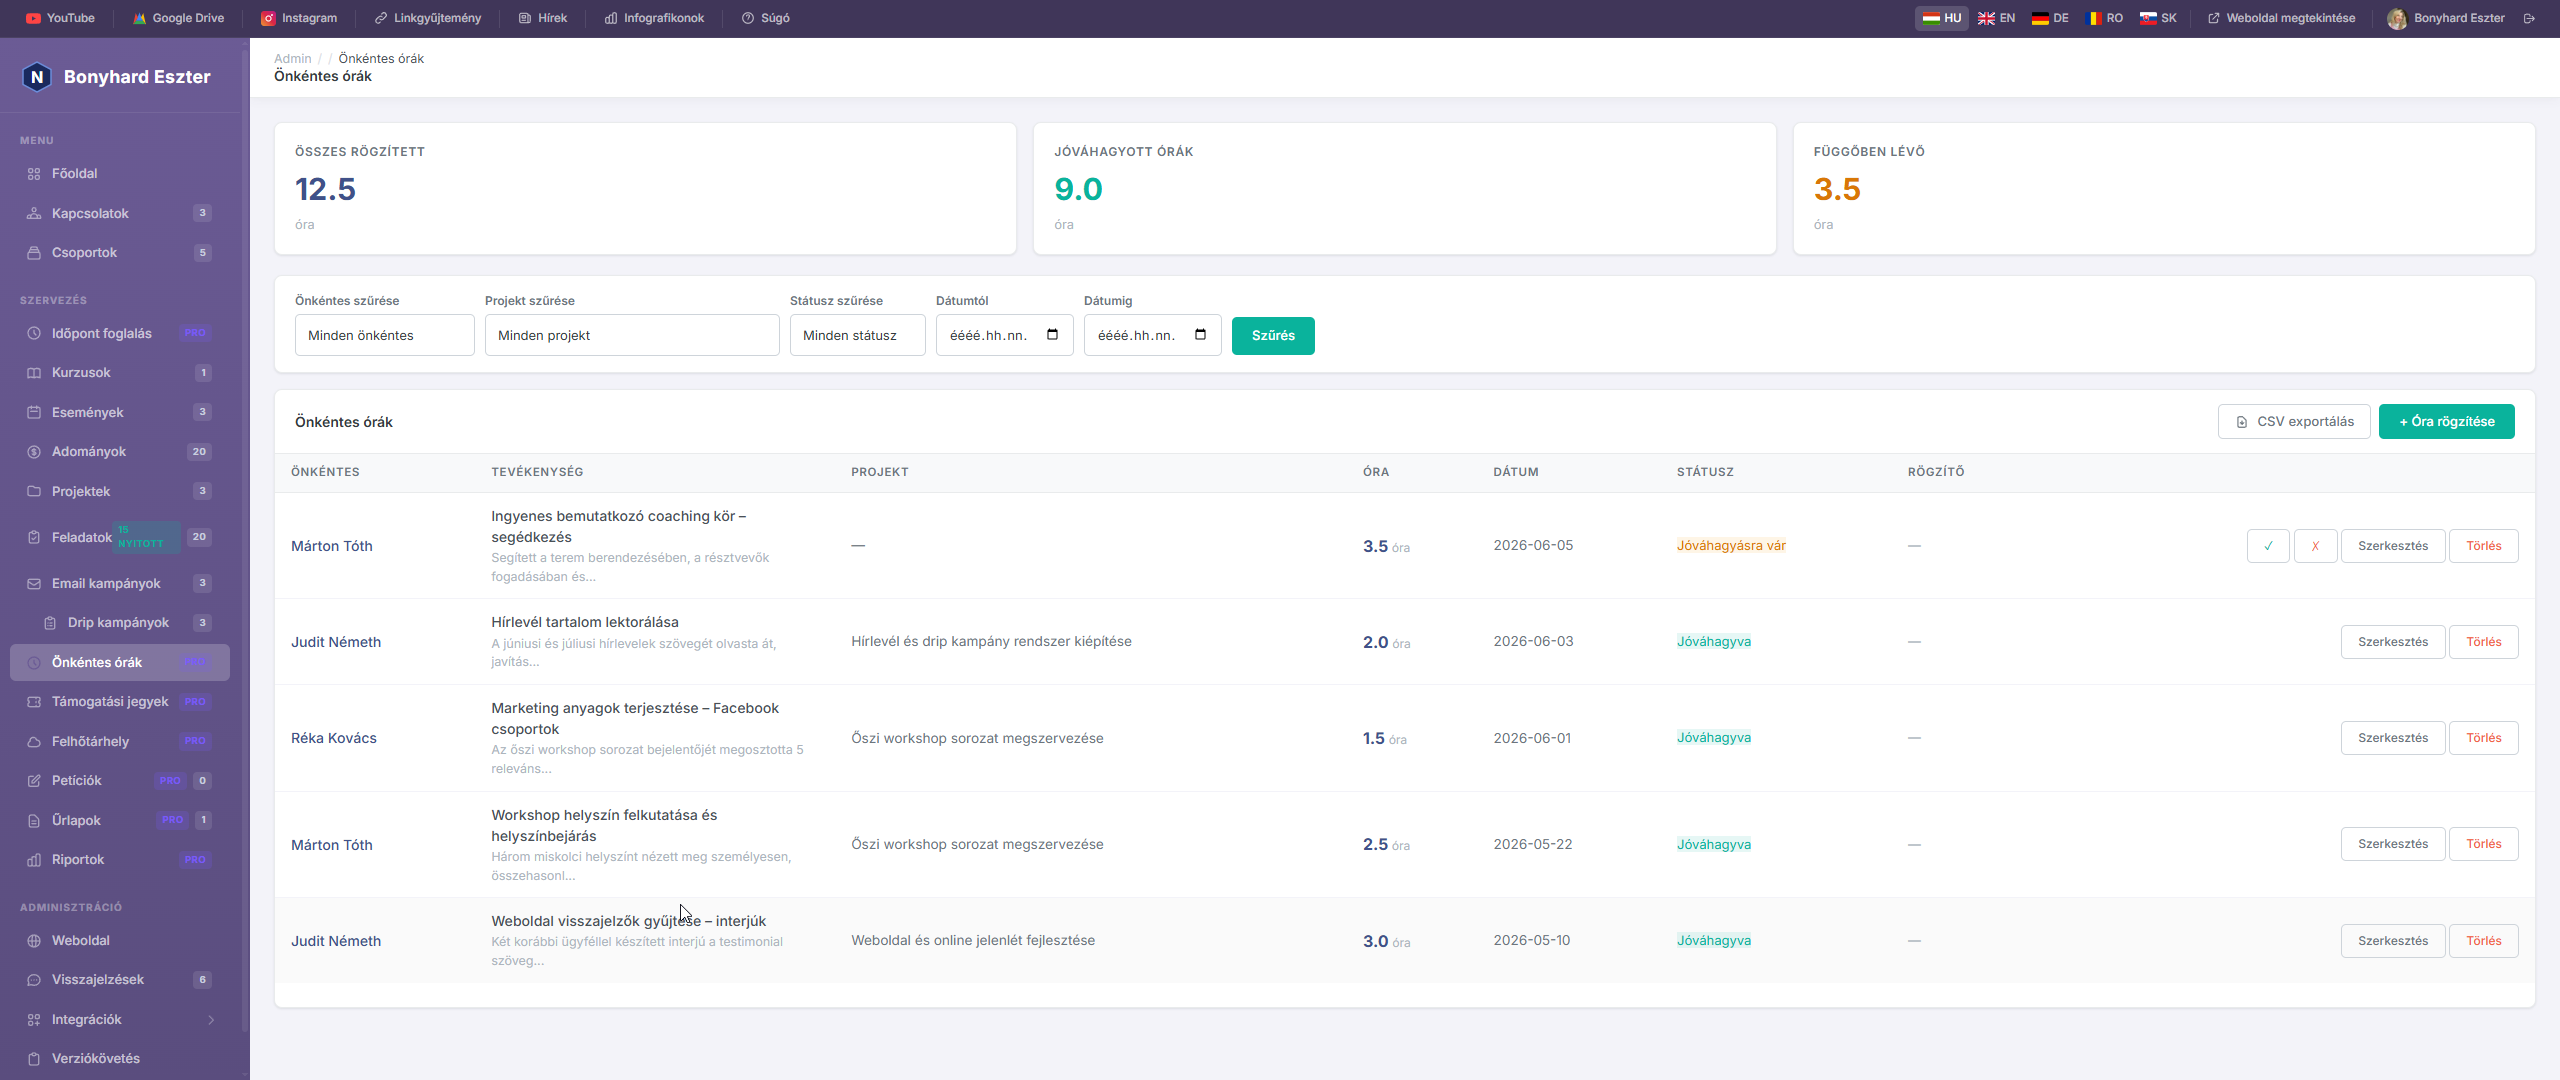
Volunteer Hours Tracking
NationForge Pro's volunteer hours tracker lets you accurately log and monitor how much time your organization's volunteers spend on volunteer work. Administrators can approve or reject submitted hours, and export all data to CSV.
Pro Feature — Volunteer hours tracking is exclusively available in NationForge Pro.
Logging Hours
- Click Volunteer Hours in the left sidebar.
- Click + Log hours.
- Fill in the fields:
- Volunteer — which contact the work belongs to
- Activity — short description (e.g. "Event organizing", "Office assistance")
- Project — optionally link to a project
- Hours — time spent (0.25–24 hours, in 15-minute increments)
- Date — when the work was done
- Notes — internal note (optional)
- The newly logged entry gets "Pending" status.
Statuses
| Status | Meaning |
|---|---|
| 🟡 Pending | Logged but not yet verified |
| 🟢 Approved | Verified by an administrator |
| 🔴 Rejected | Rejected by an administrator |
Use the ✓ button at the end of a row to approve, and ✗ to reject. These buttons only appear for pending entries.
Filtering
Use the filter bar at the top to filter by:
- Volunteer — entries for a specific person
- Project — hours linked to a specific project
- Status — pending / approved / rejected only
- From / To date — date range filter
Filters can be combined. Click ✕ to clear all filters.
Statistics
Three summary cards appear at the top of the page:
- Total logged — sum of all entries
- Approved hours — sum of verified entries only
- Pending — sum of hours awaiting approval
CSV Export
Click Export CSV to download the currently filtered data as a spreadsheet. The export includes:
- Volunteer name and email
- Activity description
- Project name
- Hours, date, status
- Notes
- Logged by
The file is UTF-8 BOM encoded — opens directly in Excel or Google Sheets.
Volunteer Profile Summary
On every contact's detail page, a Volunteer Hours card appears at the bottom showing:
- Total approved hours for that person (green badge)
- Last 8 entries with activity, project, hours, and status
- Link to all their entries on the Volunteer Hours page
Tips
- Use the Project field when logging hours tied to an event or campaign — this makes it filterable by project.
- Quarter-hour precision (0.25 h = 15 min) allows accurate logging of short activities.
- To prepare an annual volunteer summary, filter by date range and status (
Approved), then export to CSV.
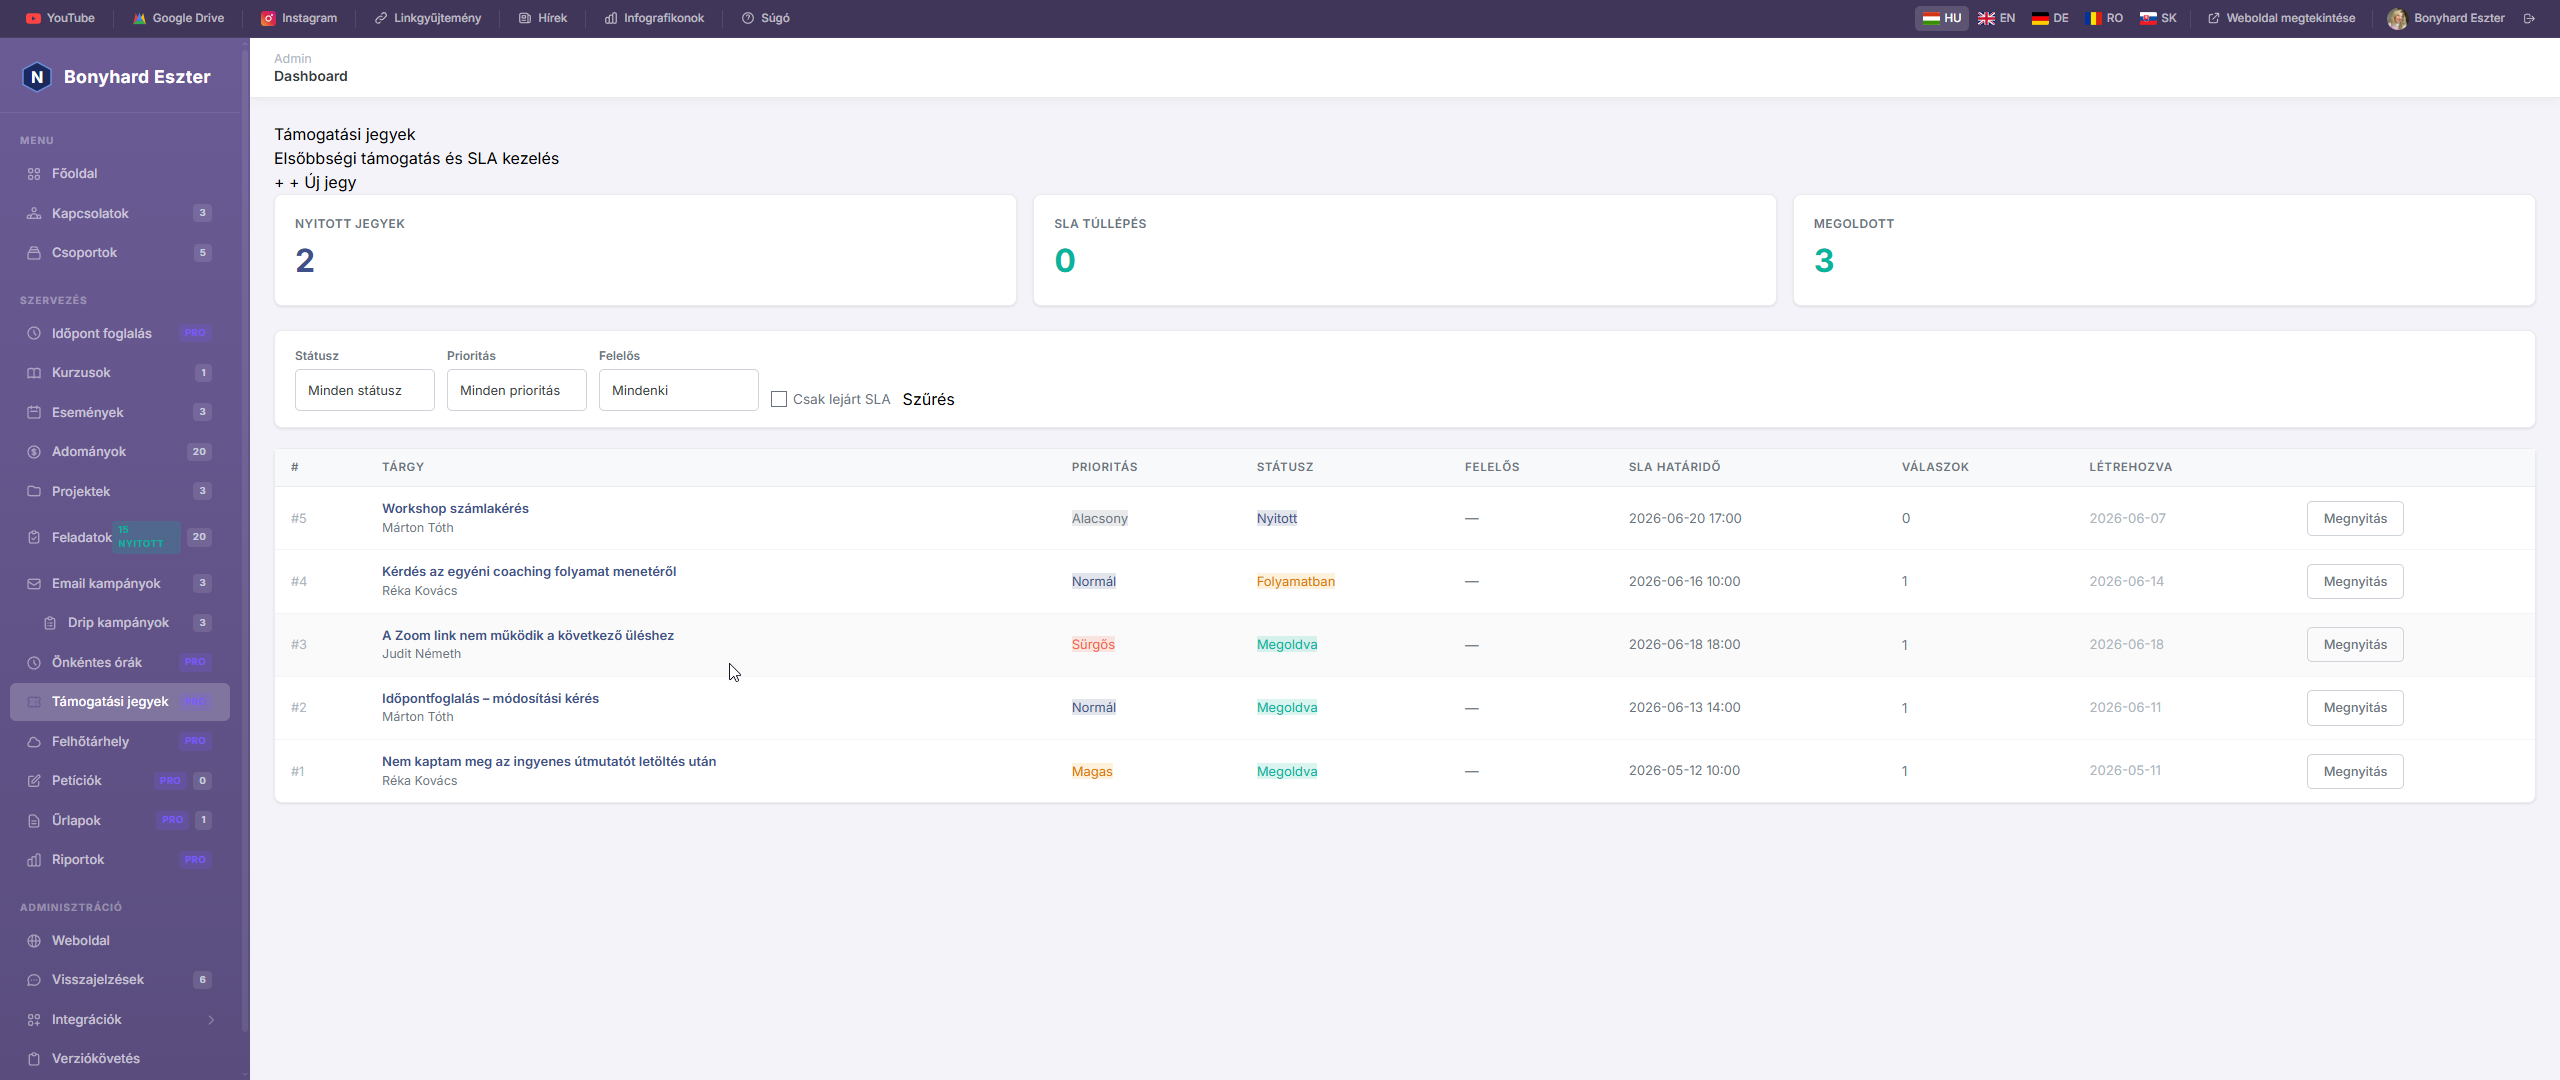
Priority Support & SLA
NationForge Pro's support ticket system lets you track incoming requests, set priorities, and use SLA deadlines to ensure timely responses.
Pro Feature — The support ticket system is exclusively available in NationForge Pro.
Creating a New Ticket
- Click Support Tickets in the left sidebar.
- Click + New Ticket.
- Fill in the fields:
- Subject — brief summary (e.g. "Billing issue")
- Description — detailed description of the problem
- Priority — Low / Normal / High / Urgent
- Assigned to — which administrator handles the ticket
- Contact — which person submitted the request (optional)
- The ticket is automatically created with "Open" status and an SLA deadline.
Priorities and SLA
| Priority | SLA Deadline |
|---|---|
| 🔴 Urgent | 4 hours |
| 🟠 High | 8 hours |
| 🔵 Normal | 24 hours |
| ⚪ Low | 72 hours |
The SLA deadline is calculated automatically when the ticket is created. If the deadline has passed and the ticket is still unresolved, the list marks it with a ⚠ red warning.
Statuses
| Status | Meaning |
|---|---|
| 🔵 Open | Received but not yet handled |
| 🟡 In Progress | Someone is actively working on it |
| 🟢 Resolved | The problem has been solved |
| ⚪ Closed | Finalized, archived ticket |
Replies and Internal Notes
In the ticket detail view, you can reply to the request:
- Normal reply — visible to the client
- Internal note — visible to admins only (check "Internal note")
The first response time is automatically recorded and displayed in the ticket details.
Quick Actions
From the right sidebar of the ticket detail view:
- Mark In Progress — immediately moves ticket to "In Progress"
- Mark as Resolved — closes the ticket and records the resolution time
- Reopen — resets the ticket to "Open" status
Filtering and Overview
Three summary cards at the top of the page:
- Open Tickets — number of active, unresolved tickets
- SLA Breach — overdue, still unresolved tickets
- Resolved — summary of closed tickets
Use the filter bar to filter by status, priority, assignee, and enable "Overdue SLA only" view.
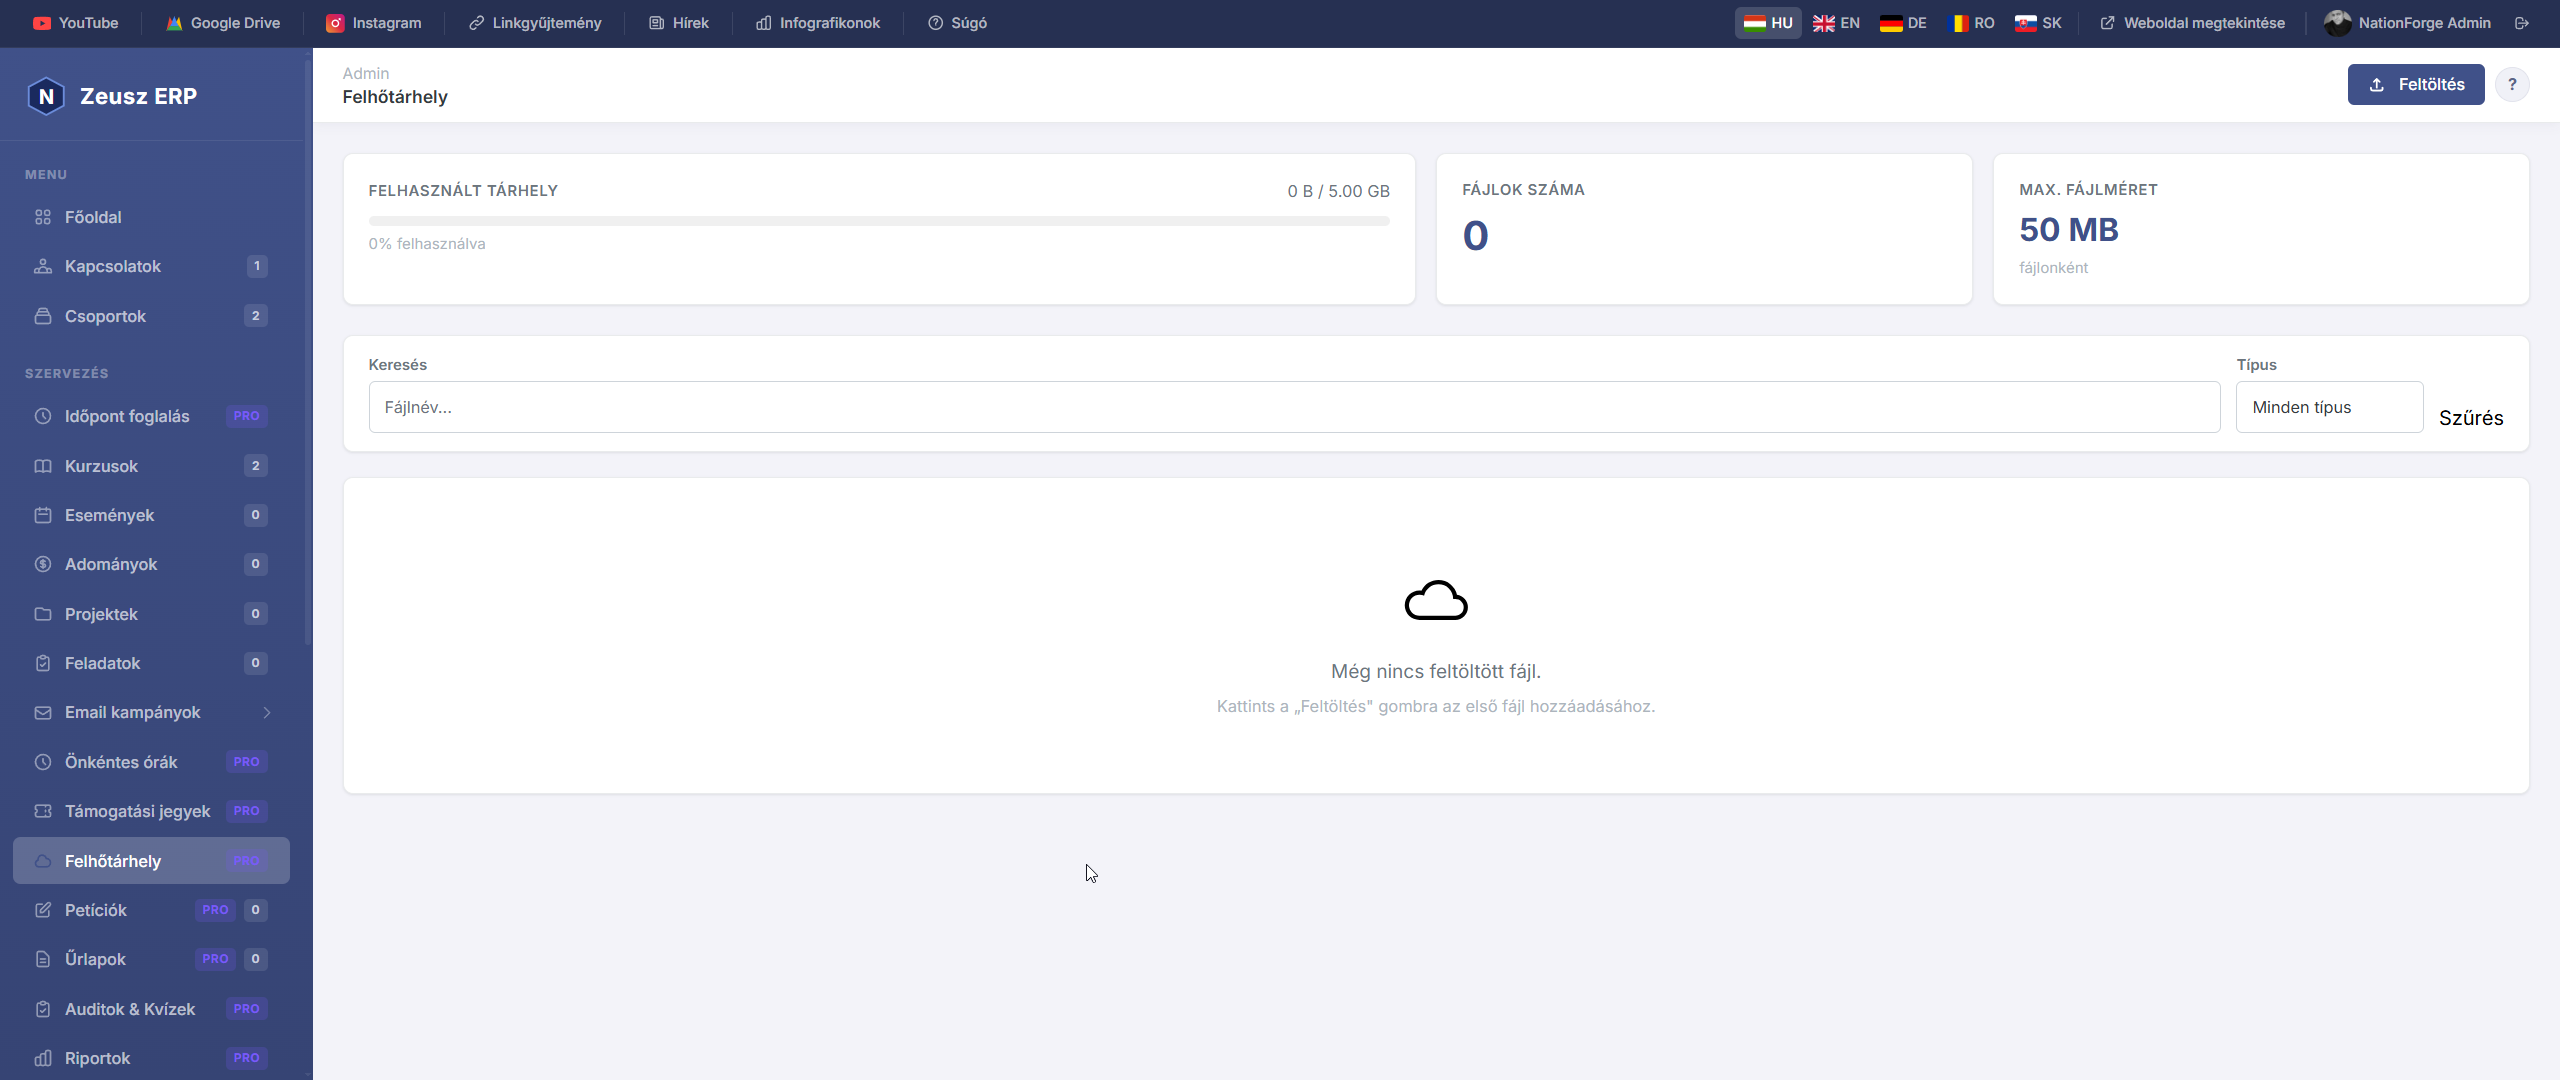
Managed Cloud Storage
NationForge Pro's managed cloud storage lets you store and manage all your organization's documents, images, and media files in one place. Files are stored securely on the server and can be downloaded at any time.
Pro Feature — Cloud storage is exclusively available in NationForge Pro.
Uploading Files
- Click Cloud Storage in the left sidebar.
- Click Upload.
- Drag files to the upload area, or click to select.
- Optionally add a description.
- Click Upload.
Multiple files can be uploaded at once.
Supported File Formats
| Category | Formats |
|---|---|
| 🖼️ Images | JPG, JPEG, PNG, GIF, WEBP, SVG |
| 📄 Documents | PDF, DOC, DOCX, PPT, PPTX |
| 📊 Spreadsheets | XLS, XLSX, CSV, TXT |
| 🗜️ Archives | ZIP, RAR, 7Z |
| 🎬 Media | MP4, MP3, WAV |
Maximum file size: 50 MB per file.
Storage Quota
The usage bar at the top shows:
- Used storage — total size of uploaded files
- Free storage — available capacity
- File count — total number of uploaded files
When usage exceeds 85%, the bar turns red.
Search and Filter
- Search — filter by file name
- Type filter — show only images, PDFs, Office documents, videos, or archives
Downloading and Deleting
- ⬇ Download: downloads the file with its original name
- ✕ Delete: permanently removes the file from the server
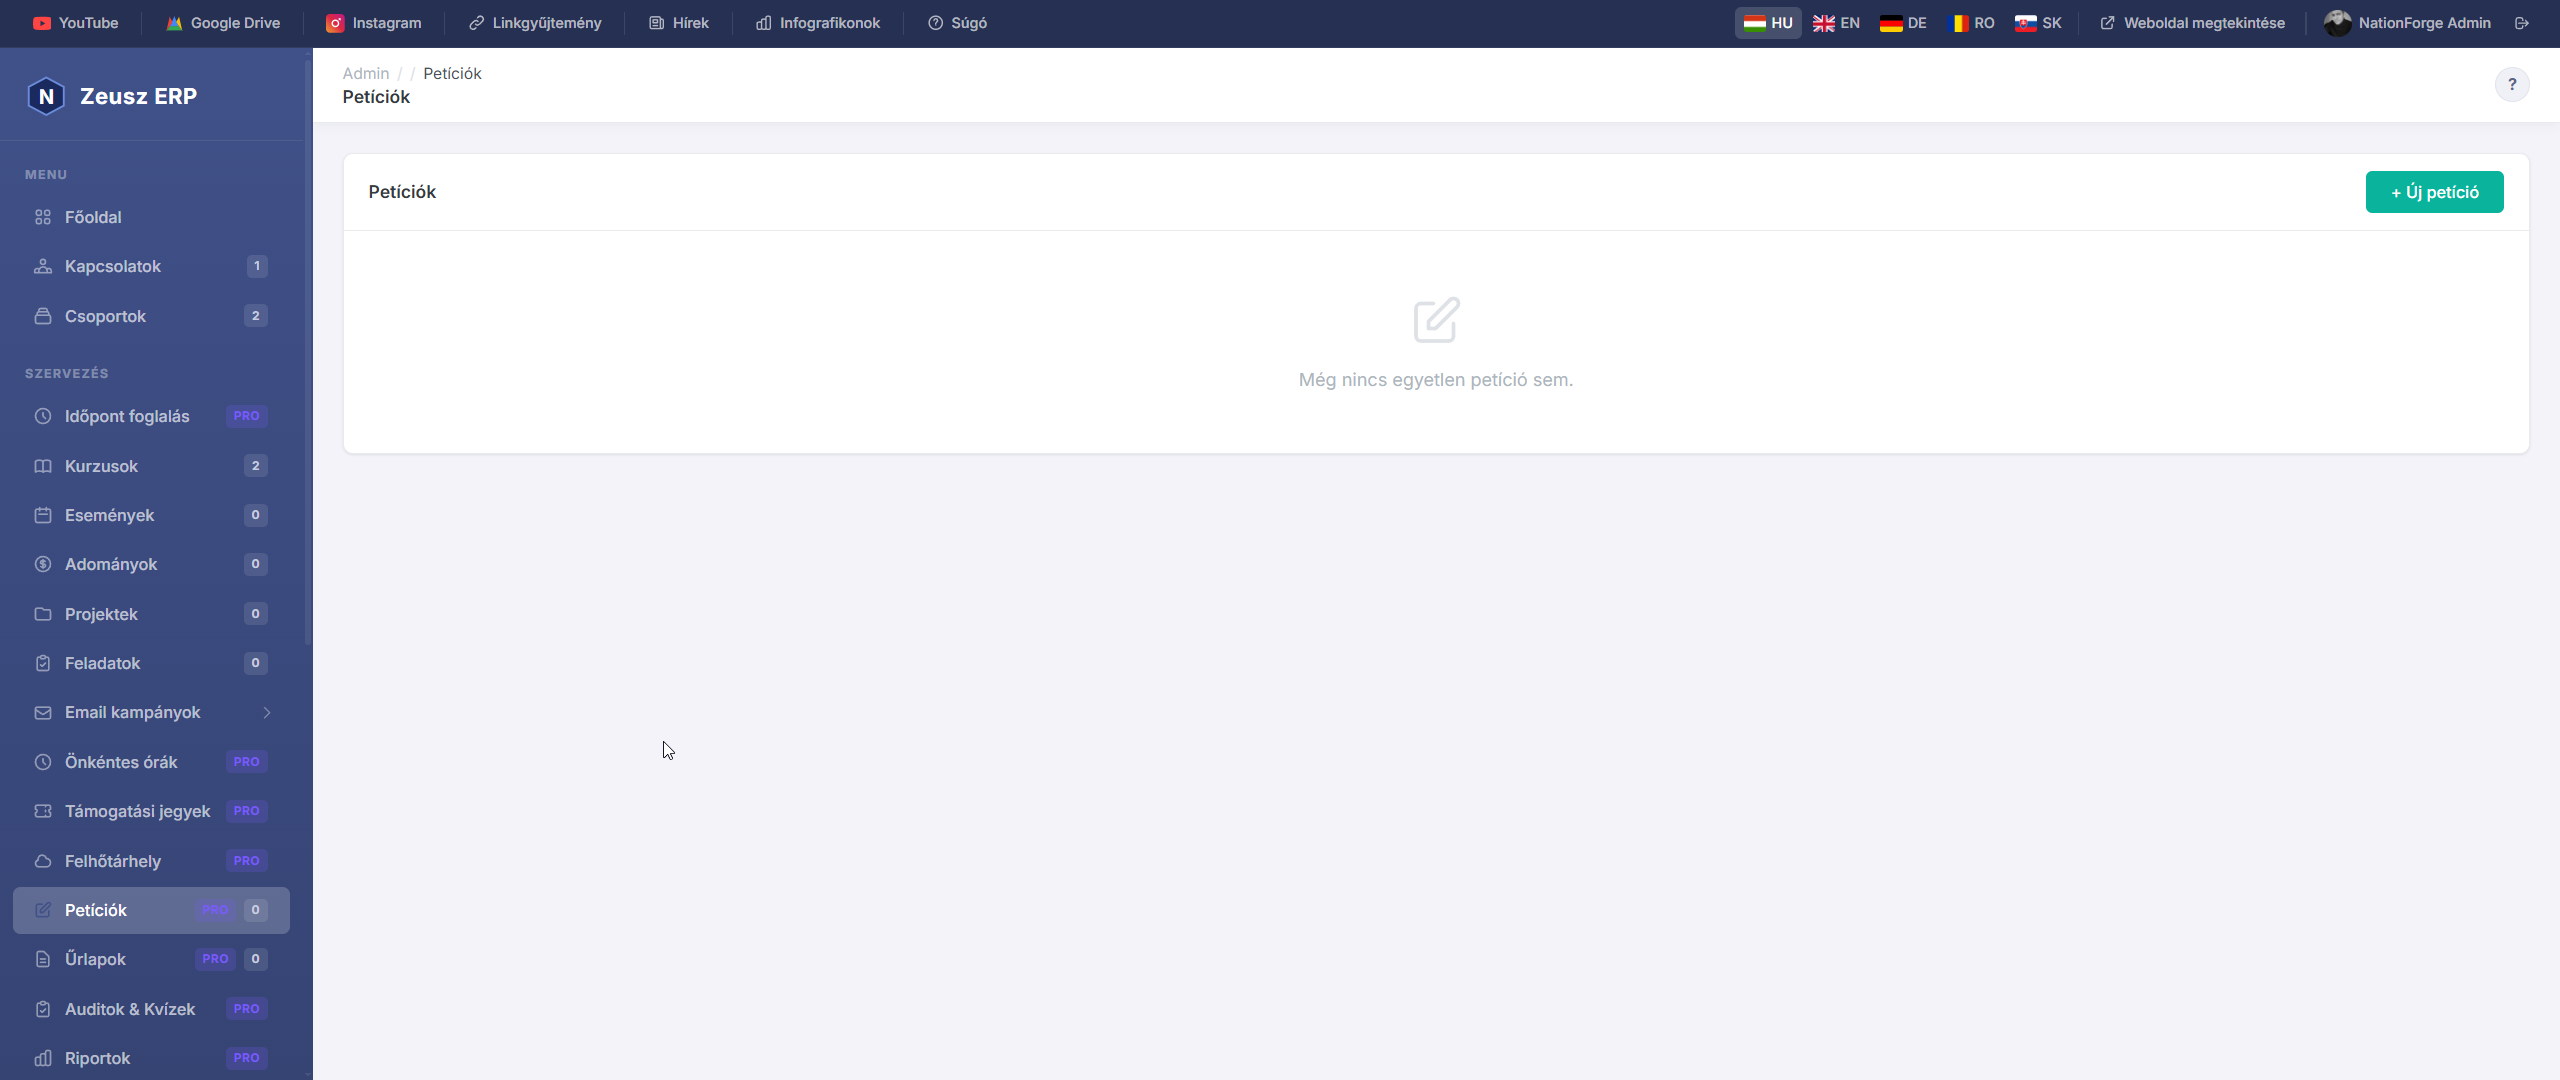
Petitions & Signature Collection
With NationForge Pro's built-in petition manager, you can launch an online signature collection in minutes. Each petition gets a unique public URL you can share anywhere — via email, social media, or QR code.
Pro Feature — The petition manager is exclusively available in NationForge Pro.
Creating a New Petition
- Click Petitions in the left sidebar.
- Click + New petition.
- Enter the petition title and description, then click Save.
- The system generates a unique slug and opens the petition management page.
The Public Signing Page
Each petition has a public page (e.g. /p/save-the-park-a1b2c3) that:
- Is accessible without login by anyone
- Shows the petition description and goal progress bar
- Lists recent signers with their names and comments
- Includes Facebook share and copy link buttons
To sign, visitors must provide:
- Full name (required)
- Email address (required, with duplicate check — the same email can only sign once)
- Comment (optional, if enabled)
Settings
The Settings tab allows you to configure:
| Setting | Description |
|---|---|
| Goal | Target number of signatures — displayed in the progress bar |
| Closing date | After this date, no new signatures are accepted |
| Active | Inactive petitions don't accept new signatures |
| Allow comments | Whether signers can add a short comment |
| Notification email | Gets notified on every new signature |
| Thank you message | Text shown after signing |
Managing Signatures
The petition Overview tab shows:
- Total and goal signature count
- Progress bar with completion percentage
- The 5 most recent signers
Click All signatures to view and delete individual signatures.
CSV export: download all signatures as a spreadsheet (Excel-compatible, UTF-8 BOM) — includes name, email, comment, date, and IP.
Automatic Contact Matching
If a signer's email already exists in your organization's contacts, the signature is automatically linked to that person — making it traceable from the contact detail page.
Tips
- Clearly state who the petition is addressed to and what the specific demand is — this increases signing rates.
- Set a goal — the visual progress bar motivates signers.
- Set a closing date if the issue is time-sensitive — urgency also increases participation.
- Share the link directly via the NationForge Email campaigns feature.
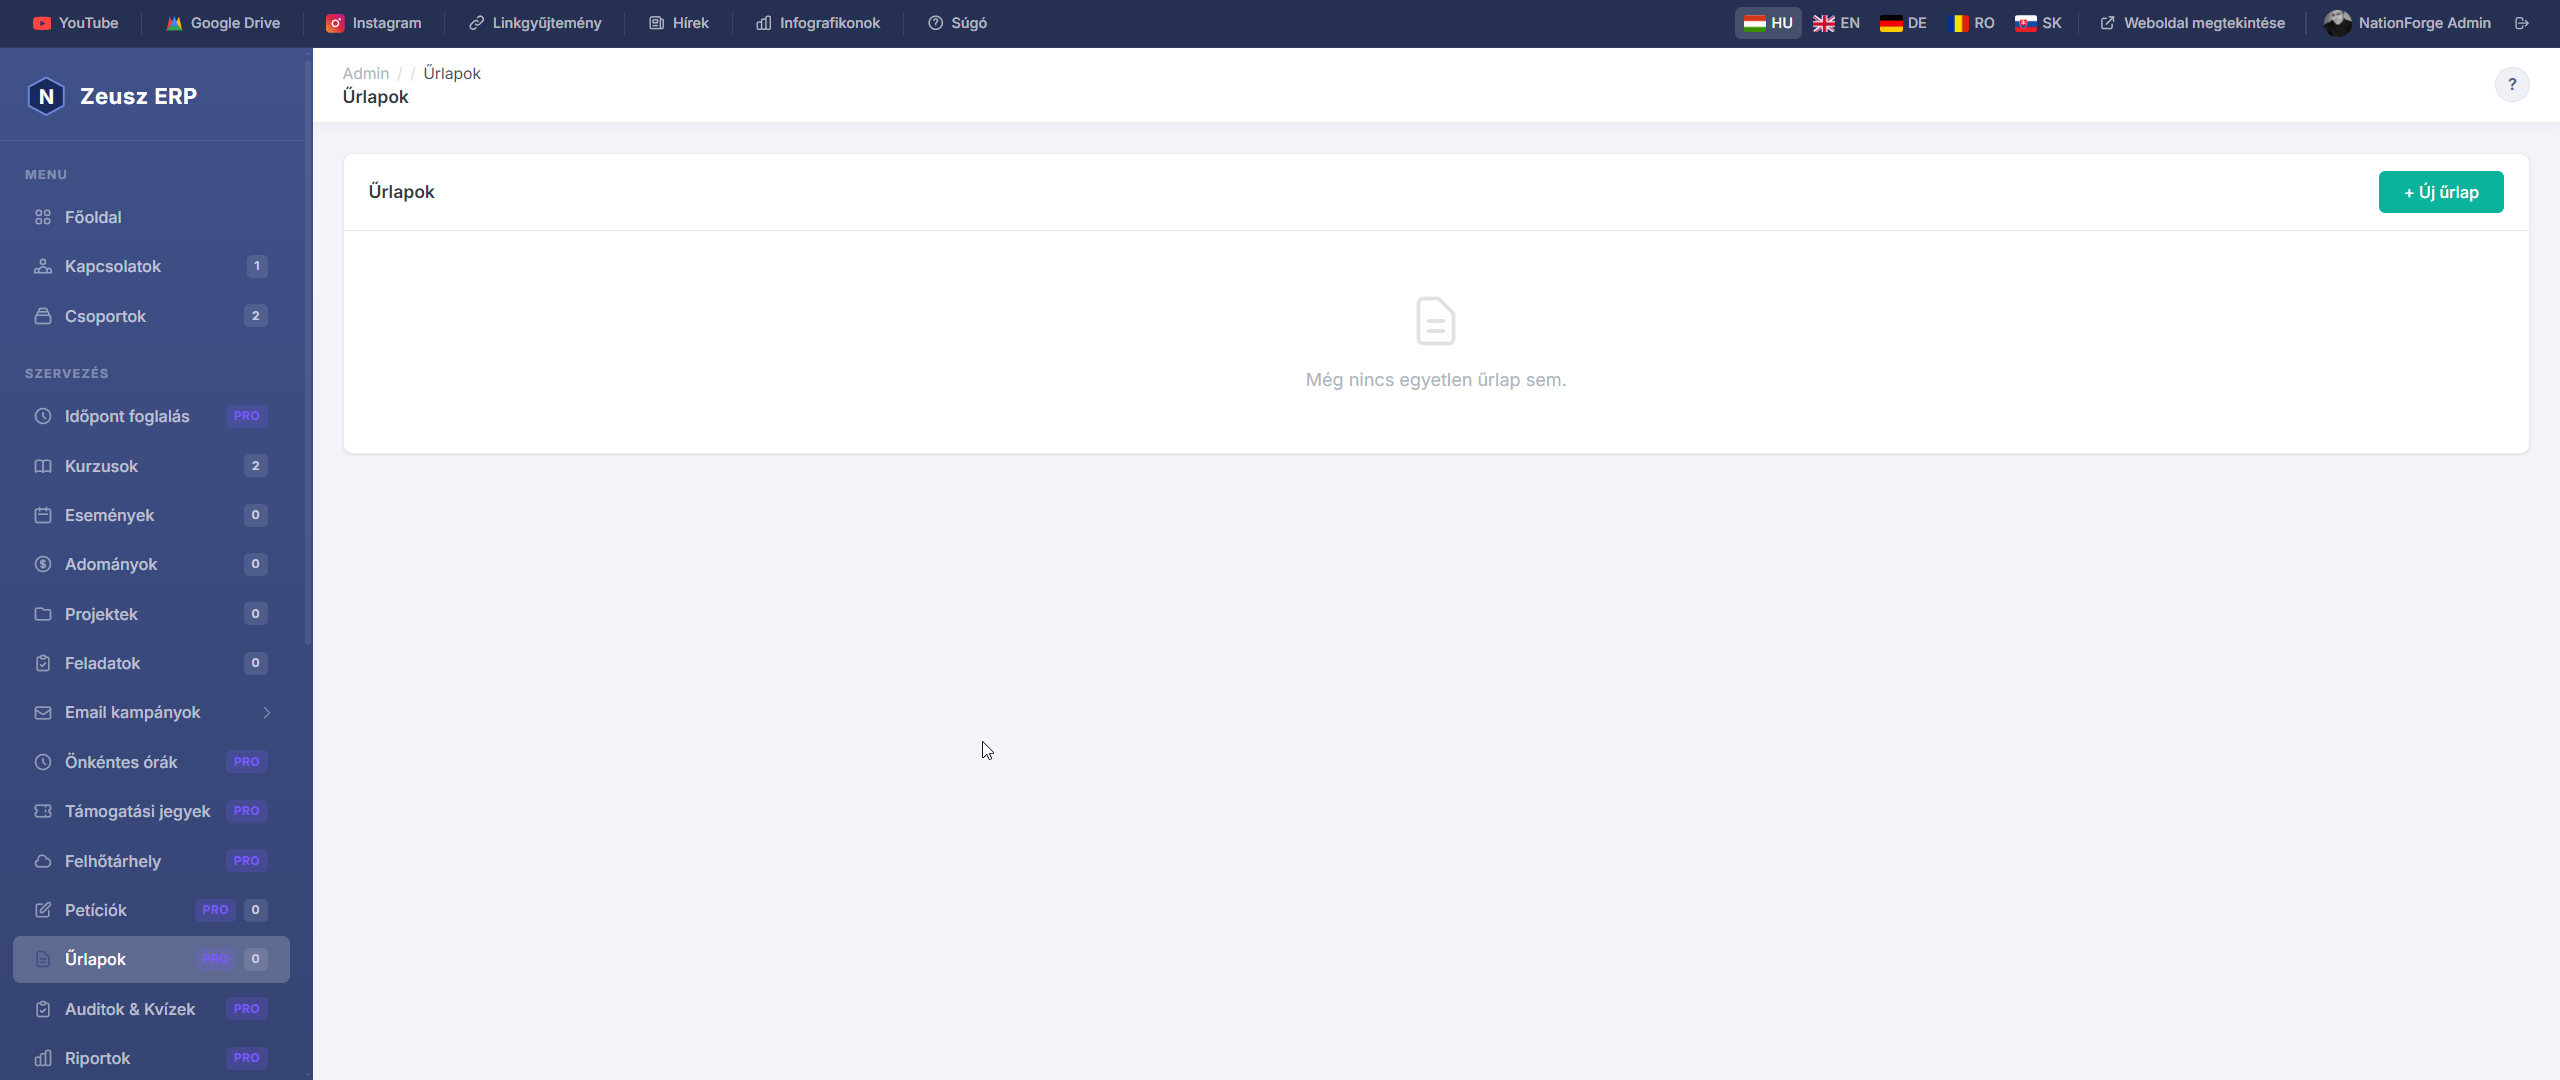
Survey & Form Builder
With NationForge Pro's built-in form builder, you can create custom submission forms in minutes — for registrations, surveys, memberships, or any kind of data collection. Every form gets a unique public URL you can share anywhere.
Pro Feature — The form builder is exclusively available in NationForge Pro.
Creating a New Form
- Click Forms in the left sidebar.
- Click + New form.
- Enter the form name (and optionally a description), then click Save.
- The system automatically generates a unique slug and opens the Builder page.
Adding Fields
The Builder tab shows an Add field panel at the top.
Available field types:
| Type | Description |
|---|---|
| Short text | Single-line text input |
| Long text | Multi-line textarea |
| With email validation | |
| Phone | Phone number input |
| Number | Accepts numbers only |
| Date | Date picker |
| Dropdown | Choose one from preset options |
| Radio | Radio buttons (single choice) |
| Checkboxes | Checkboxes (multiple choices) |
| Section header | Divider/title for longer forms |
When filling in a field:
- Label — what the visitor sees above the field (required)
- Placeholder — light hint text inside the input
- Help text — small explanatory note below the field
- Options (for dropdown/radio/checkbox) — one option per line
- Required — submission only succeeds if this field is filled
Use the ▲ / ▼ arrows to reorder fields.
Public URL
The public URL of the form (e.g. /f/membership-form-a1b2c3) appears at the top of the builder page. This URL:
- Is accessible without login by anyone
- Can be shared via email, social media, or QR code
- Can be copied to clipboard with the Copy URL button
Settings
The Settings tab allows you to change:
- Active / Inactive — inactive forms can't be submitted
- Allow multiple submissions — the same person can submit more than once
- Thank you message — text shown after successful submission
- Notification email — if set, an email is sent on every new submission
Viewing Submissions
- Click the Submissions tab.
- See all submissions with date, IP, and a summary of the first few answers.
- Click a row to open the full detail view.
- Use Export CSV to download all submissions as a spreadsheet (UTF-8 BOM, Excel-compatible).
Automatic contact matching: If the form has an email field and that email already exists in your organization's contacts, the submission is automatically linked to that person.
Tips
- Use Section headers in long forms to improve readability.
- Make the first Required field the email or full name — this helps with contact matching.
- Customize the thank-you message to match your organization's tone.
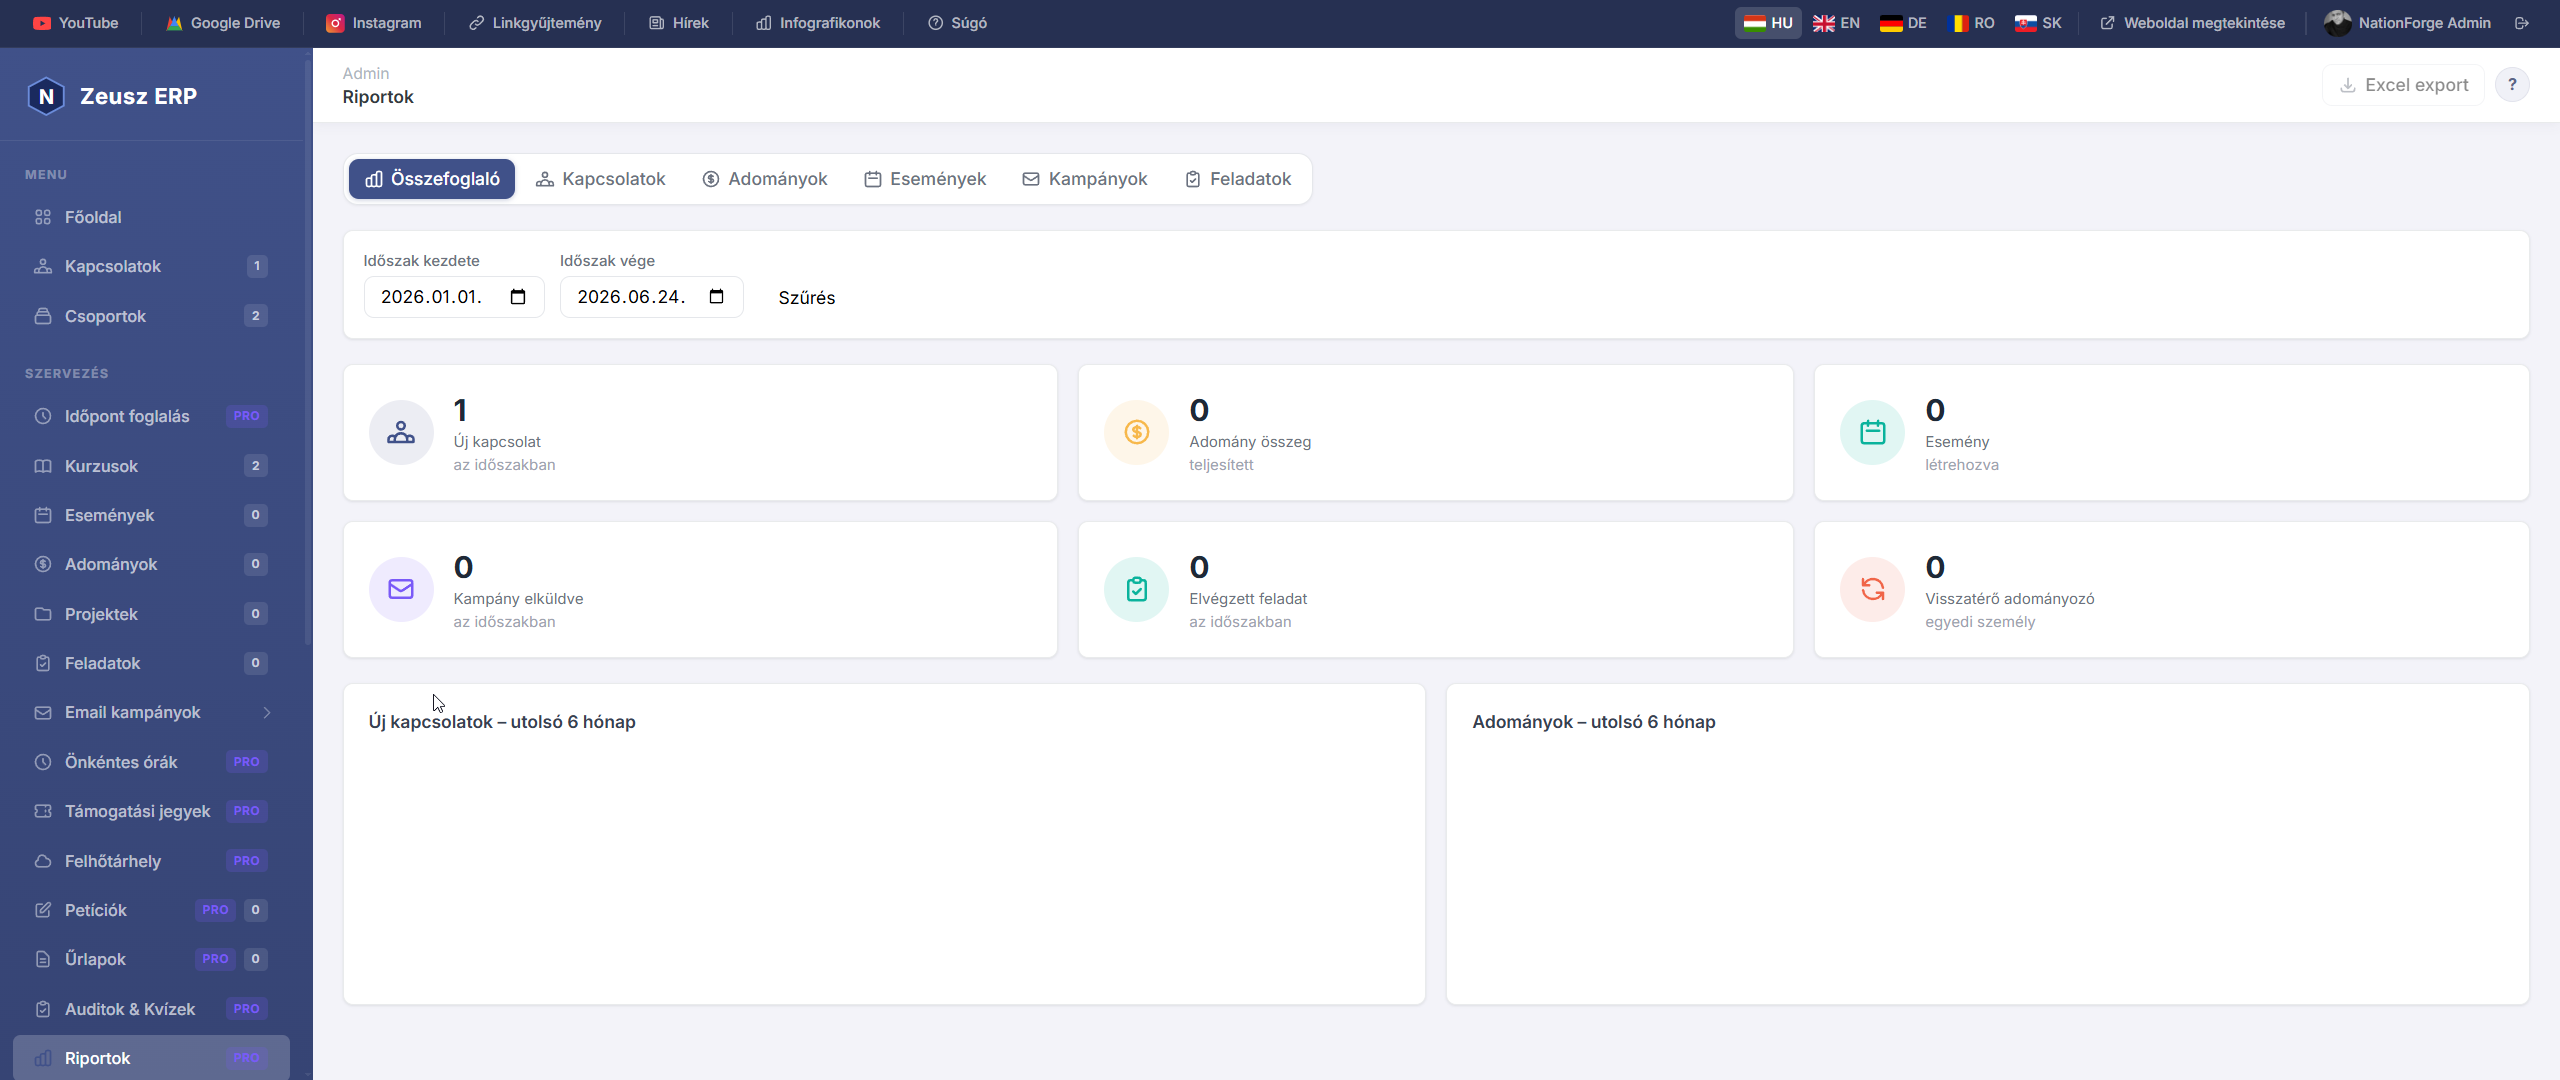
Reports
The Reports page provides comprehensive statistics and data export for all your organization's data.
Available Report Types
| Tab | Content |
|---|---|
| Summary | 6 KPI cards + monthly trend charts (last 6 months) |
| Contacts | Status and source breakdown, subscription rate |
| Donations | Totals by currency / payment method / campaign |
| Events | Registration count, check-in rate, ticket revenue |
| Campaigns | Send statistics, failure counts |
| Tasks | Status, priority, overdue, completion rate |
Filters
Each report supports date range filtering (Start – End date). The Contacts tab also supports status filtering; Donations support currency and campaign filters.
Data Export
Every report type can be exported in 3 formats:
- CSV – importable into any spreadsheet app, UTF-8 encoded
- Excel (XLSX) – formatted with colored headers and auto-sized columns
- PDF – A4 landscape with organization name and date range header
Export buttons are located at the right side of the filter bar.
Pro Feature
The Advanced Reporting & Data Export module is exclusively available in the Pro edition.
A Weboldal modul lehetővé teszi, hogy a NationForge nyilvános weboldalának teljes tartalmát az admin felületen keresztül szerkeszd — kódolási ismeretek nélkül. Az oldal tetején gyors ugró linkek találhatók, amelyekkel azonnal a kívánt szekcióra ugorhatsz.
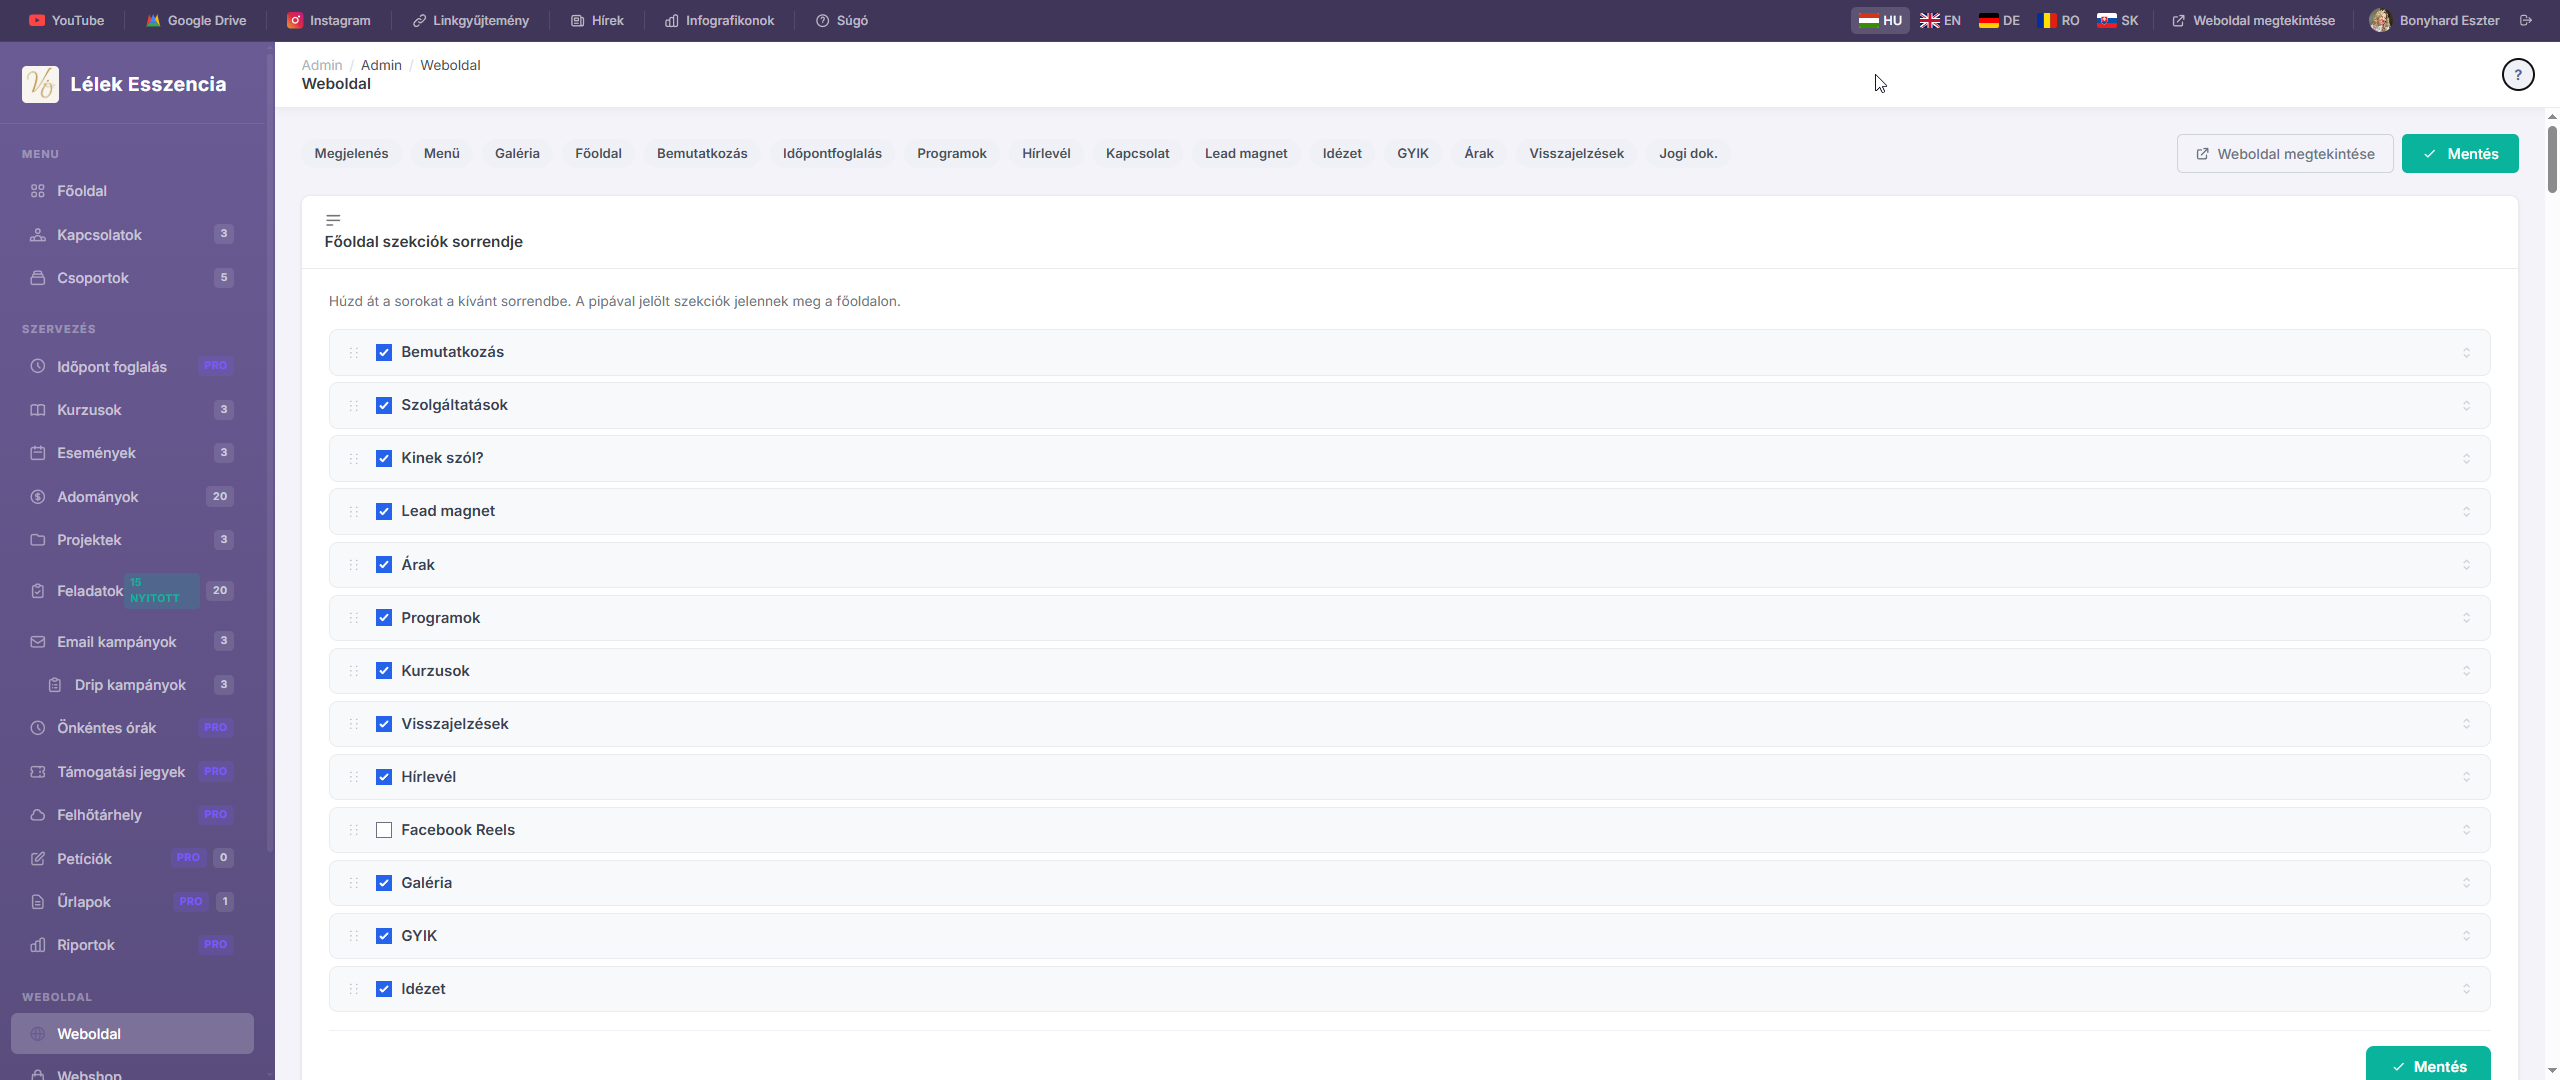
Szekciók sorrendje
Az oldal legelső kártyáján állíthatod be, hogy melyik szekciók jelenjenek meg a főoldalon és milyen sorrendben.
- Húzd át a sorokat egymás fölé / alá a kívánt sorrendbe
- A pipa bekapcsolt állapotban az adott szekció látszik a nyilvános főoldalon; kikapcsolva elrejtődik
- A sorrend és a láthatóság a Mentés gombbal rögzítődik
Tipp: A szekciók sorrendjét és láthatóságát bármikor megváltoztathatod anélkül, hogy a tartalmat elveszítenéd.
Megjelenés
Az oldal dizájnját és márkaidentitását itt állíthatod be.
Szervezet / márkanév
Ez a név jelenik meg a weboldal fejlécében, a küldött e-mailekben és a böngésző fülén. Ajánlott a rövid, felismerhető márkanév megadása (pl. „Vissza Önmagadhoz").
Weboldal sablon stílusa
Két sablon közül választhatsz:
| Sablon | Leírás | Ajánlott |
|---|---|---|
| Klasszikus | Modern, semleges, kék-sötét dizájn | Általános szervezeteknek |
| Elegáns & Feminin | Krém, arany, púderrózsaszín — serif betűtípussal | Coaching, wellness, nőies brandeknek |
Weboldal alapszíne (klasszikus sablon)
A színválasztóval és a hex-kód mezővel állíthatod be a gombok, linkek és kiemelések színét. Az előnézeti téglalap azonnal mutatja a választott színt.
Elegáns sablon színpalettája
Az elegáns sablonban 5 alapszínt módosíthatsz egyenként:
| Szín | Szerepe |
|---|---|
| Törtfehér | Fő háttérszín |
| Meleg bézs | Másodlagos háttér, kártyák |
| Púder rózsaszín | Gombok, kiemelések |
| Mély kakaóbarna | Szöveg, fejléc |
| Arany | Díszítő akcentus (idézetek, vonalak) |
A körökre kattintva megnyílik a színválasztó, a hex-mező manuális bevitelre is alkalmas.
Menü beállítások
A weboldal fejlécének navigációs menüjét itt állíthatod be fogd és vidd módszerrel.
- Bal oszlop (Rejtett): az elérhető, de jelenleg nem megjelenített menüpontok
- Jobb oszlop (Látható): ezek jelennek meg a weboldal tetején, a megadott sorrendben
Menüpont feliratának módosítása
A menüpontok nevére kattintva közvetlenül szerkesztheted a feliratot (inline szerkesztés).
Lábléc ikon (Gyors linkek)
A látható menüpontok mellett megjelenik egy képernyő ikon. Ha rákattintasz, az adott menüpont felkerül a weboldal lábléc „Gyors linkek" részébe is.
Egyéni link hozzáadása
Az „Egyéni link hozzáadása" gombbal olyan menüpontot adhatsz hozzá, ami egy külső URL-re mutat (pl. blog, Instagram, árlistapdf).
Képgaléria (elegáns sablon)
Ez a szekció csak az elegáns sablon esetén releváns. A főoldal alján egy 5 képes galéria jelenik meg.
- 5 kép tölthető fel (1–5. slot)
- Ha egy slot üres marad, a galéria annyi képpel jelenik meg, amennyit feltöltöttél
- Ha minden slot üres, a galéria szekció nem jelenik meg
- Ajánlott képarány: álló (portré, 3:4 vagy 4:5)
Főoldal (Hero szekció)
A weboldal legelső és legnagyobb látható blokkja, amellyel a látogató azonnal találkozik.
| Mező | Leírás |
|---|---|
| Főcím (hero üzenet) | Nagy betűs szlogen (H1) – max 80 karakter ajánlott |
| Alcím / mottó | Rövid kiegészítő szöveg a főcím alatt |
| Háttérkép | JPG, PNG, WEBP · max 4 MB · Ajánlott méret: 1400×600 px |
A „Kép törlése" jelölőnégyzet bekapcsolásával eltávolíthatod a jelenlegi képet.
Rövid bemutatkozás
Ez a szekció négy részt tartalmaz:
Bemutatkozó szöveg és kép
- Bemutatkozó szöveg: 2–4 mondatos rövid önbemutatkozás, amely a szöveg melletti képpel együtt jelenik meg
- Bemutatkozás kép: A szöveg bal oldalán jelenik meg – négyzetes vagy portré arányú kép ajánlott (JPG, PNG, WEBP · max 4 MB)
„Kinek segítesz?" blokk
| Mező | Leírás |
|---|---|
| Cím | pl. „Neked szól ez az oldal, ha..." |
| Leírás | 3–5 mondat a célcsoportodról |
Problémák lista
Soronként egy problémát írj be, amellyel az ügyfeleid szembesülnek. Minden sor külön kártyaként jelenik meg a weboldalon.
Példa:
Elveszettnek érzed magad
Párkapcsolati nehézségek
Burnout, kiégés
Szolgáltatások lista
Formátum: Cím | Leírás (cső karakterrel elválasztva, soronként 1 szolgáltatás).
Példa:
Egyéni coaching | 60 perces személyes ülések
Páros tanácsadás | Kapcsolati harmónia
Online konzultáció | Bárhonnan elérhető
Időpontfoglalás szekció
A főoldalon megjelenő foglalási CTA (Call-to-Action) gomb beállításai.
| Mező | Leírás |
|---|---|
| Gomb felirata | pl. „Időpontfoglalás", „Foglalj most!" |
| Időpontfoglalás URL | Külső foglalórendszer (pl. Calendly) URL-je, vagy üresen hagyva a belső foglalóra mutat |
Ha a NationForge belső időpontfoglaló rendszerét használod, az URL mezőt hagyd üresen – a gomb automatikusan a beépített foglalóra irányít.
Programok szekció
A főoldalon megjelenő közelgő események szekció fejlécét és képeit itt állíthatod be.
| Mező | Leírás |
|---|---|
| Szekció felső label | Kis felirat a cím felett (pl. „Naptár", „Hamarosan") |
| Szekció főcíme | A szekció H2 fejléce (pl. „Közelgő programok") |
| Alapértelmezett eseménykép | Ha egy eseménynek nincs saját borítóképe, ez jelenik meg · Ajánlott: 800×500 px |
| Szekció banner kép | A szekció fejlécének háttérképe · Ajánlott: 1400×400 px |
Az egyes események saját képét, időpontját és leírását az Események adminisztrációs menüpontban tudod beállítani.
Hírlevél-feliratkozás
| Mező | Leírás |
|---|---|
| Hírlevél-feliratkozás űrlap | Válaszd ki, melyik belső form jelenjen meg a „Hírlevél" szekcióban |
| Közelgő események megjelenítése | Az Események szekció látható legyen a főoldalon |
| Visszajelzések megjelenítése | Az ügyfélvélemények szekció látható legyen |
Az űrlapok az Űrlapok adminisztrációs menüpontban hozhatók létre.
Kapcsolati adatok
A weboldal láblécében megjelenő elérhetőségi információk.
| Mező | Leírás |
|---|---|
| Telefonszám | pl. +36 30 123 4567 |
| E-mail cím | Kapcsolati e-mail (pl. [email protected]) |
| Cím / helyszín | Postai cím vagy helyszín leírása |
| Facebook URL | Szervezet Facebook-oldalának teljes linkje |
| Instagram URL | Instagram profil linkje |
| TikTok URL | TikTok profil linkje |
| Lábléc szöveg | Copyright vagy egyéb lábléc felirat (pl. © 2026 Bonyhard Eszter) |
Facebook Reels
Legfeljebb 3 Facebook Reel / videó beágyazható a weboldalba beágyazott lejátszóként.
- Illeszd be a Facebook Reel teljes URL-jét (pl.
https://www.facebook.com/reel/123456) - A videók a Facebook szerverén maradnak, a weboldal beágyazott lejátszóként mutatja őket
- Ha mindhárom mező üres, a szekció nem jelenik meg
Ingyenes letölthető anyag (Lead magnet)
Egy ingyenesen letölthető tartalom (PDF, útmutató, ellenőrzőlista), amelyet az érdeklődő az e-mail-je megadásáért cserébe kap. Kiválóan növeli a hírlevél-feliratkozók számát.
| Mező | Leírás |
|---|---|
| Aktív kapcsoló | Be/ki – csak ha be van kapcsolva, jelenik meg a weboldalon |
| Cím | Az ajánlat neve (pl. „5 lépés a kiegyensúlyozottabb élethez") |
| Alcím / hook | Rövid meggyőző szöveg (pl. „Töltsd le INGYEN!") |
| Leírás | Mit tartalmaz az anyag, miért éri meg letölteni? |
| Borítókép | PDF előnézet kép vagy könyv borító (JPG, PNG, WEBP) |
| Letölthető fájl | A tényleges letölthető fájl (PDF, DOC, ZIP · max 20 MB) |
| Feliratkozási űrlap | Melyik belső form slug-hoz kapcsolódik |
| Gomb szövege | CTA szövege (pl. „Igen, kérem ingyen!", „Letöltöm most") |
Idézet szekció
Egy inspiráló idézet vagy ügyfélvélemény kiemelése díszes, sötét háttérrel.
| Mező | Leírás |
|---|---|
| Idézet szövege | A megjeleníteni kívánt idézet (max. 3–4 sor ajánlott) |
| Szerző / aláírás | Opcionális – pl. az idézet szerzőjének neve és titulusa |
Az admin felületen élő előnézet mutatja, hogyan fog kinézni a szekció. Ha az idézet szövegét üresen hagyod, a szekció automatikusan elrejtődik.
Gyakori kérdések (GYIK)
Dinamikusan bővíthető kérdés-válasz lista, amely a weboldalon accordion (kinyíló) formában jelenik meg.
- Kattints a „Kérdés hozzáadása" gombra új Q&A sor hozzáadásához
- Minden sornál megadhatsz egy kérdést és egy hozzá tartozó választ
- A sorokat az × gombbal törölheted
- A mentésnél a sorrend megmarad
Tipp: A GYIK szekció csökkenti az ügyfélkérdések számát és növeli a bizalmat. Ideális kérdések: árak, időtartam, online/személyes lehetőség, garancia.
Árak / Díjszabás
A weboldalon megjelenő árlistát itt állíthatod össze.
| Mező | Leírás |
|---|---|
| Megjelenítés kapcsoló | Be/ki – ha ki van kapcsolva, az egész Árak szekció rejtett |
| Szekció cím | A szekció fejléce (pl. „Árak", „Díjszabás", „Csomagjaim") |
Minden árcsomagnál megadható:
- Csomag neve – pl. „Egyéni ülés", „Havi coaching csomag"
- Ár – szabad szöveges mező (pl. „15 000 Ft / alkalom")
- Rövid leírás – egy sor összefoglaló
- Tartalmazza – soronként egy pont, amely checkbox-listaként jelenik meg
- Kiemelt csomag – bejelölve más háttérszínnel emelkedik ki a többi csomag közül
Az „Ár hozzáadása" gombbal korlátlan számú csomagot adhatsz hozzá.
Jogi dokumentumok
A weboldal adatvédelmi aloldalán megjelenő jogi szövegeket itt szerkesztheted.
| Dokumentum | Elérési URL |
|---|---|
| ÁSZF | /jogi/aszf |
| Adatkezelési szabályzat | /jogi/adatkezeles |
A szerkesztő támogatja a formázást: félkövér, lista, cím (H2, H3), hivatkozás. A szövegek mentés után azonnal élőben megjelennek a nyilvános aloldalakon.
Ügyfélvisszajelzések
A főoldal „Visszajelzések" szekciójában megjelenő vélemények kezelése.
Új visszajelzés hozzáadása
Az oldal jobb oldalán lévő formmal adhatod meg:
- Ügyfél neve (kötelező)
- Titulus / foglalkozás – pl. „Vállalkozó, Budapest"
- Visszajelzés szövege (kötelező)
- Értékelés – 1–5 csillag
- Ügyfél fotója – JPG, PNG · max 1 MB · Négyzetes kép ajánlott (ha nincs kép, monogram jelenik meg)
Visszajelzés szerkesztése / törlése
- A Szerkesztés gombra kattintva az adott kártya alatt nyílik meg a szerkesztő
- Az Aktív (látható) jelölővel ideiglenesen elrejthetsz egy véleményt anélkül, hogy törlöd
Tipp: A visszajelzések megjelenítése a Hírlevél szekció „Visszajelzések megjelenítése" kapcsolójával kapcsolható be/ki globálisan.
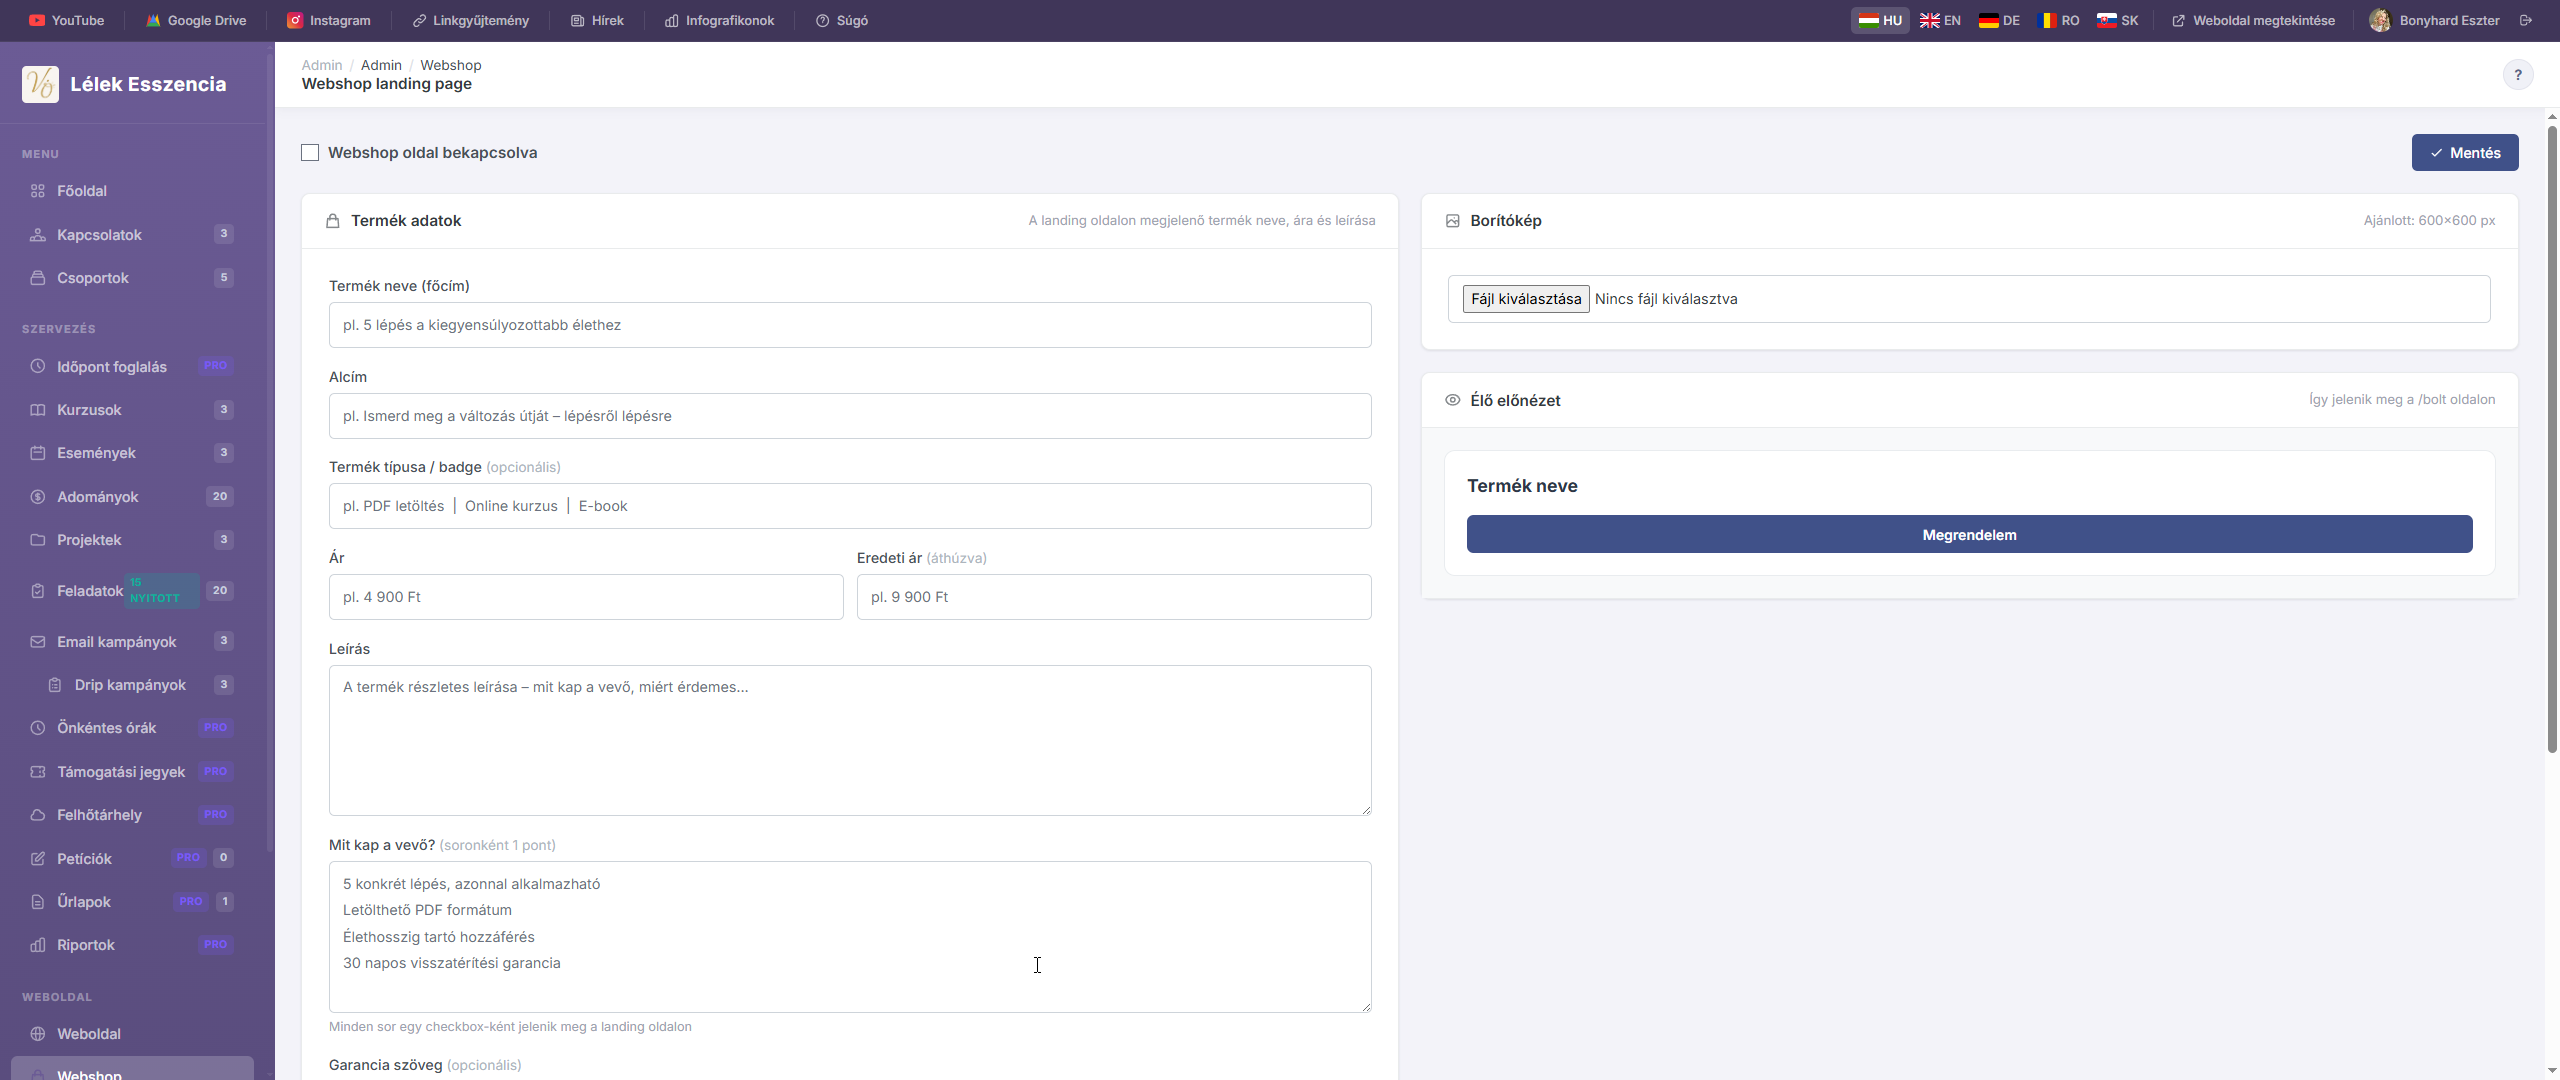
A Webshop modul egy egyoldalas termék landing page-et biztosít, amelyen egyetlen terméket vagy digitális anyagot értékesíthetsz — Stripe, SimplePay, Barion fizetési linkkel vagy NationForge űrlappal. Az oldal a /bolt URL-en érhető el.
Bekapcsolás / kikapcsolás
Az oldal tetején lévő „Webshop oldal bekapcsolva" kapcsolóval engedélyezheted vagy letilthatod a nyilvános bolt oldalt. Ha ki van kapcsolva, a /bolt URL nem érhető el.
Bekapcsolt állapotban megjelenik a „Bolt megtekintése" gomb, amellyel azonnal megnézheted, hogyan látják a látogatók.
Termék adatok
A bolt landing oldalán megjelenő termék alapinformációi.
| Mező | Leírás |
|---|---|
| Termék neve (főcím) | A termék neve, H1-es fejlécként jelenik meg (pl. „5 lépés a kiegyensúlyozottabb élethez") |
| Alcím | Rövid bevezető szöveg a cím alatt (pl. „Ismerd meg a változás útját – lépésről lépésre") |
| Termék típusa / badge | Kis kiemelő felirat a cím felett (pl. „PDF letöltés", „Online kurzus", „E-book") — opcionális |
| Ár | A termék ára szabad szöveges formátumban (pl. „4 900 Ft") |
| Eredeti ár (áthúzva) | Ha megadod, a bolt oldalon áthúzva jelenik meg az eredeti ár — kedvezményes hatást kelt |
| Leírás | A termék részletes leírása (mit kap a vevő, miért érdemes megvenni) |
Mit kap a vevő? — funkciók listája
Soronként írj be egy-egy pontot arról, mit tartalmaz a termék. Minden sor egy pipás checkbox-ként jelenik meg a landing oldalon.
Példa:
5 konkrét lépés, azonnal alkalmazható
Letölthető PDF formátum
Élethosszig tartó hozzáférés
30 napos visszatérítési garancia
Garancia szöveg
Opcionális mező — ha megadod, a vásárlás gomb alatt jelenik meg zárolt lakat ikonnal (pl. „30 napos visszatérítési garancia – kockázatmentes").
Vásárlás gomb
A landing oldalon megjelenő CTA (Call-to-Action) gomb beállításai.
| Mező | Leírás |
|---|---|
| Gomb szövege | A gomb felirata (pl. „Megrendelem", „Kérem most!", „Letöltöm") |
| Vásárlási link (URL) | Ahova a gomb kattintás után irányít |
Milyen URL-t adj meg?
| Fizetési rendszer | URL formátum példa |
|---|---|
| Stripe | https://buy.stripe.com/test_abc123... |
| SimplePay | A SimplePay által generált fizetési link |
| Barion | A Barion payment link URL-je |
| NationForge űrlap | /urlapok/rendeles-neve (belső form URL) |
Tipp: Ha NationForge belső űrlapot használsz, a vásárló az adatait megadja, te pedig e-mailben értesítést kapsz, majd manuálisan küldöd a terméket. Ez a legegyszerűbb megoldás fizetési integráció nélkül.
Borítókép
A landing oldalon megjelenő termékfotó vagy mockup kép.
- Ajánlott méret: 600×600 px (négyzetes)
- Formátum: JPG, PNG, WEBP
- A kép a termék leírása mellé kerül — PDF-eknél érdemes egy szép mockup képet feltölteni
- A „Kép eltávolítása" jelölőnégyzettel törölheted a meglévő képet
Élő előnézet
A jobb oldali panel valós időben mutatja, hogyan fog kinézni a bolt oldal a megadott adatokkal:
- Badge, főcím, alcím
- Ár és áthúzott eredeti ár
- Az első 3 feature pont (pipás lista)
- Vásárlás gomb
- Garancia szöveg
Az előnézet nem frissül automatikusan gépelés közben — a Mentés után látod az élő verziót a nyilvános
/boltoldalon.
Mentés
Az oldal alján és tetején egyaránt megtalálható a „Beállítások mentése" gomb. A módosítások csak mentés után jelennek meg a nyilvános bolt oldalon.
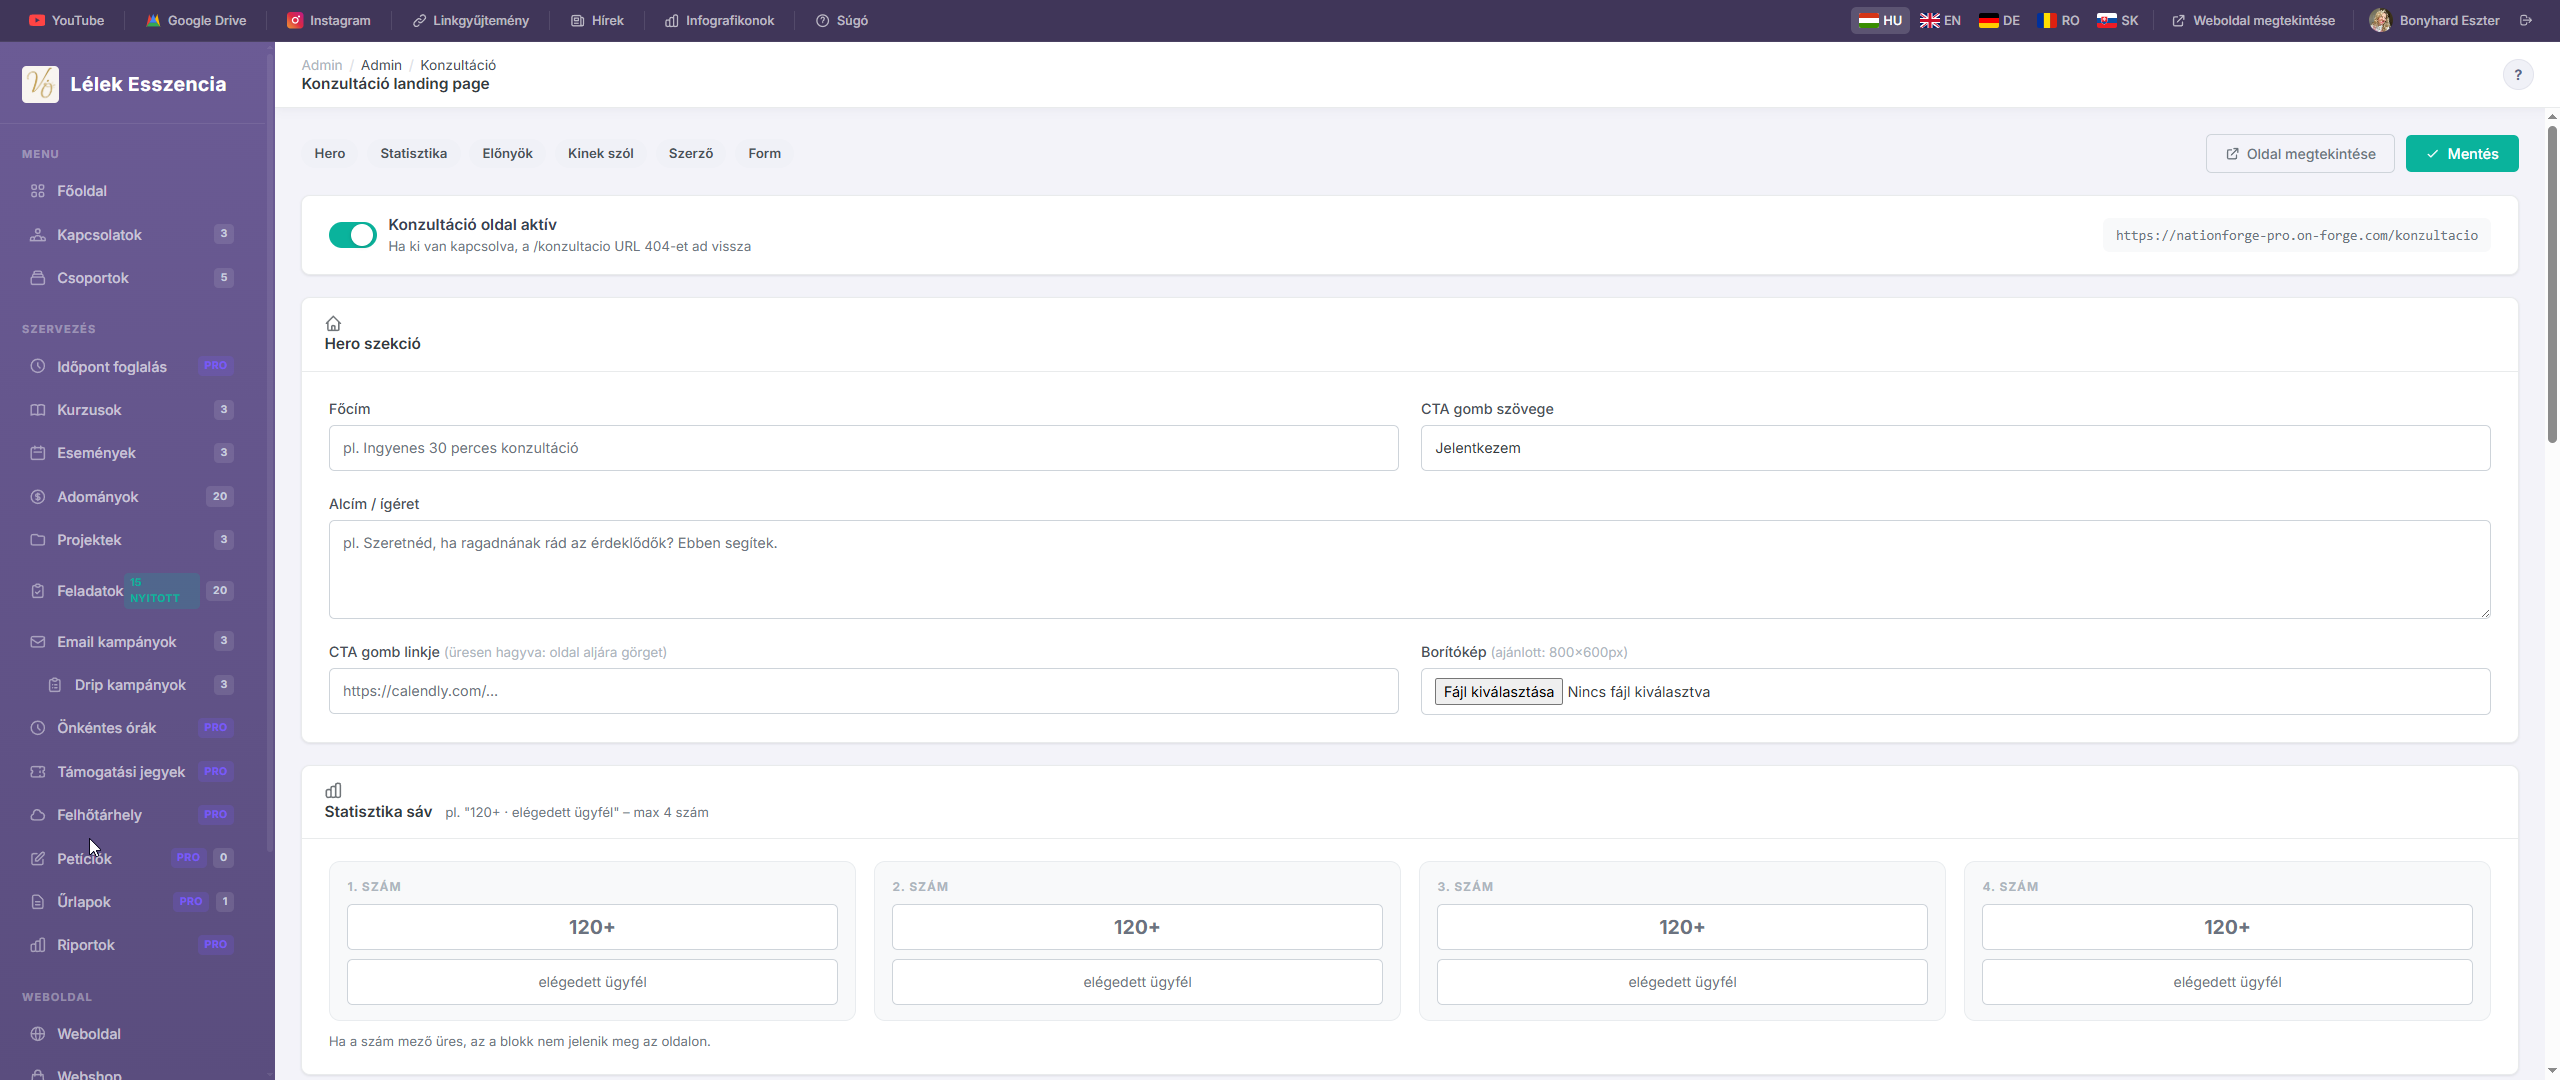
A Konzultáció modul egy dedikált landing page-et biztosít az ingyenes vagy fizetős konzultációs ajánlatodhoz. Az oldal a /konzultacio URL-en érhető el, és célja, hogy az érdeklődőket regisztrációra ösztönözze.
Bekapcsolás / kikapcsolás
Az oldal tetején lévő „Konzultáció oldal aktív" kapcsolóval engedélyezheted vagy letilthatod a nyilvános oldalt. Ha ki van kapcsolva, a /konzultacio URL 404-es hibát ad vissza.
Bekapcsolt állapotban megjelenik az „Oldal megtekintése" gomb, amellyel azonnal megnézheted a nyilvános oldalt.
Hero szekció
A konzultáció landing oldal legelső, legnagyobb látható blokkja.
| Mező | Leírás |
|---|---|
| Főcím | Az ajánlat neve vagy szlogenje (pl. „Ingyenes 30 perces konzultáció") |
| Alcím / ígéret | Rövid meggyőző szöveg a főcím alatt – mit kap az érdeklődő? |
| CTA gomb szövege | A regisztrációs gomb felirata (pl. „Jelentkezem", „Lefoglalom a helyem") |
| CTA gomb linkje | Ha kitöltöd, a gomb erre az URL-re irányít (pl. Calendly). Ha üresen hagyod, a gomb az oldal aljára (a formhoz) görget |
| Borítókép | A hero szekció mellé kerülő kép · Ajánlott méret: 800×600 px · JPG, PNG, WEBP |
Tipp: Ha NationForge belső regisztrációs formodat használod, a CTA gomb linkjét hagyd üresen — az oldal automatikusan a form szekcióra görget.
Statisztika sáv
Legfeljebb 4 szám jeleníthető meg egy sávban a hero alatt (pl. „120+ · elégedett ügyfél").
Minden blokkhoz két mező tartozik:
- Szám – pl. „120+", „5 év", „98%"
- Felirat – pl. „elégedett ügyfél", „tapasztalat", „elégedettség"
Ha a szám mező üres, az az egész blokk nem jelenik meg az oldalon.
Előnyök – Benefit blokkok
Legfeljebb 3 előnykártya jeleníthető meg, amelyek azt mutatják be, mit kap a résztvevő a konzultációból.
Minden blokkhoz megadható:
| Mező | Leírás |
|---|---|
| Cím | Az előny rövid neve (pl. „Sorban fognak állni érted") |
| Rövid leírás | 1-2 mondatos összefoglaló |
| Pontok | Soronként 1 pont – pipás listaként jelenik meg az oldalon |
Példa pontokhoz:
Több ügyfél
Kiszámítható bevétel
Időszabadság
Hatékony rendszer
Kinek szól / Nem neked szól
Ez a szekció két oszlopban mutatja meg, kinek való és kinek nem való a konzultáció.
| Mező | Megjelenés |
|---|---|
| Szekció főcíme | A szekció fejléce (pl. „Kinek szól?") |
| Neked szól, ha... | Soronként 1 pont – zöld pipával jelenik meg |
| Nem neked szól, ha... | Soronként 1 pont – piros ×-szel jelenik meg |
Példa:
Neked szól, ha...        | Nem neked szól, ha...
─────────────────────────|──────────────────────
Coachként dolgozol       | Alkalmazottként dolgozol
Naptárad feltöltöd       | Gyorsmegoldást keresel
Nyitott vagy a változásra| Nem csinálsz semmit
Szerző / Coach bemutatkozás
A konzultáció ajánló személy bemutatkozója, amely hitelességet és bizalmat épít.
| Mező | Leírás |
|---|---|
| Neve | A coach / szakértő neve (pl. „Bonyhard Eszter") |
| Bemutatkozás | Néhány mondat: ki vagy, mit csinálsz, miért érdemes rád hallgatni |
| Fotó | Kerek formában jelenik meg · Négyzetes kép ajánlott · max 2 MB |
A „Fotó eltávolítása" jelölőnégyzettel törölheted a meglévő fotót.
Regisztrációs form & Visszajelzések
Regisztrációs form
Válaszd ki, melyik NationForge belső form jelenjen meg az oldal alján:
- Ha választasz formotat, az az oldal alján jelenik meg, és a felső CTA gomb oda görget le
- Ha nem választasz formotat (vagy a legördülőt „Nincs form"-on hagyod), a CTA gomb a megadott külső linkre irányít (Calendly, SimplePay, stb.)
Az elérhető formokat az Űrlapok adminisztrációs menüpontban tudod létrehozni.
Visszajelzések megjelenítése
Ha bekapcsolod, a rendszerben lévő aktív ügyfélvélemények megjelennek a konzultáció oldalon. A visszajelzések kezelése az Admin → Visszajelzések menüpontban történik.
Mentés
Az oldal tetején és alján egyaránt megtalálható a „Beállítások mentése" gomb. A módosítások csak mentés után jelennek meg a nyilvános /konzultacio oldalon.
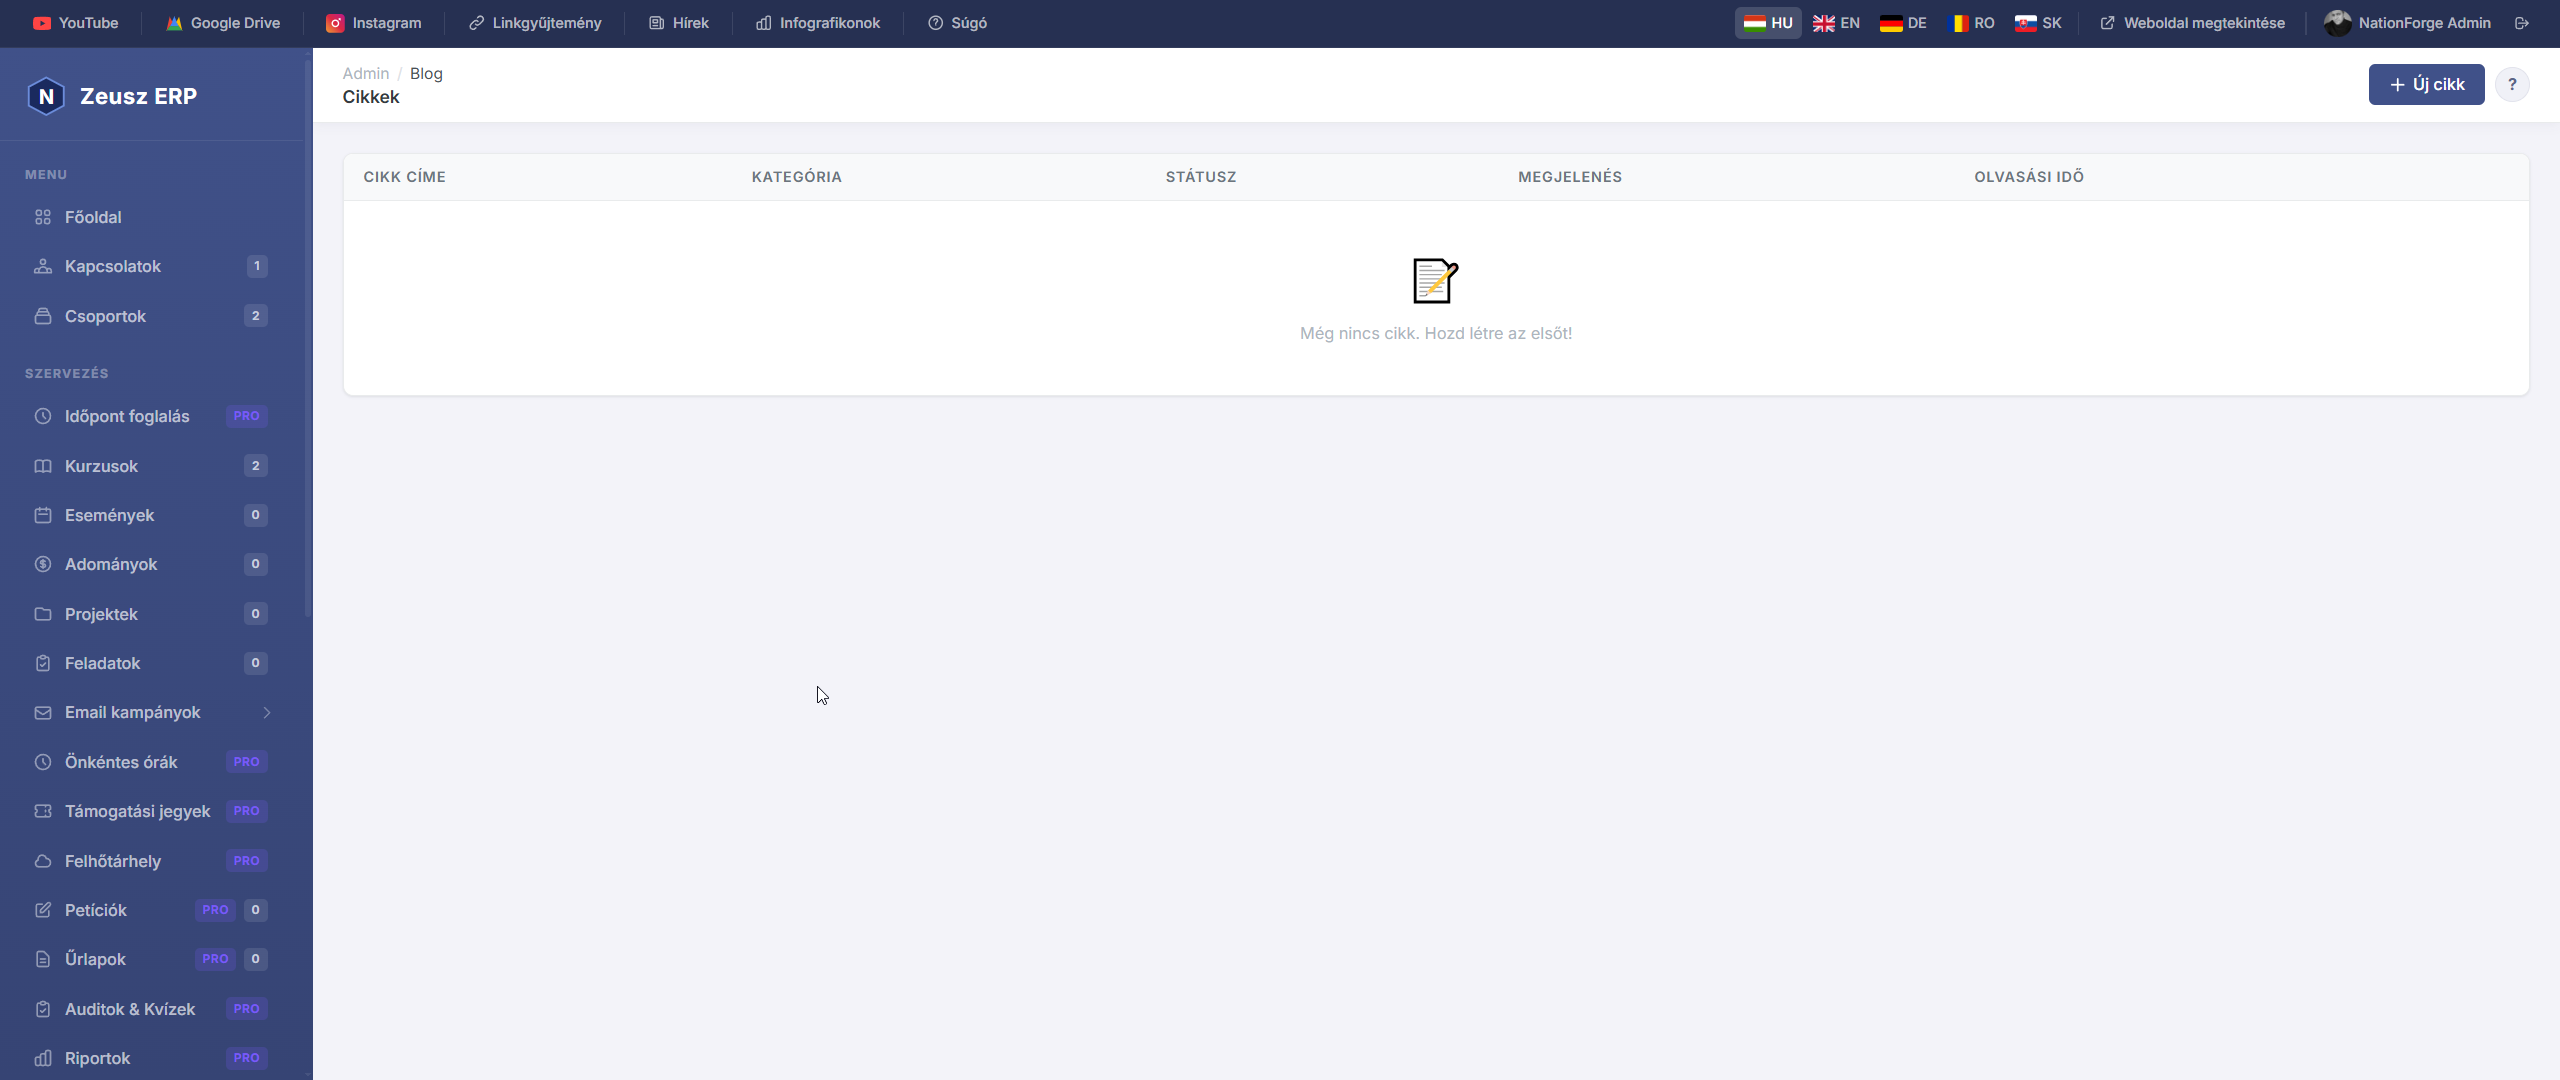
A Blog & Tudásközpont modul lehetővé teszi, hogy szakmai cikkeket, útmutatókat és tartalmakat publikálj a nyilvános weboldalon. A cikkek SEO-barát URL-en jelennek meg, és kategóriákba rendezhetők.
Cikkek listája
Az admin oldal táblázatban mutatja az összes cikket:
| Oszlop | Leírás |
|---|---|
| Cikk címe | A cikk neve és szerzője — rákattintva megnyílik a szerkesztő |
| Kategória | A cikkhez rendelt kategória |
| Státusz | Vázlat, Publikált vagy Archivált |
| Megjelenés | A cikk közzétételének dátuma és időpontja |
| Olvasási idő | Becsült olvasási idő percben |
Az „+ Új cikk" gombbal hozhatod létre az első cikket.
Cikk létrehozása / szerkesztése
Tartalom
| Mező | Leírás |
|---|---|
| Cikk címe (kötelező) | A cikk főcíme, ami az oldalon H1-ként jelenik meg |
| Rövid bevezető (Excerpt) | 2–4 mondatos összefoglaló, ami a cikklistában látszik a cím alatt |
| Cikk tartalma (kötelező) | A teljes cikk szövege — TinyMCE vizuális szerkesztővel írható (félkövér, lista, kép, link, táblázat stb.) |
Közzététel beállítások
| Beállítás | Leírás |
|---|---|
| Státusz | Vázlat — nem nyilvános; Publikált — mindenki láthatja; Archivált — rejtett, de megmarad |
| Kategória | A cikk besorolása (a kategóriákat az Admin → Blog → Kategóriák menüben kezelheted) |
| Publikálás dátuma | Ha üresen hagyod, közzétételkor automatikusan az aktuális dátum kerül be. Jövőbeli dátum megadásával időzítheted a megjelenést |
| Olvasási idő (perc) | Kézzel megadható becsült érték — az oldalon megjelenik a cikk tetején |
Keresőoptimalizálás (SEO)
| Mező | Leírás |
|---|---|
| SEO Title | A böngészőfülön és a Google találatokban megjelenő cím (max. 60 karakter ajánlott) |
| SEO Description | A Google keresési találatok alatt megjelenő szöveg (max. 160 karakter ajánlott) |
Tipp: Ha a SEO mezőket üresen hagyod, a rendszer automatikusan a cikk címét és az excerpt-et használja.
Kategóriák
A Blog & Tudásközpont menüpont alatt található Kategóriák almenüben hozhatod létre és szerkesztheted a cikk kategóriákat.
- Minden cikkhez opcionálisan rendelhető egy kategória
- A kategóriák segítik a látogatókat a tartalmak között való navigációban
- Az oldalon kategória szerinti szűrés érhető el
Nyilvános megjelenés
A publikált cikkek a weboldal blog szekciójában jelennek meg. Minden cikknek automatikusan generálódik egy SEO-barát URL a cím alapján (pl. /blog/hogyan-novelje-az-eladas).
Tipp: A Vázlat státuszú cikkeket csak admin felületen láthatod — a látogatók nem férnek hozzá. Ez kiváló a cikkek előkészítésére és lektorálásra.
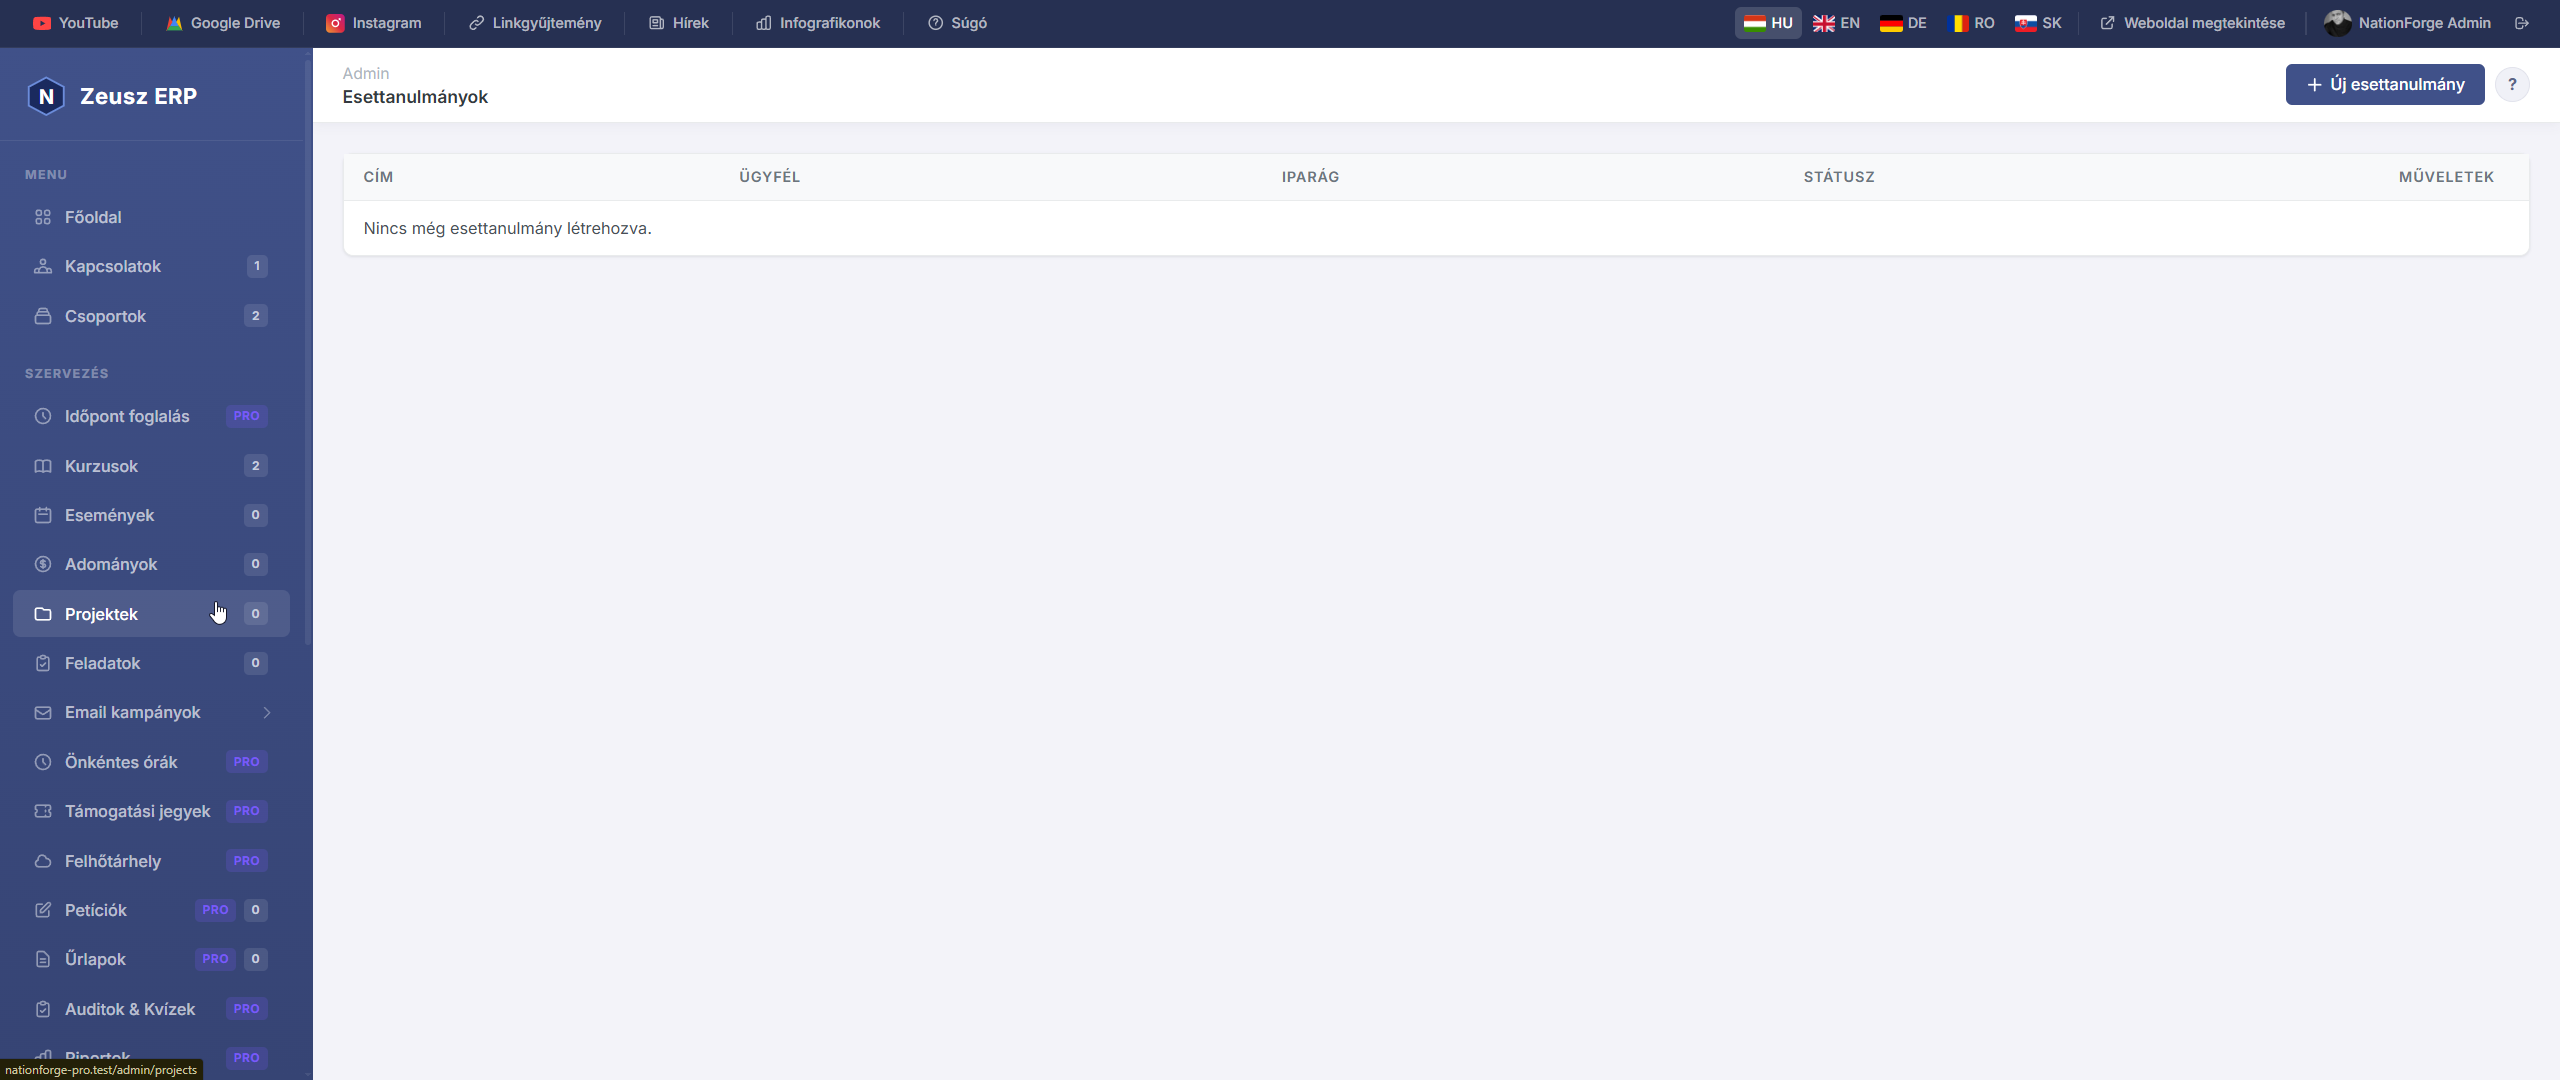
Az Esettanulmányok modul lehetővé teszi, hogy korábbi sikeres projektjeidet, ügyfeleidet és eredményeidet strukturáltan bemutasd a nyilvános weboldalon. Minden esettanulmány egy dedikált aloldalon jelenik meg, amely a probléma–megoldás–eredmény narratívát követi.
Esettanulmányok listája
Az admin oldal táblázatban mutatja az összes esettanulmányt:
| Oszlop | Leírás |
|---|---|
| Cím | A projekt megnevezése |
| Ügyfél | Az érintett ügyfél neve |
| Iparág | Az ügyfél iparága vagy szegmense |
| Státusz | Piszkozat, Publikált vagy Archivált |
Az „+ Új esettanulmány" gombbal hozhatod létre az elsőt.
Esettanulmány létrehozása / szerkesztése
Alapadatok
| Mező | Leírás |
|---|---|
| Cím (kötelező) | A projekt neve (pl. „Online tagsági rendszer kiépítése") |
| Ügyfél neve | A megrendelő / ügyfél neve (opcionális, ha NDA miatt nem adható meg, hagyd üresen) |
| Iparág / Szegmens | pl. „civil szervezet", „önkormányzat", „kkv", „egészségügy" |
Kiemelt eredmények (Számadatok)
Ezek a számok vizuálisan kiemelve jelennek meg az esettanulmányban — legfeljebb 4–5 mutatót érdemes megadni.
Minden sorhoz két mező tartozik:
- Label — az eredmény neve (pl. „Tagszám növekedés", „Megtakarított munkaóra")
- Value — a konkrét szám vagy adat (pl. „+300%", „40 óra/hó")
Az „+ Új adat hozzáadása" gombbal adhatsz hozzá újabb sort, az X gombbal törölhetsz meglévőt.
Tartalom
A tartalmi részt három szekció alkotja, mindegyik TinyMCE vizuális szerkesztővel írható:
| Szekció | Leírás |
|---|---|
| A Probléma | Milyen kihívással szembesült az ügyfél, miért keresett megoldást? |
| A Megoldás | Mit valósítottatok meg együtt — milyen funkciók, folyamatok kerültek bevezetésre? |
| Az Eredmény | Mik a mérhető és tapasztalható eredmények? |
Tipp: A három szekciós felépítés a legmeggyőzőbb ügyfélszerző tartalom — a látogató azonosítani tudja saját helyzetét a „Probléma" szekcióban, és az „Eredmény" meggyőzi a döntésről.
Borítókép
Az esettanulmányhoz feltölthető egy borítókép, amely a listában és az oldal tetején jelenik meg. Ajánlott: 1200×630 px, JPG vagy PNG.
Publikálás
| Beállítás | Leírás |
|---|---|
| Státusz | Piszkozat — nem nyilvános; Publikált — mindenki láthatja; Archivált — rejtett |
SEO beállítások
| Mező | Leírás |
|---|---|
| Meta Cím | A Google találatokban megjelenő cím (max. 60 karakter) |
| Meta Leírás | A keresési találatok alatti szöveg (max. 160 karakter) |
Nyilvános megjelenés
A publikált esettanulmányok a weboldal dedikált aloldalán jelennek meg. Minden esettanulmánynak automatikusan generálódik egy URL a cím alapján (pl. /esettanulmanyok/online-tagsagi-rendszer).
Tipp: A Piszkozat státuszú esettanulmányokat csak admin felületen láthatod. Publikálás előtt érdemes átolvasni és jóváhagyatni az ügyféllel.

Az Ajánlások modul lehetővé teszi, hogy az ügyfelek, résztvevők és tagok pozitív visszajelzéseit rögzítsd és megjelenítsd a nyilvános weboldalon.
Ajánlások listája
Az Ajánlások oldalon kártyás formában látható az összes visszajelzés: a szerző neve, beosztása, a szöveg, a csillagos értékelés és az aktív/inaktív állapot.
Új ajánlás hozzáadása
Kattints az „Új ajánlás" gombra. Megadható adatok:
| Mező | Leírás |
|---|---|
| Szerző neve | A visszajelzést adó személy neve (kötelező) |
| Beosztás / cím | pl. „Coach", „Ügyvezető", „Résztvevő" (opcionális) |
| Szöveg | A visszajelzés tartalma (max. 1000 karakter, kötelező) |
| Értékelés | 1–5 csillag (kötelező) |
| Fotó | A szerző profilképe (JPG/PNG, max. 1 MB) |
| Sorrend | Megjelenítési sorrend száma (kisebb = előrébb) |
Szerkesztés és inaktiválás
Minden ajánlásnál szerkeszthető az összes adat. Az Aktív jelölő be/kikapcsolásával az ajánlás megjelenik vagy elrejtődik a nyilvános weboldalon — a kód módosítása nélkül.
Megjelenítés a weboldalon
Az ajánlások a nyilvános weboldal Vélemények szekciójában jelennek meg, ha a Weboldal kezelés → „Vélemények megjelenítése" opció be van kapcsolva. Csak az aktív ajánlások látszanak.
White-label & Custom Domain
White-label & Custom Domain
The White-label feature allows each organization to access the application with its own branding – custom name, logo, colors and domain. This is especially useful when you run NationForge as a SaaS for multiple clients.
What can be customized?
| Setting | Description |
|---|---|
| Brand Name | The application name shown in the browser tab and sidebar |
| Logo | Organization logo displayed at the top of the sidebar |
| Favicon | The icon shown in the browser tab |
| Primary Color | The main color of the sidebar and UI |
| Subdomain | e.g. myclient.nationforge.example.com |
| Custom Domain | e.g. app.myclient.com |
Where to configure
Go to the Organizations page, click the pencil icon, then scroll down to the White-label / Custom Branding section.
Uploading a logo and favicon
- Logo: max. 2 MB, JPG / PNG / SVG / WebP. Shown at the top of the sidebar next to the app name.
- Favicon: max. 512 KB, ICO / PNG / SVG. Shown as the icon in the browser tab.
Setting a brand name
Enter the name in the Brand Name field — this is what organization members see in the sidebar and browser tab, overriding the default application name.
If left empty, the organization's name is used.
Setting up a subdomain
- On the server, set the base domain in
.env:APP_BASE_DOMAIN=nationforge.example.com - In the organization editor, fill in the Subdomain field (letters, numbers, hyphens only — e.g.
myclient). - In your DNS manager, create an A or CNAME record:
myclient.nationforge.example.com→ your server's IP or hostname
After this, the URL myclient.nationforge.example.com will automatically open the branded interface for that organization.
Setting up a custom domain
- In the organization editor, fill in the Custom Domain field (e.g.
app.myclient.com). - In the client's DNS manager, create a CNAME record:
app.myclient.com→ your server's hostname
- Make sure your web server (Apache / Nginx) accepts this domain name (virtual host configuration).
Note: For HTTPS, an SSL certificate is required for the custom domain (e.g. via Let's Encrypt).
Domain lock
When someone opens the application via a custom domain or subdomain:
- The system automatically sets the context to that organization
- The organization switcher is hidden — the user only sees that organization's data
- All branding (color, logo, name, favicon) matches the organization
Typical SaaS workflow
- You run NationForge on a single server
- Create an organization for each client in the admin panel
- Configure: brand name, logo, primary color, custom domain
- Set the CNAME record in the client's DNS
- The client accesses the app at e.g.
app.theirparty.com— with their own branding, with no mention of NationForge anywhere
Important notes
- Subdomain and Custom Domain must be globally unique (two organizations cannot share the same value)
- Custom Domain format:
subdomain.tldorsub.domain.tld(do not include thehttps://prefix) - Subdomain may only contain ASCII letters, numbers and hyphens, up to 63 characters
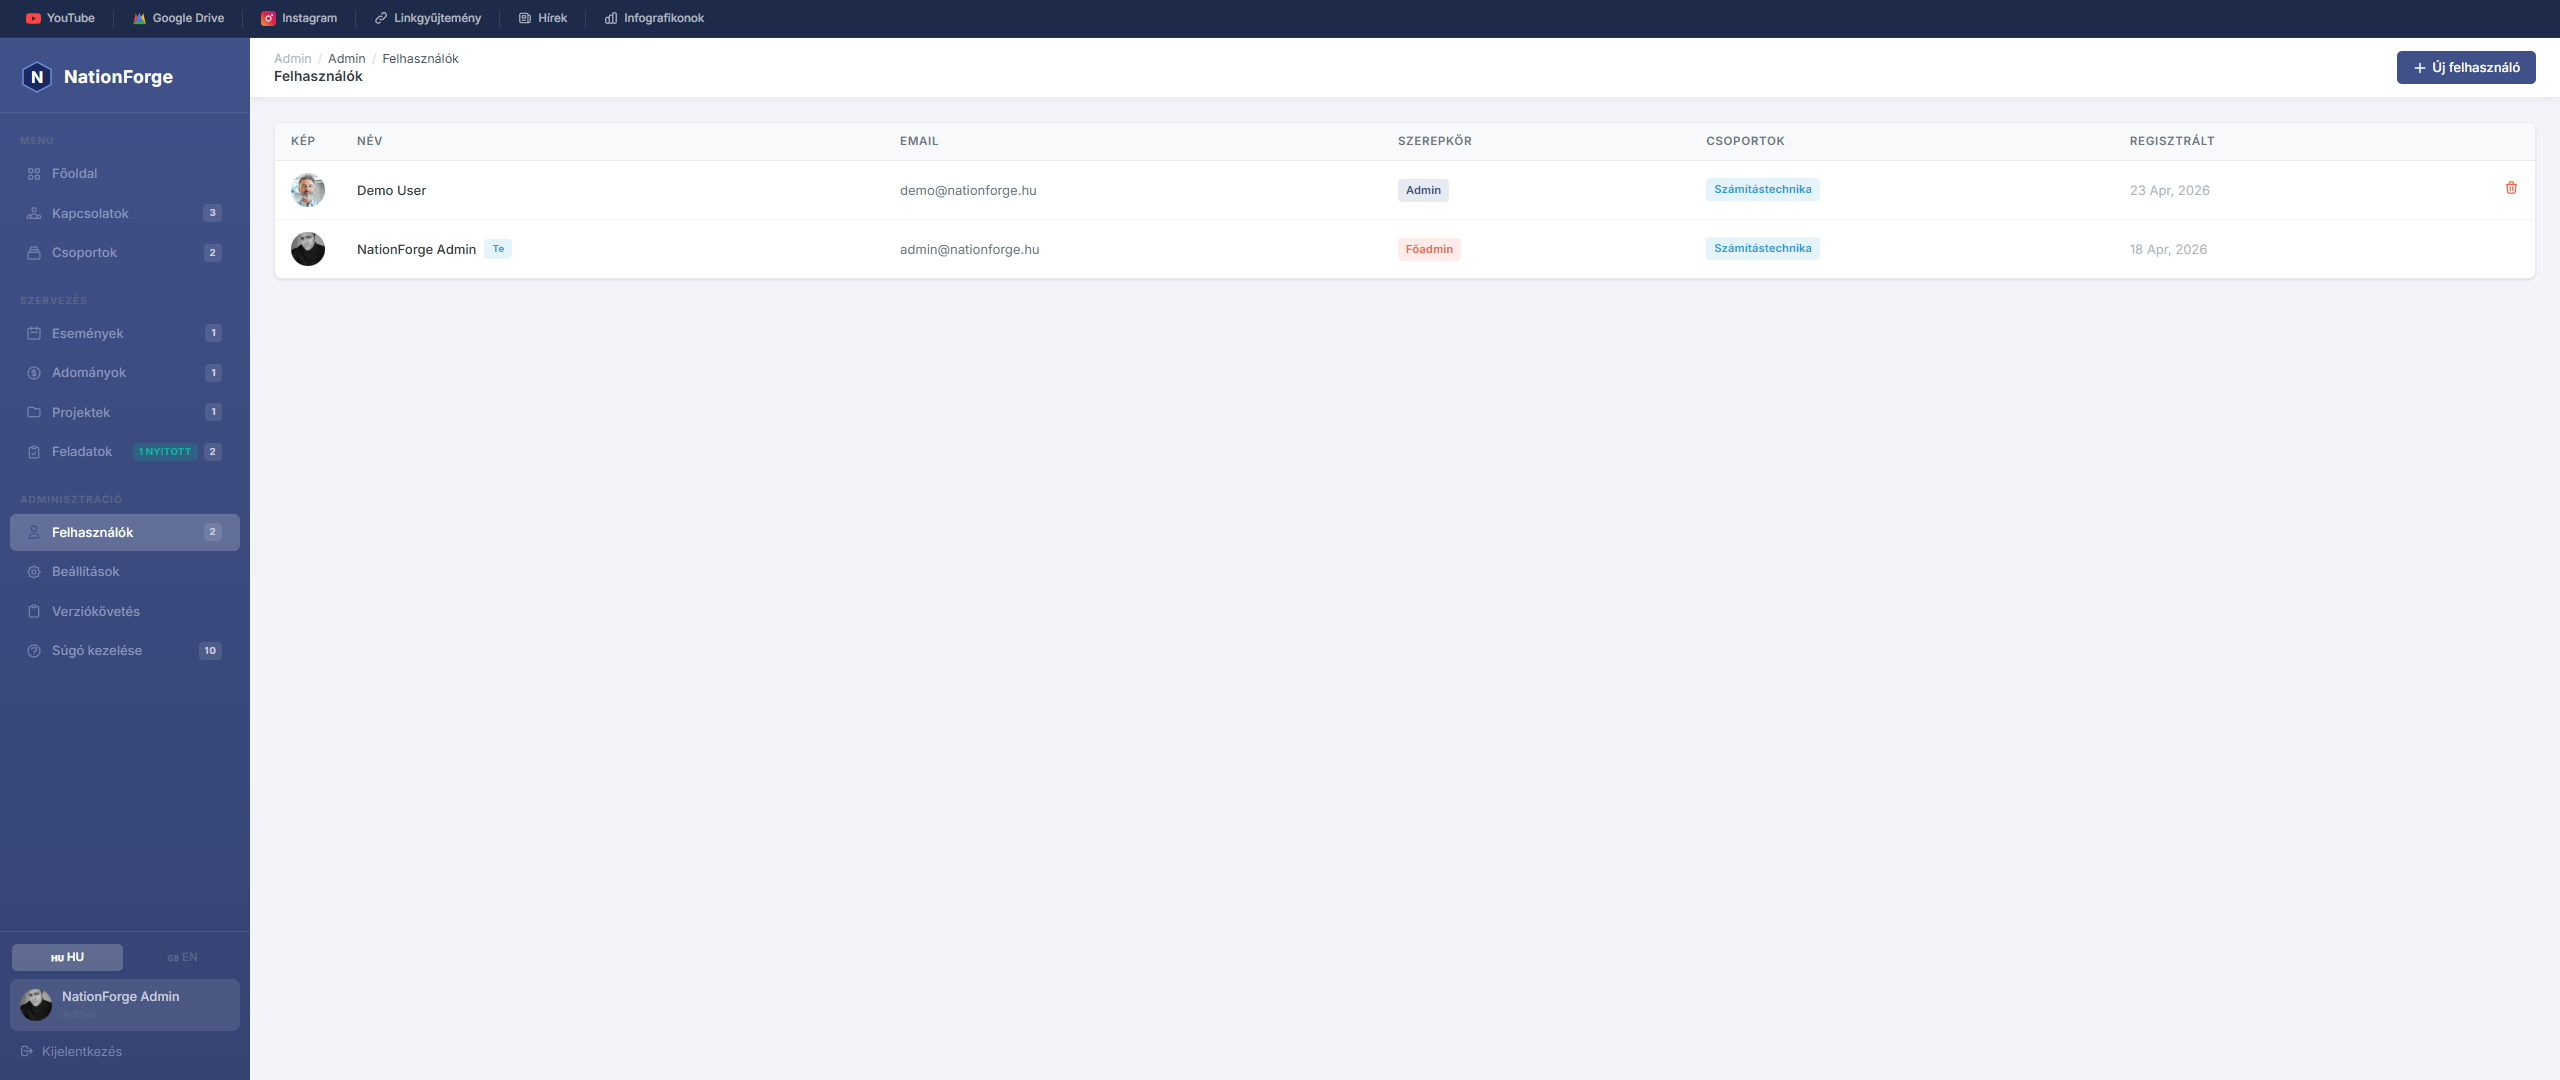
Users
The Users page manages access accounts for the administration system.
New user — Click the "New user" button. Required fields: full name, email address, password, role. A profile photo can also be uploaded.
Roles:
- super-admin — full access to everything
- admin — administrative rights
- editor — content editing rights
- member — basic access level
Edit — Click the user row. Leaving the password field empty keeps the existing password.
Own account — A logged-in user cannot delete their own account.
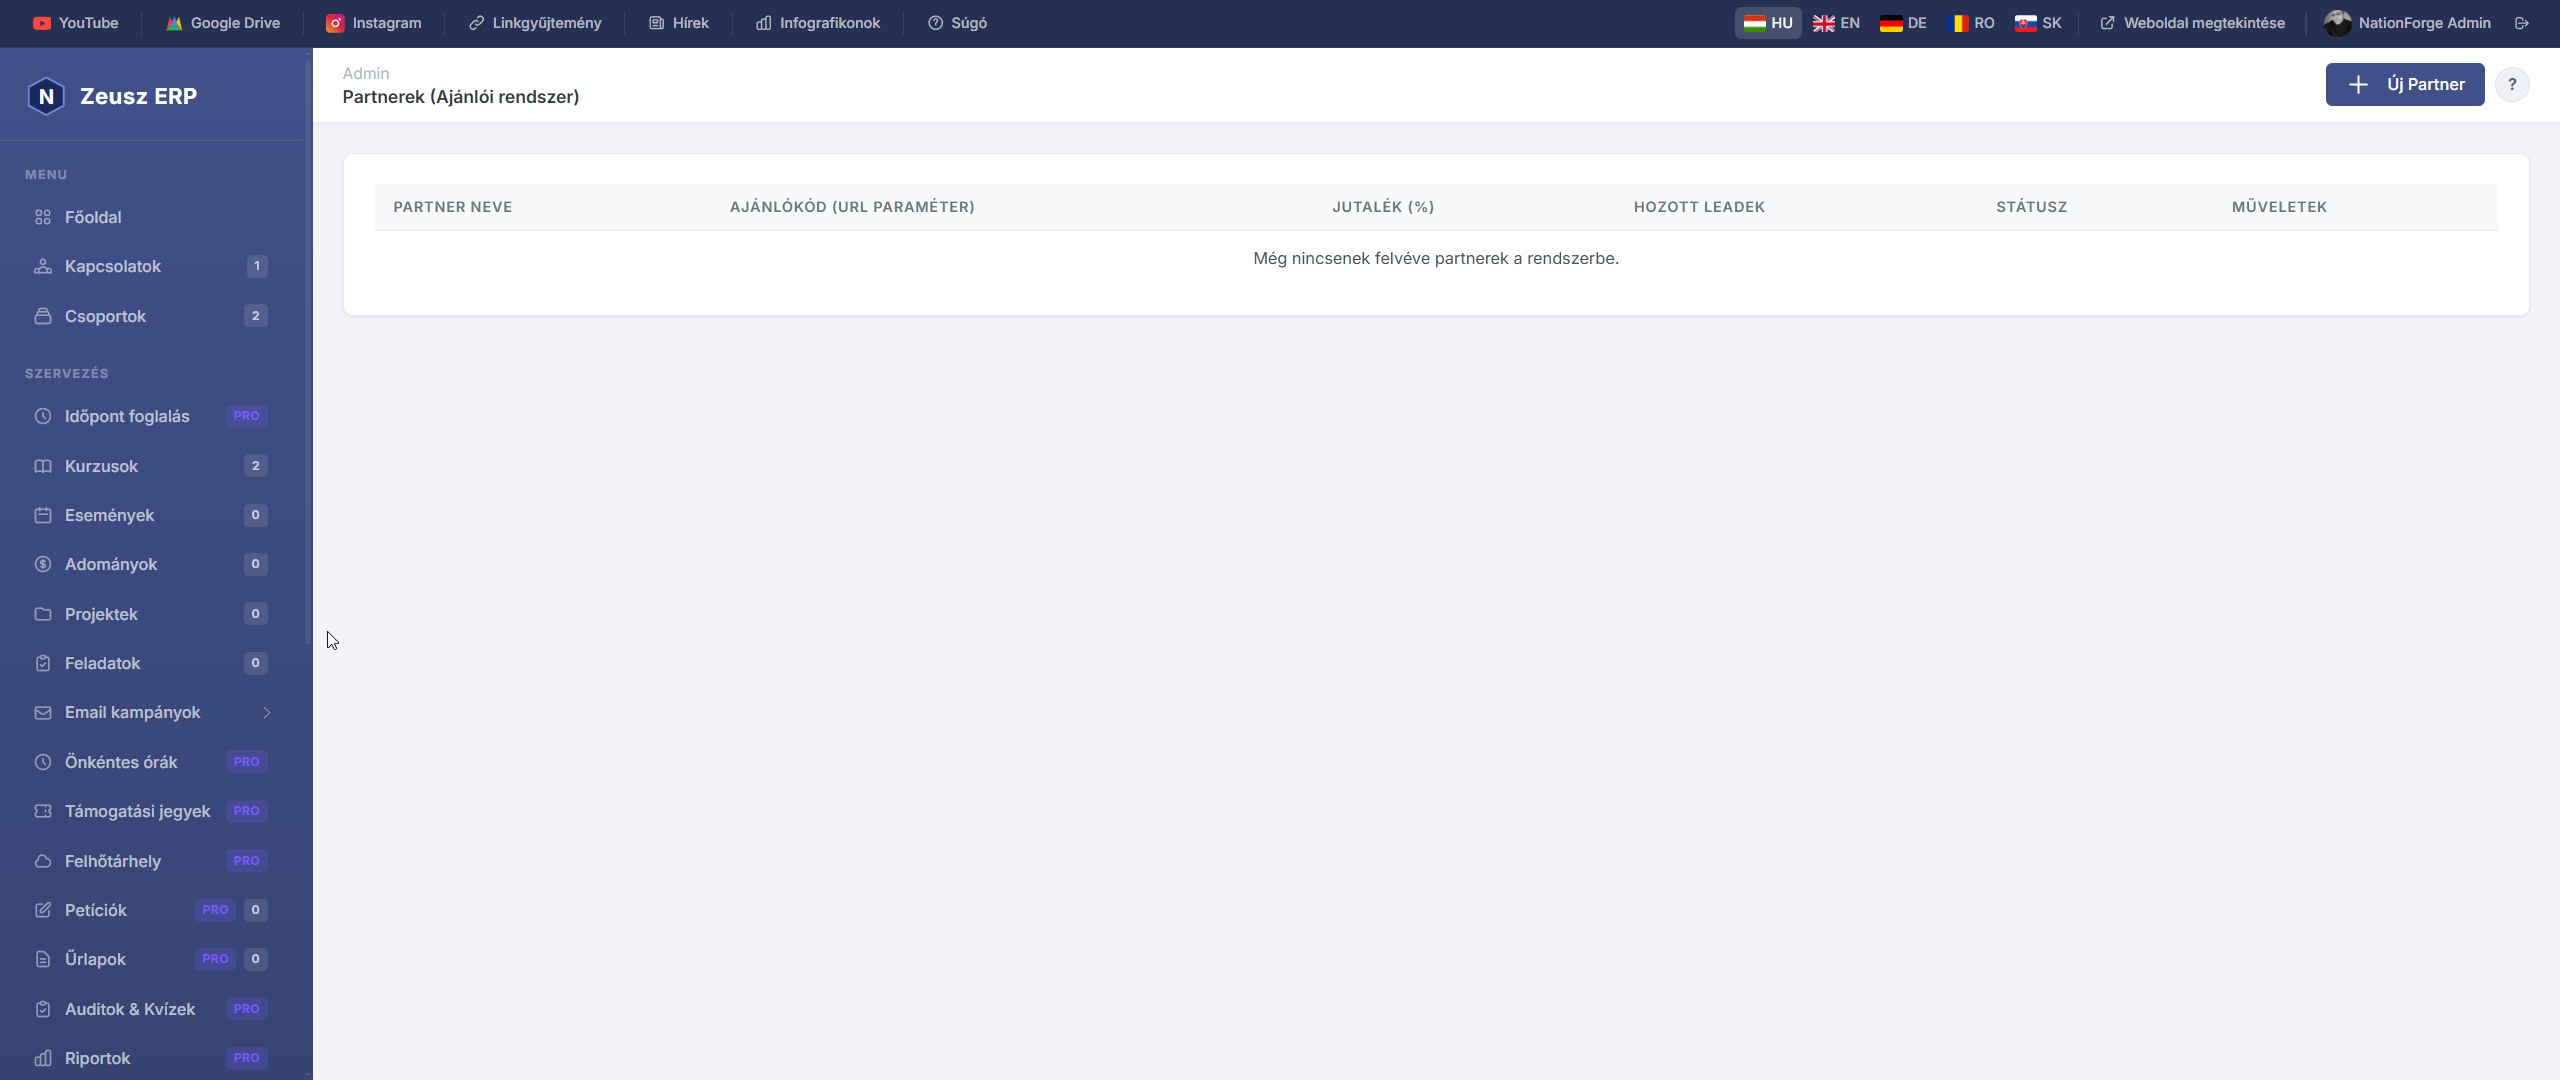
A Partnerek (Ajánlói rendszer) modul lehetővé teszi, hogy kijelölt személyeket vagy szervezeteket partner státuszba emeljél, akik ajánlókódjukkal új ügyfeleket hoznak. Minden partnerhez egyedi ?ref= URL paraméter tartozik, amellyel nyomon követhető, ki honnan érkezett.
Partnerek listája
Az admin oldal táblázatban mutatja az összes felvett partnert:
| Oszlop | Leírás |
|---|---|
| Partner neve | A partnerként rögzített felhasználó neve |
| Ajánlókód | Az egyedi URL paraméter (pl. ?ref=KUPON2026) — ezt osztja meg a partner |
| Jutalék (%) | A partnernek járó jutalék mértéke százalékban |
| Hozott leadek | Hány látogató érkezett eddig ezen az ajánlókódon |
| Státusz | Aktív (zöld) — a kód működik; Inaktív (szürke) — a kód nem rögzít új leadet |
Új partner hozzáadása
Az „+ Új Partner" gombra kattintva felugró ablakban adhatod meg az adatokat:
| Mező | Leírás |
|---|---|
| Felhasználó (kötelező) | Csak meglévő, regisztrált felhasználóból lehet partnert csinálni — a partner a saját dashboardján követheti az eredményeit |
| Jutalék (%) | A partnernek járó jutalék százaléka (pl. 10.00 = 10%) |
| Ajánlókód | Opcionális — ha üresen hagyod, a rendszer automatikusan generál egyet a partner nevéből (pl. KOVACS-PETER). Egyedi promóciós kódot is megadhatsz (pl. KUPON2026) |
| Aktív partner | Bejelölve a kód azonnal aktív lesz és rögzíti a beérkező leadeket |
Partner szerkesztése
A listában a „Szerkesztés" gombra kattintva módosíthatod:
- Jutalék (%) — az aktuális jutalék mértéke
- Ajánlókód — az egyedi URL paraméter (megváltoztatása után a régi link nem fog működni)
- Aktív / Inaktív kapcsoló — ideiglenesen kikapcsolható a partner kódjának rögzítése
Partner törlése
A „Törlés" gombbal véglegesen eltávolítható a partner a rendszerből.
Figyelem: A korábban hozott leadek megmaradnak az adatbázisban, de a törölt ajánlókód többé nem fog működni — az ezután érkező látogatók nem kerülnek a partnerhez rögzítésre.
Hogyan működik az ajánlói rendszer?
- A partner megkapja az egyedi linkjét:
https://pelda.com/?ref=KOVACS-PETER - Ha valaki erre a linkre kattint, a rendszer cookie-ban rögzíti az ajánlókódot
- Ha ez a látogató regisztrál, feliratkozik vagy kitölt egy űrlapot, a lead a partnerhez kerül rögzítésre
- Az admin felületen a „Hozott leadek" oszlop mutatja az eredményeket
Tipp: Az ajánlókódot a partner megoszthatja közösségi médián, hírlevelében vagy személyes ajánlásként — bármilyen URL-be beilleszthető a
?ref=KÓDparaméter.
Audit napló
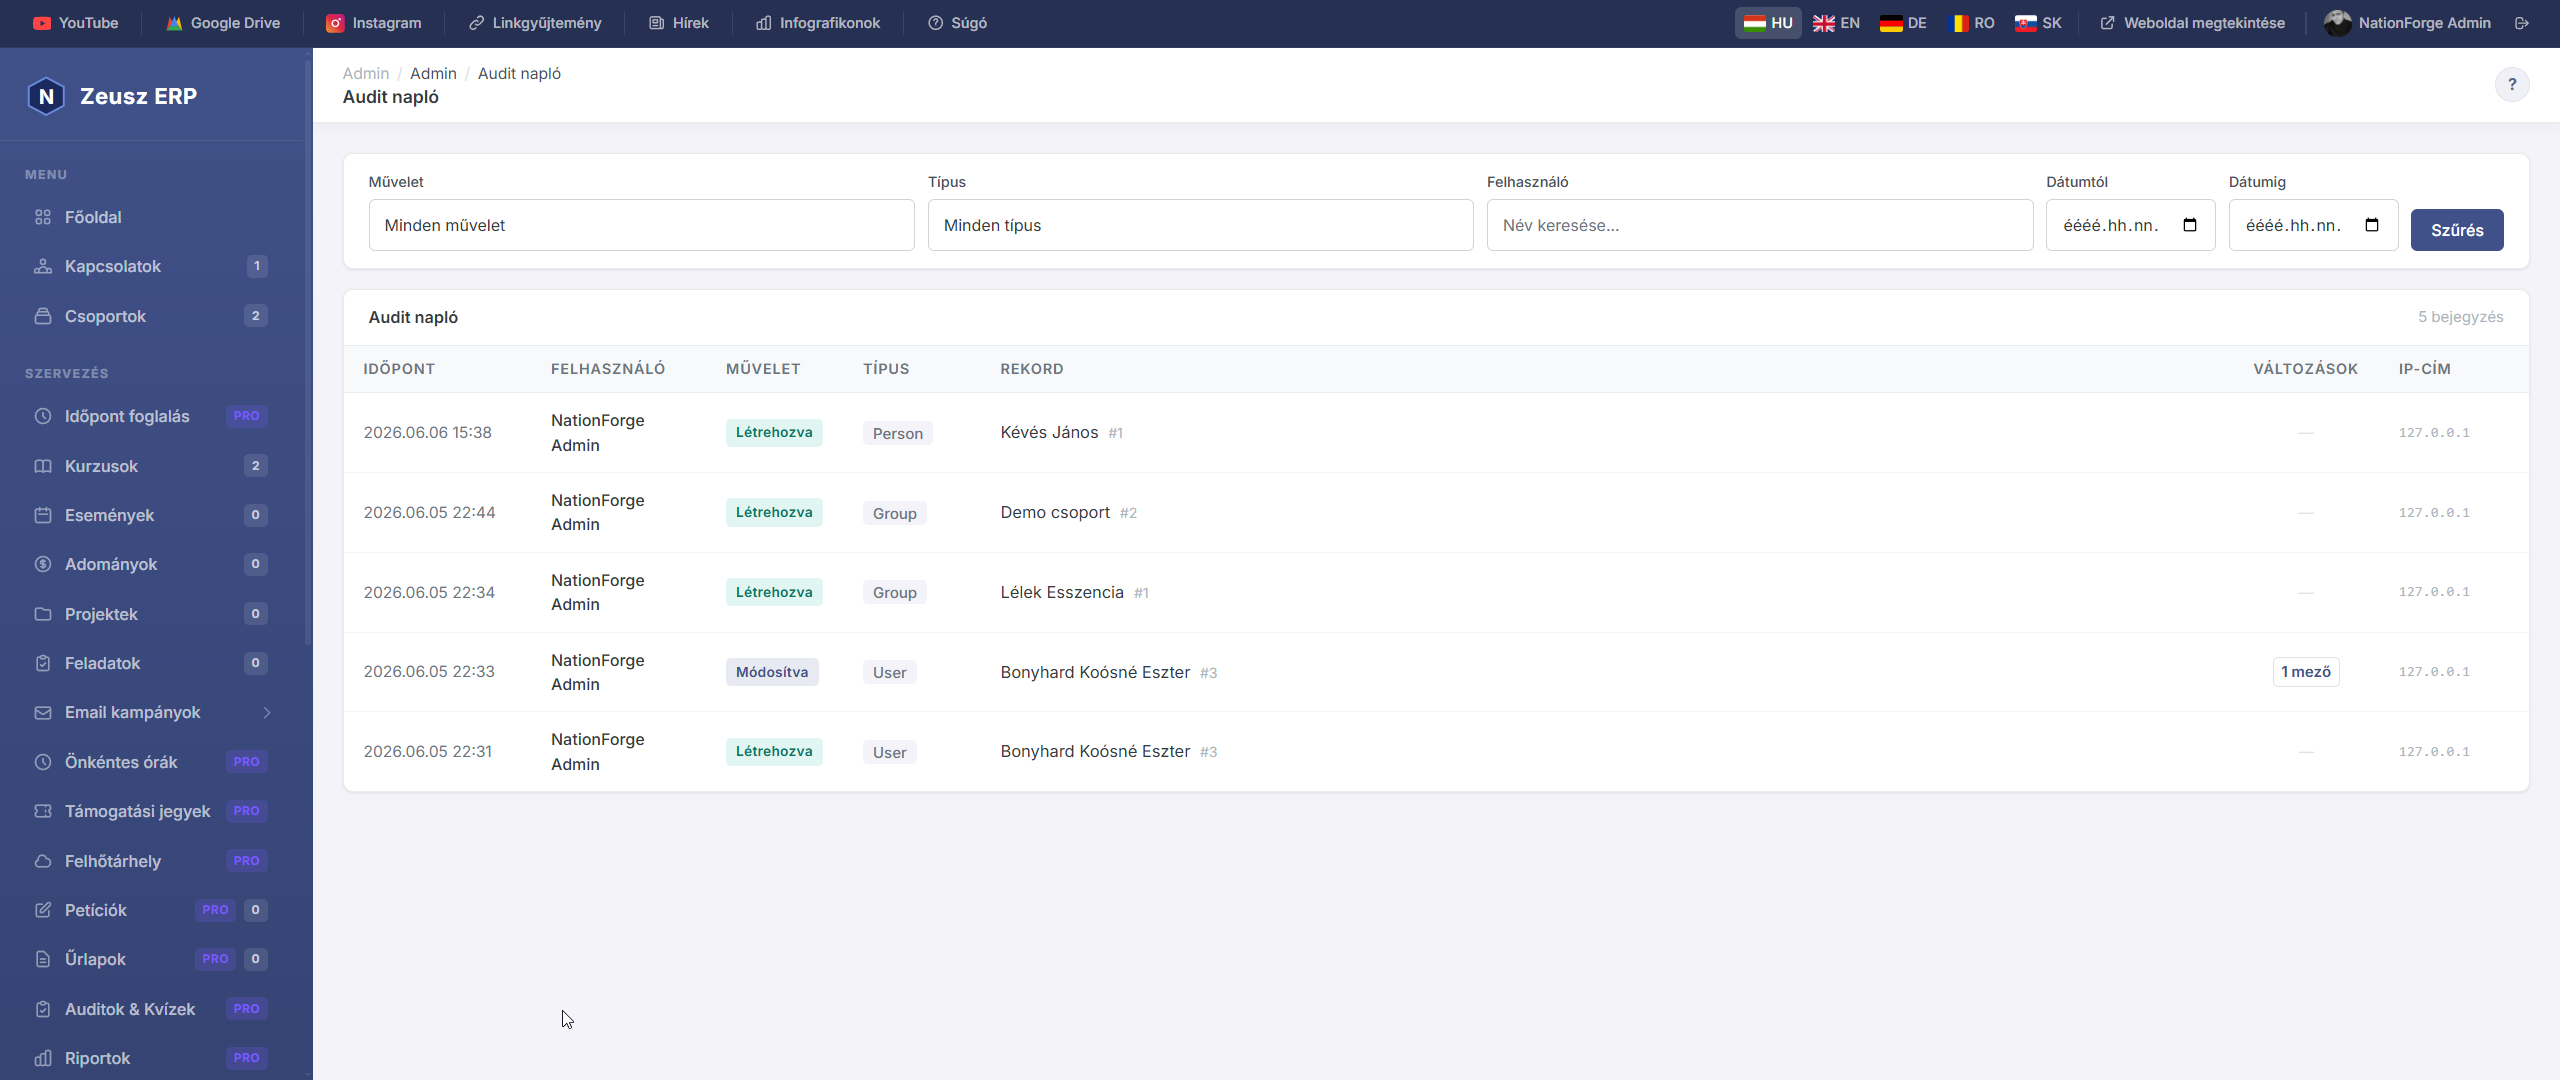
Az Audit napló az összes adminisztrátori tevékenységet rögzíti — ki, mit, mikor módosított a rendszerben. Ez az oldal kizárólag super-admin jogosultságú felhasználók számára érhető el.
Napló megtekintése
Az Audit napló táblázatában minden esemény sorban látható:
| Oszlop | Leírás |
|---|---|
| Időpont | A művelet pontos dátuma és ideje |
| Felhasználó | Melyik admin hajtotta végre |
| Művelet | created / updated / deleted / restored |
| Típus | Melyik adattípust érintette (pl. Person, Event, Task) |
| Leírás | Rövid összefoglaló a változásról |
Szűrési lehetőségek
Az eseménylista az alábbi szempontok szerint szűrhető:
| Szűrő | Leírás |
|---|---|
| Művelet | created / updated / deleted / restored |
| Típus | Melyik modell típust érintette |
| Felhasználó | Szabad szöveges keresés a felhasználó nevére |
| Dátumtól / Dátumig | Időszak meghatározása |
Művelettípusok
- created – Új rekord létrehozása
- updated – Meglévő rekord módosítása
- deleted – Rekord törlése
- restored – Törölt rekord visszaállítása (soft delete esetén)
Fontos tudnivalók
- Az audit napló automatikusan töltődik fel — külön beállítás nem szükséges
- A rekordok nem törölhetők az audit naplóból (írásvédett)
- Az oldal oldalanként 50 bejegyzést jelenít meg
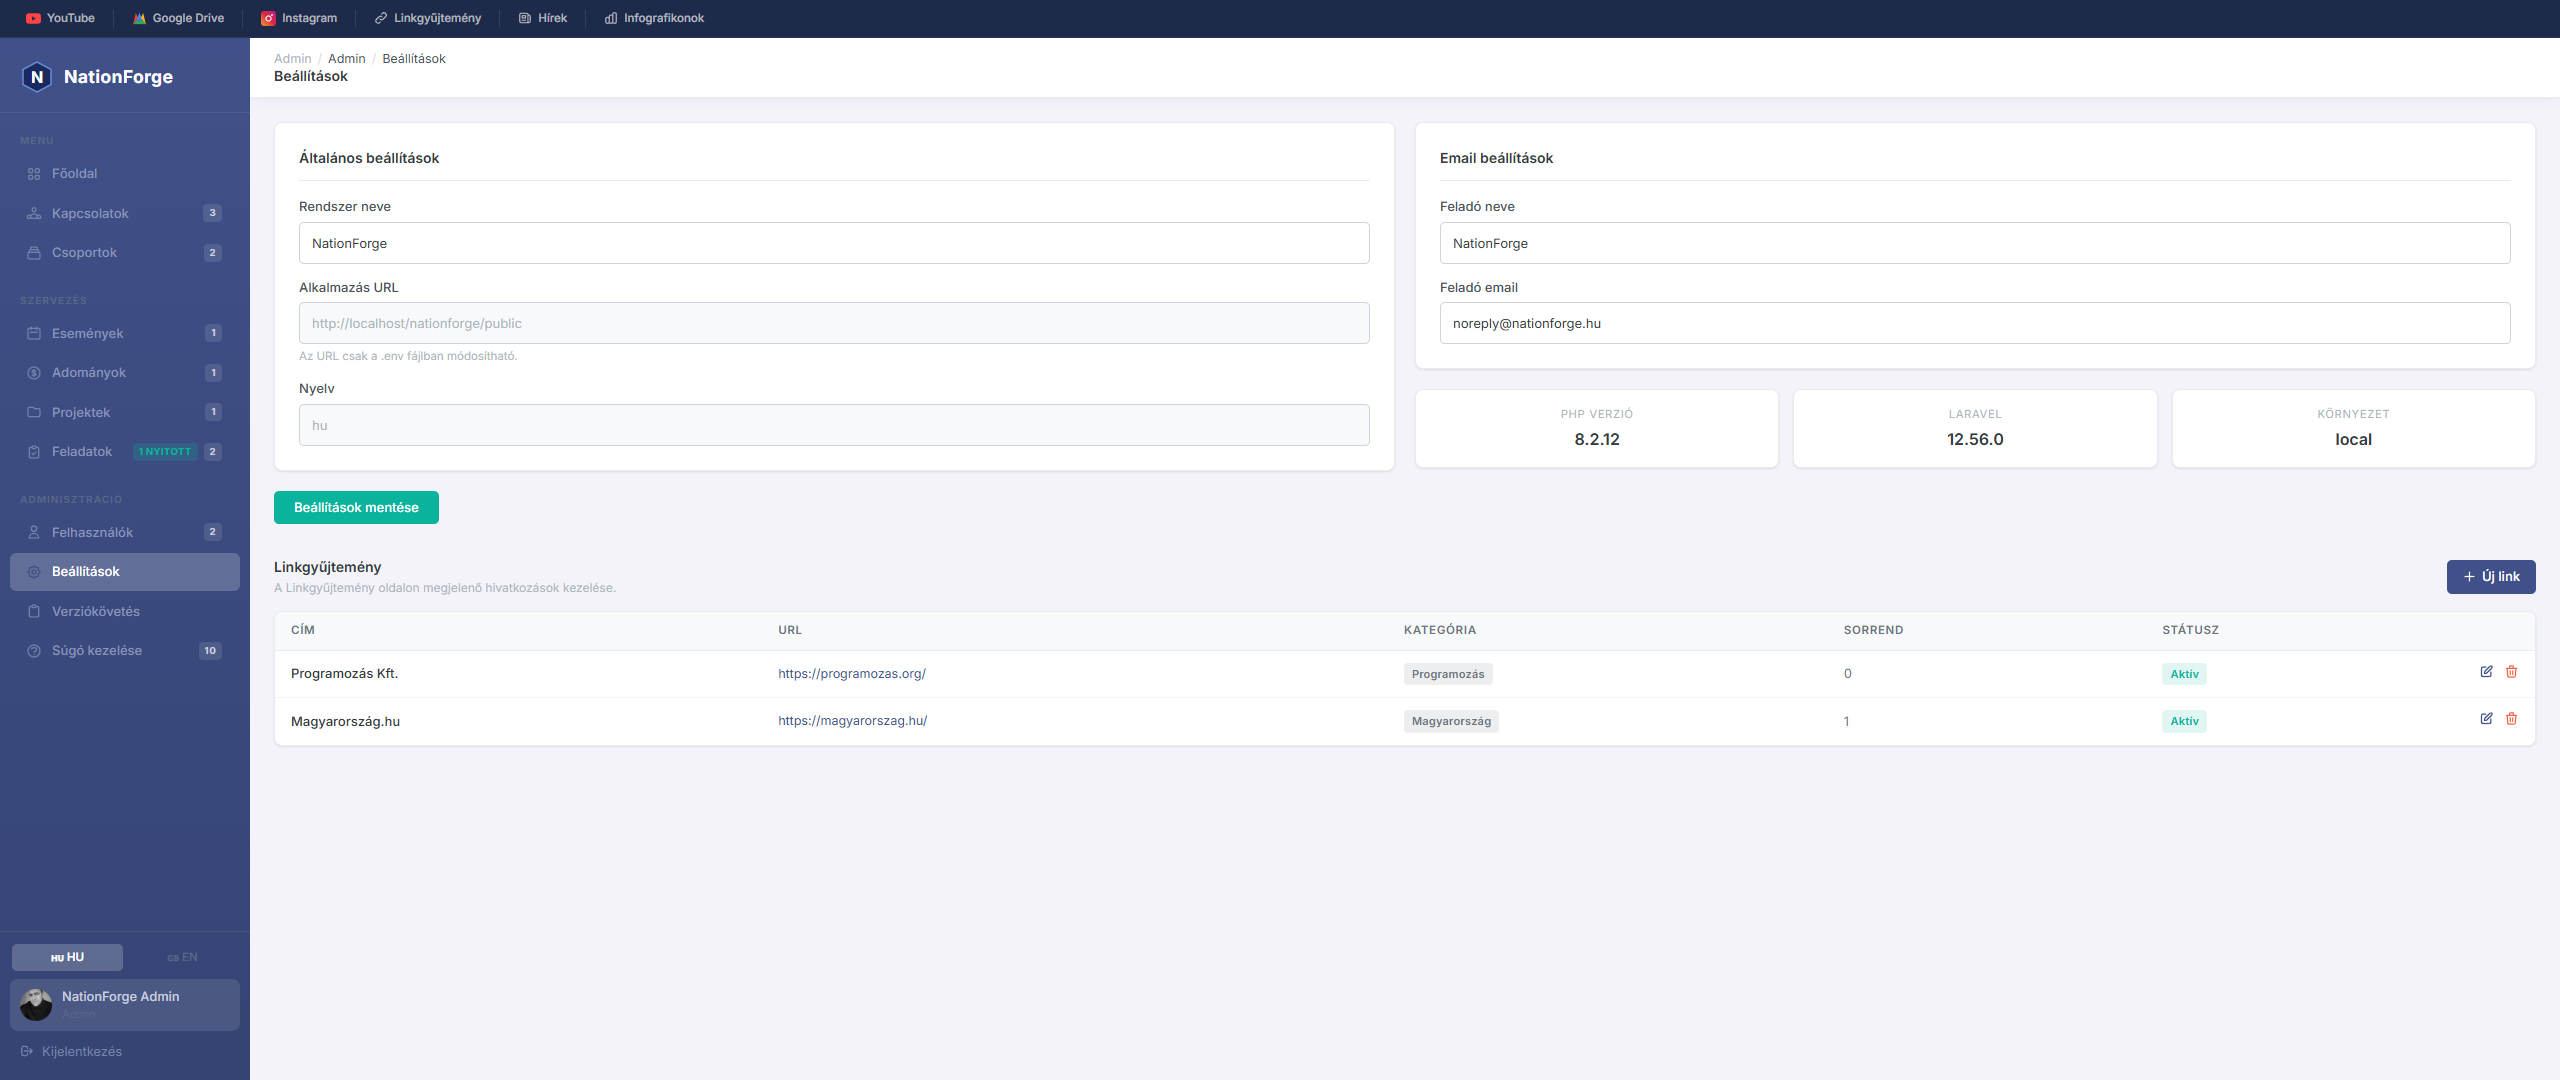
Settings
The Settings page allows you to modify the basic configuration of the system.
General settings:
- System name — the name displayed on the browser tab and in the admin panel
- Application URL — can only be modified in the
.envfile on the server - Language — currently only configurable in
.env
Email settings:
- Sender name — this appears as the sender on outgoing emails
- Sender email — replies are delivered to this email address
System information — The bottom of the page shows the PHP version, Laravel version, and current environment.
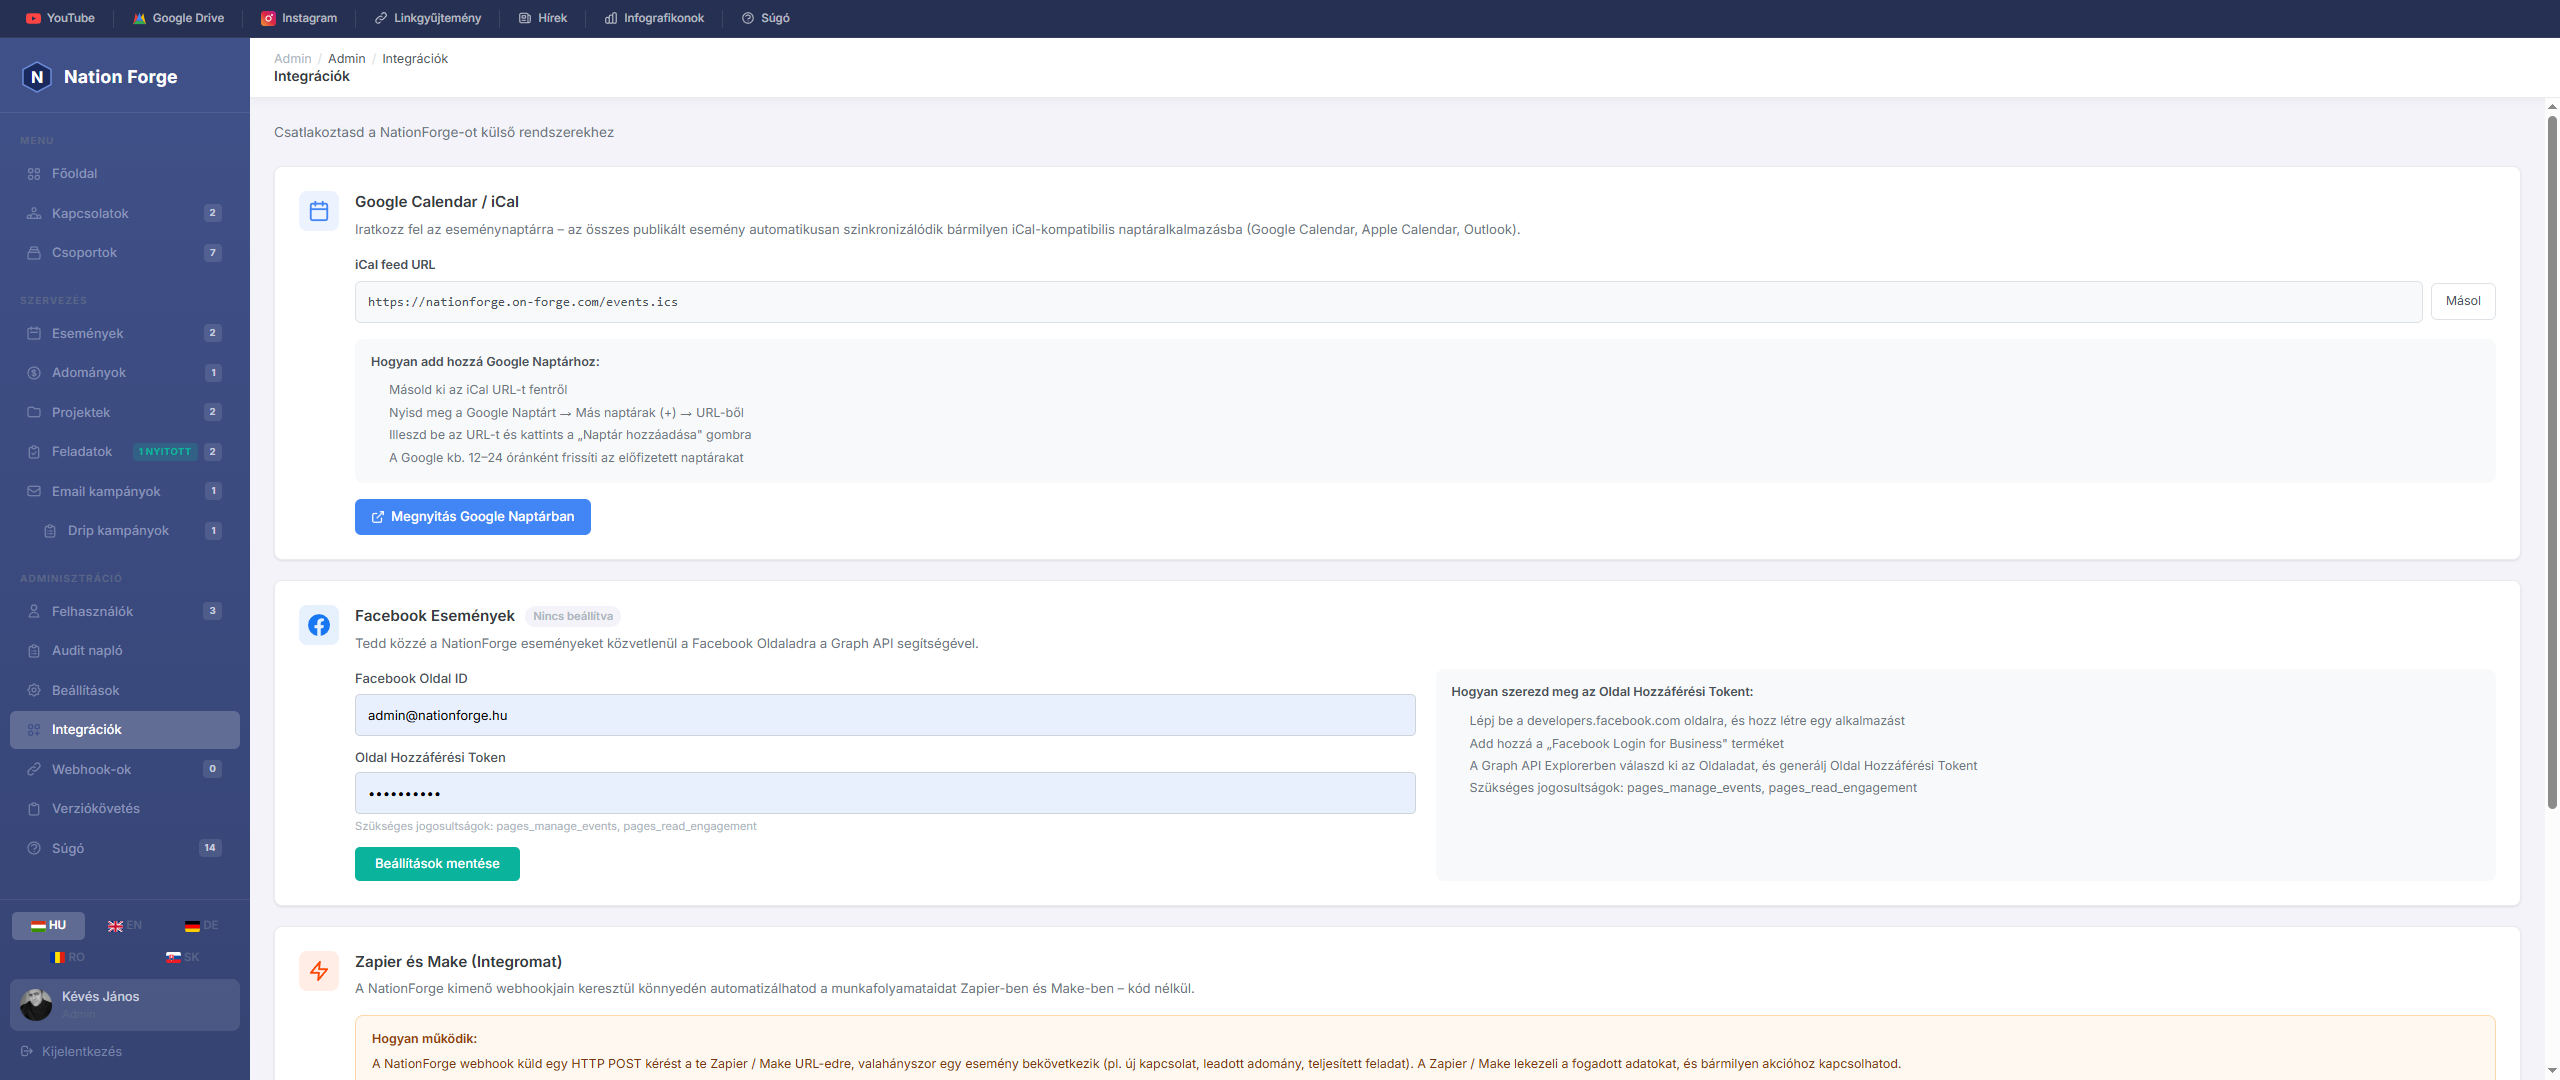
Integrations
The Integrations page allows you to connect NationForge to external services: Google Calendar, Facebook, and Zapier / Make automation platforms.
Google Calendar / iCal Sync
NationForge exposes all published events via a public iCal feed URL that any calendar application can subscribe to.
How to add to Google Calendar:
- Copy the iCal feed URL using the "Copy" button
- Open Google Calendar → Other calendars (+) → From URL
- Paste the URL, then click "Add calendar"
- Google refreshes subscribed calendars approximately every 12–24 hours
The iCal feed works with any app that supports the RFC 5545 format: Apple Calendar, Microsoft Outlook, Thunderbird, etc.
The "Open in Google Calendar" button performs the above in a single click — it opens the Google Calendar subscription screen with the URL pre-filled.
Facebook Events
This integration lets you publish NationForge events directly to your Facebook Page via the Graph API.
Configuration:
| Field | Description |
|---|---|
| Facebook Page ID | The numeric identifier of your Facebook Page (e.g. 123456789012345) |
| Page Access Token | Token generated via the Graph API. Required permissions: pages_manage_events, pages_read_engagement |
After saving, a "Publish to Facebook" button appears on each published event page. Clicking it automatically creates the event on the configured Facebook Page.
How to get a Page Access Token:
- Go to developers.facebook.com and create an app
- Add the "Facebook Login for Business" product
- In the Graph API Explorer, select your page and generate a Page Access Token
- Required permissions:
pages_manage_events,pages_read_engagement
If the Page Access Token is missing or the integration is not configured, the "Publish to Facebook" button will show an error and redirect you to the Integrations settings page.
Zapier & Make (Integromat)
Automation built on top of NationForge's outgoing webhook system (v1.24.0). Both Zapier and Make can receive NationForge events and connect them to any external application — no code required.
How it works:
Whenever a selected system event occurs, NationForge sends an HTTP POST request to a configured URL. Zapier / Make receives the data and triggers any action you define (send an email, update a Google Sheet, post to Slack, etc.).
Setting up Zapier
- Create a new Zap in Zapier
- Choose the trigger: "Webhooks by Zapier" → "Catch Hook"
- Copy the webhook URL generated by Zapier
- In NationForge, go to Webhooks and create a new webhook with that URL
- Select which event type should trigger it (e.g.
contact.created) - Activate the webhook, then test from the Zapier interface
Setting up Make (Integromat)
- Create a new scenario in Make
- Add "Webhooks" → "Custom webhook" as the first module
- Copy the webhook URL generated by Make
- In NationForge, create a new webhook with that URL
- Activate both the webhook and the scenario
Available event types:
| Event | Description |
|---|---|
contact.created |
New contact added |
contact.updated |
Contact modified |
contact.deleted |
Contact deleted |
event.created |
New event created |
event.registration |
Someone registered for an event |
donation.created |
New donation recorded |
campaign.sent |
Email campaign sent |
task.created |
New task created |
task.completed |
Task marked as done |
drip.enrolled |
Contact enrolled in drip campaign |
group.created |
New group created |
group.deleted |
Group deleted |
To manage webhooks, go to the Webhooks section in the left sidebar.
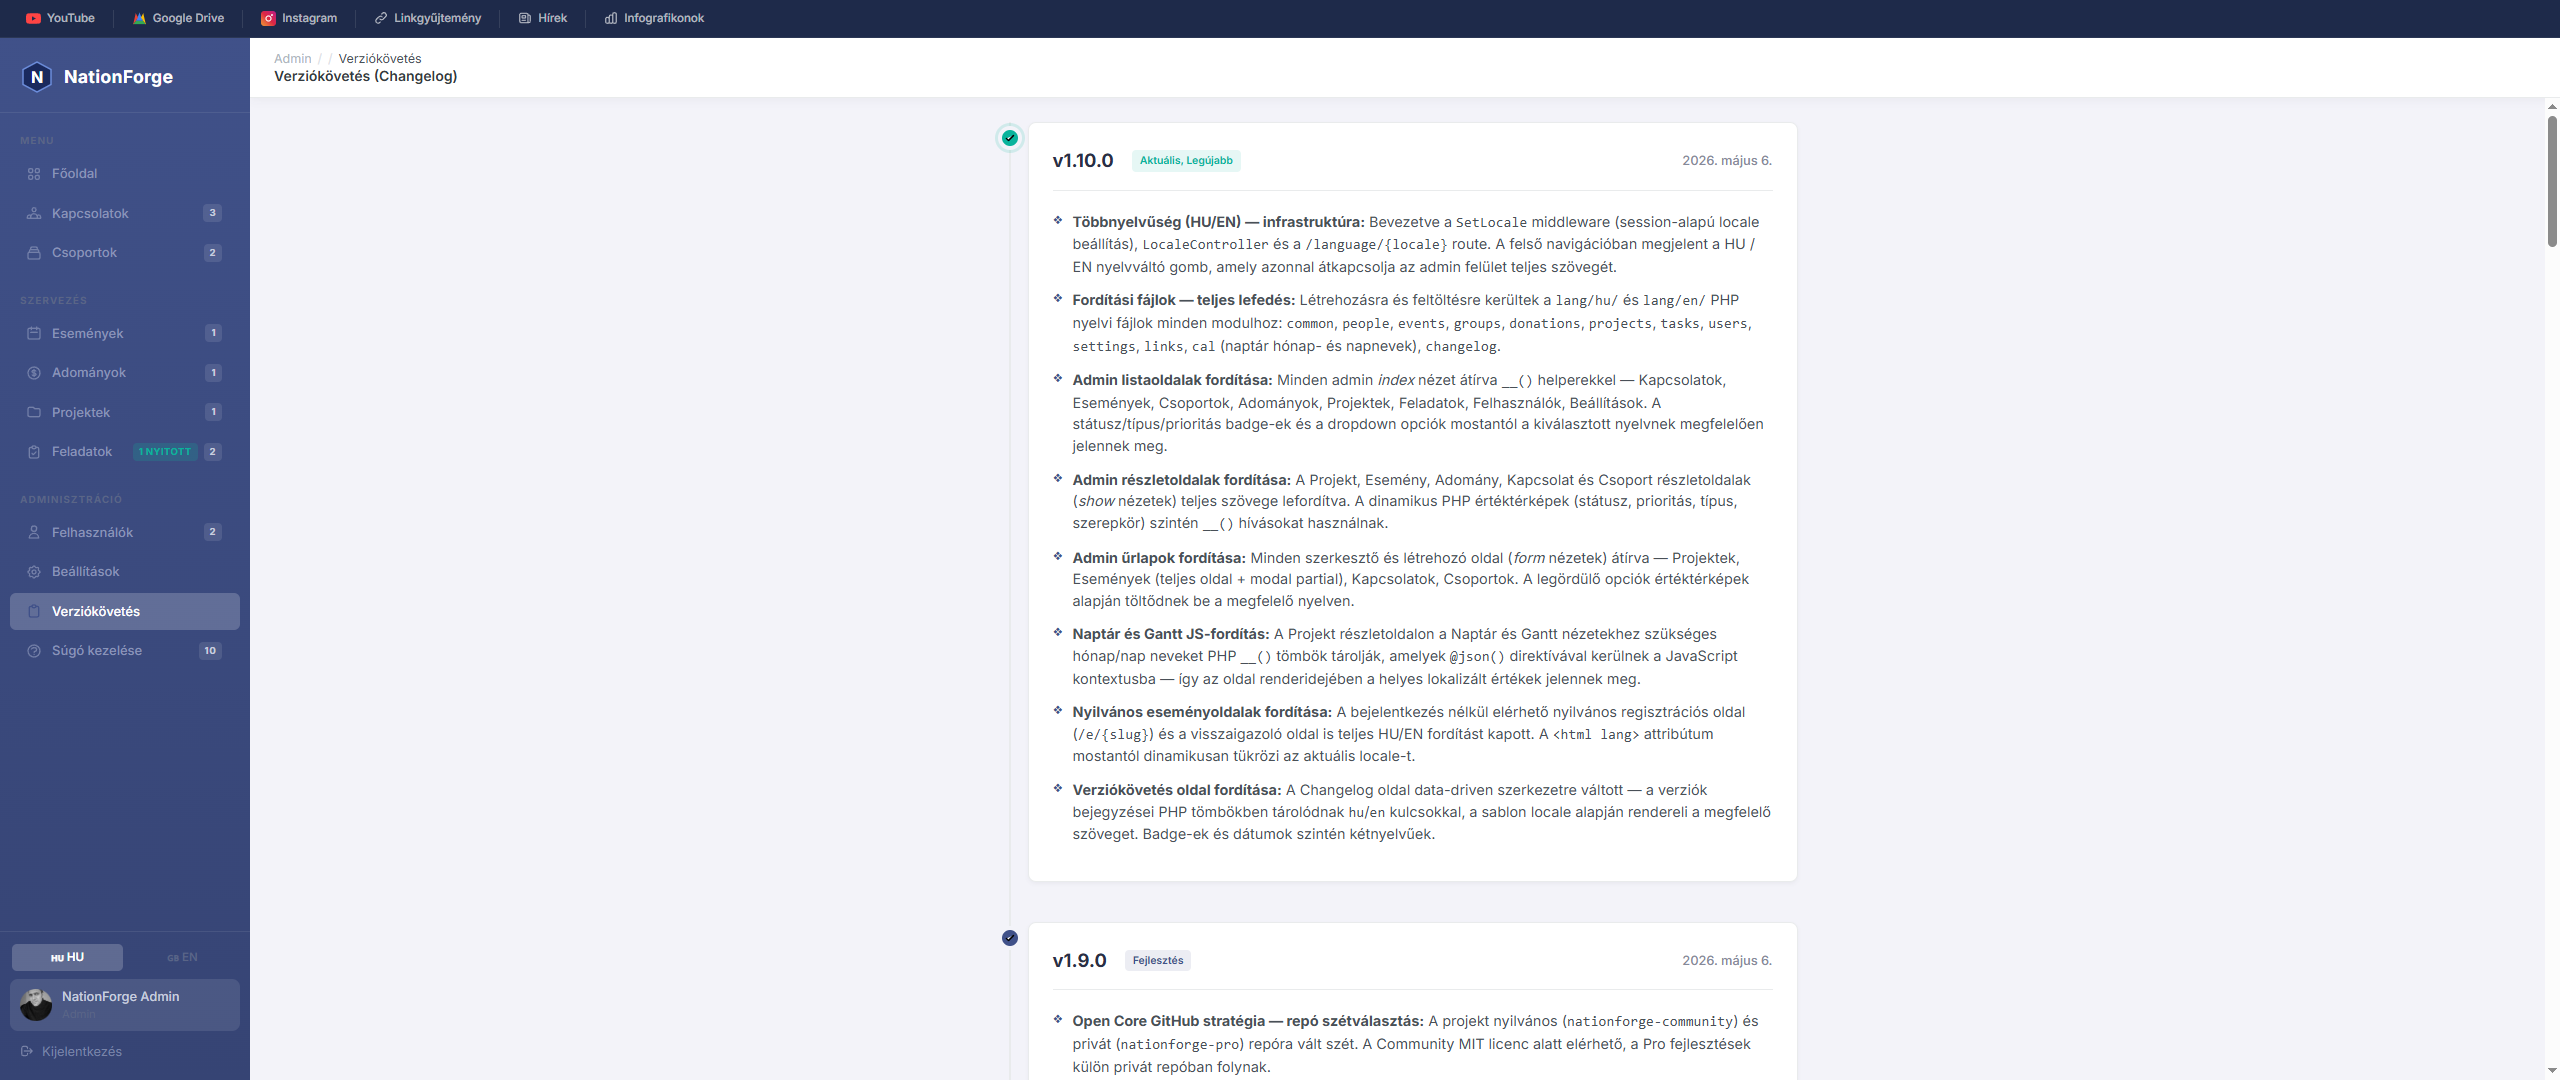
The Changelog page contains the system's development log — documenting the new features, improvements, and fixes in every released version.
Versions - The page lists versions from newest to oldest. Each version includes:
- Version number (e.g. v1.10.0)
- Release date
- List of changes made in that version
What is it for? - It lets you track when specific features were added, what was fixed, and what to expect in upcoming releases.
Bilingual display - The full changelog is available in both Hungarian and English — use the language switcher in the top-right corner to switch.
A Linkgyűjtemény a szervezet leggyakrabban használt külső weboldalait, eszközeit és erőforrásait tárolja egy helyen, könnyen elérhető formában.
Linkek elérése
A rögzített linkek az admin felület felső gyorslinkek sávjában jelennek meg (a sötét sávban, a menü tetején). A „Linkgyűjtemény" gombra kattintva megnyílik az összes aktív link, kategóriák szerint csoportosítva.
Linkek kezelése
A linkek a Beállítások oldal alján, a Linkgyűjtemény szekcióban kezelhetők.
Új link hozzáadása
| Mező | Leírás |
|---|---|
| Cím | A link megjelenő neve (kötelező) |
| URL | A teljes webcím (kötelező, pl. https://...) |
| Leírás | Rövid leírás (max. 300 karakter) |
| Kategória | Csoport neve (pl. „Közösségi média", „Eszközök") |
| Szín | HEX szín kód, amely a link kártyán megjelenik |
| Sorrend | Megjelenítési sorrend száma |
| Aktív | Ha ki van kapcsolva, a link rejtett marad |
Kategóriák
A linkek kategóriánként csoportosítva jelennek meg a gyűjteményben. Azonos kategória nevű linkek egy csoportba kerülnek. Ha egy linknek nincs kategóriája, az „Egyéb" csoportba kerül.
Szerkesztés és törlés
Minden link szerkeszthető és törölhető. A törlés visszavonhatatlan.
Manage Help
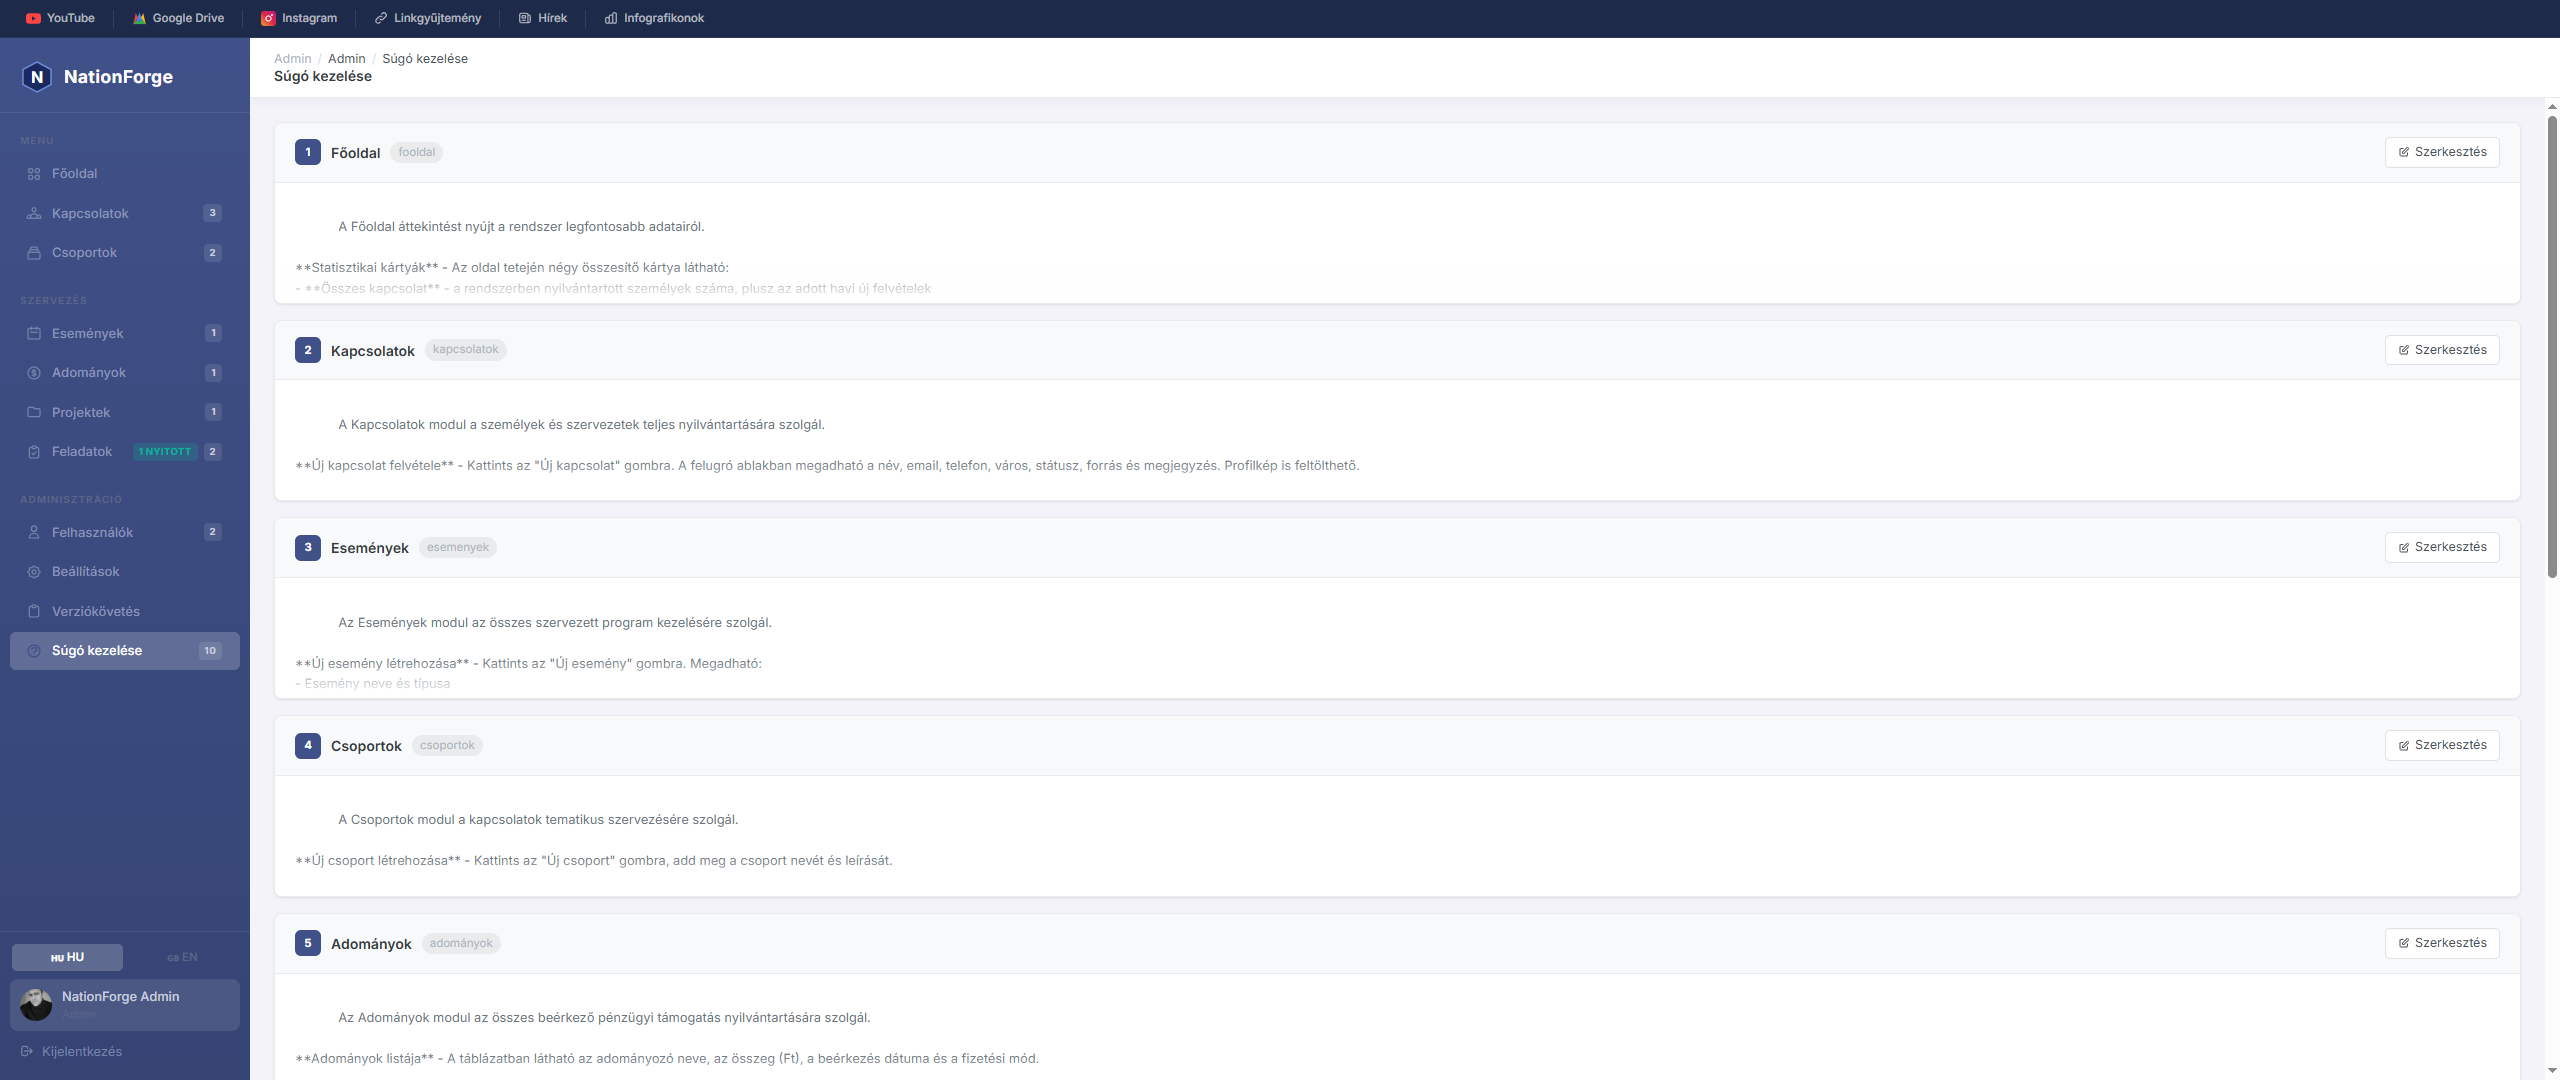
The Manage Help page allows administrators to edit the content of help articles.
Article list - All help articles are listed in sort order. Each article shows its menu key and a content preview.
Editing - Click "Edit" to open the editor modal:
- Menu name – this appears in the help sidebar
- Content – the article text, using Markdown-like formatting
Formatting options in content:
**bold**→ bold text- list item→ bullet point- Empty line = paragraph separator
Save - Clicking Save applies the new content immediately on the help page.
Access - The help page is accessible to all logged-in users via the "?" icon in the navigation bar.